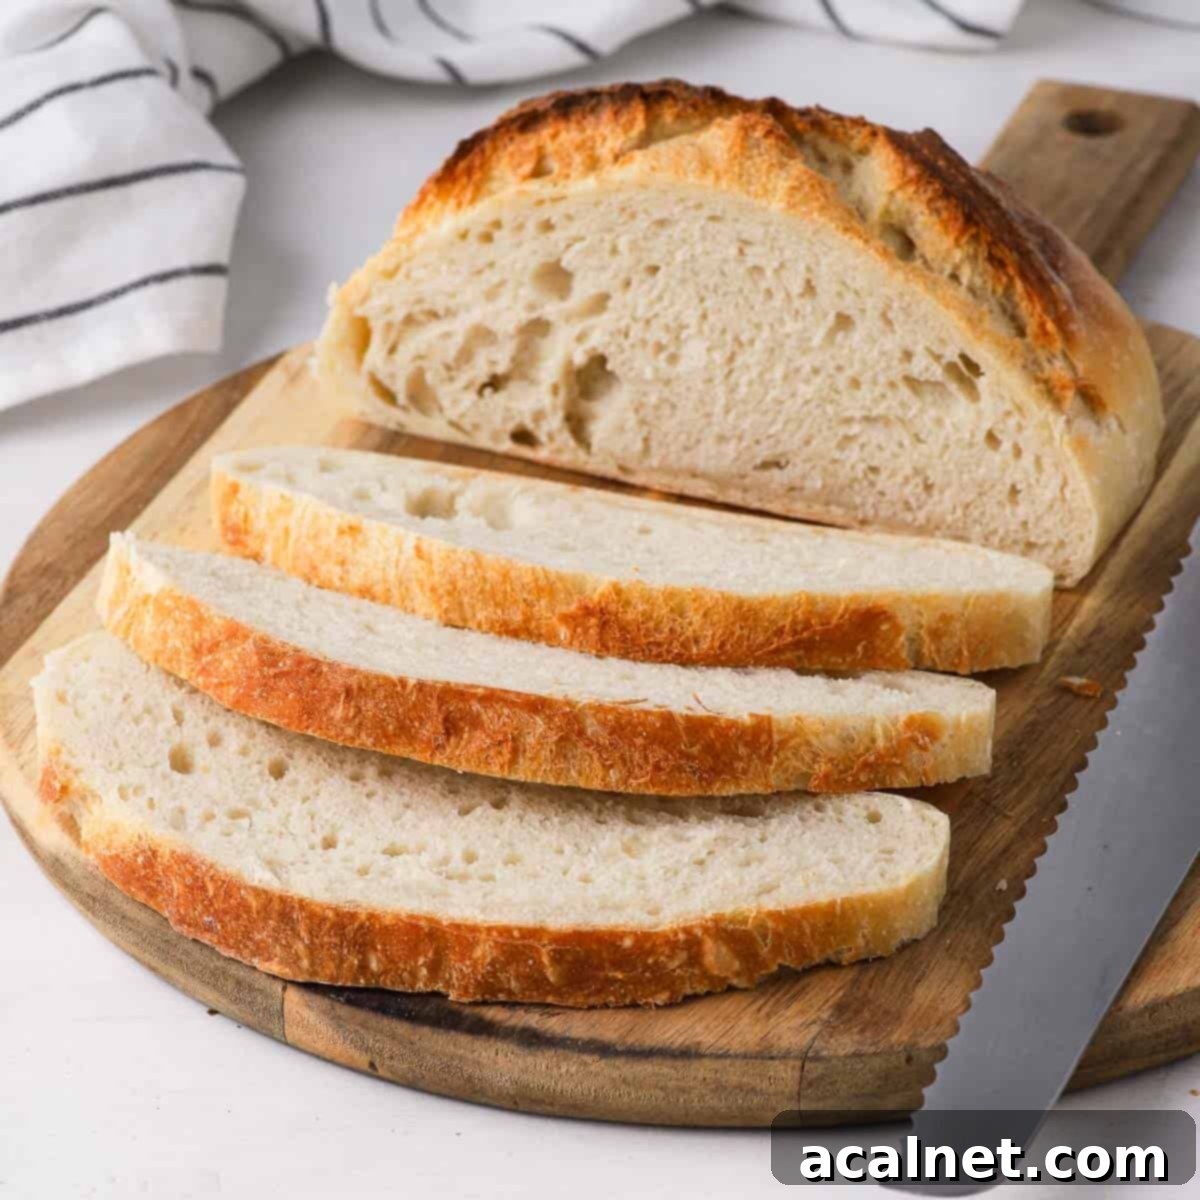
Bake the Perfect Loaf: Easy No-Knead Bread in Your Remoska Tria (Even on the Go!)
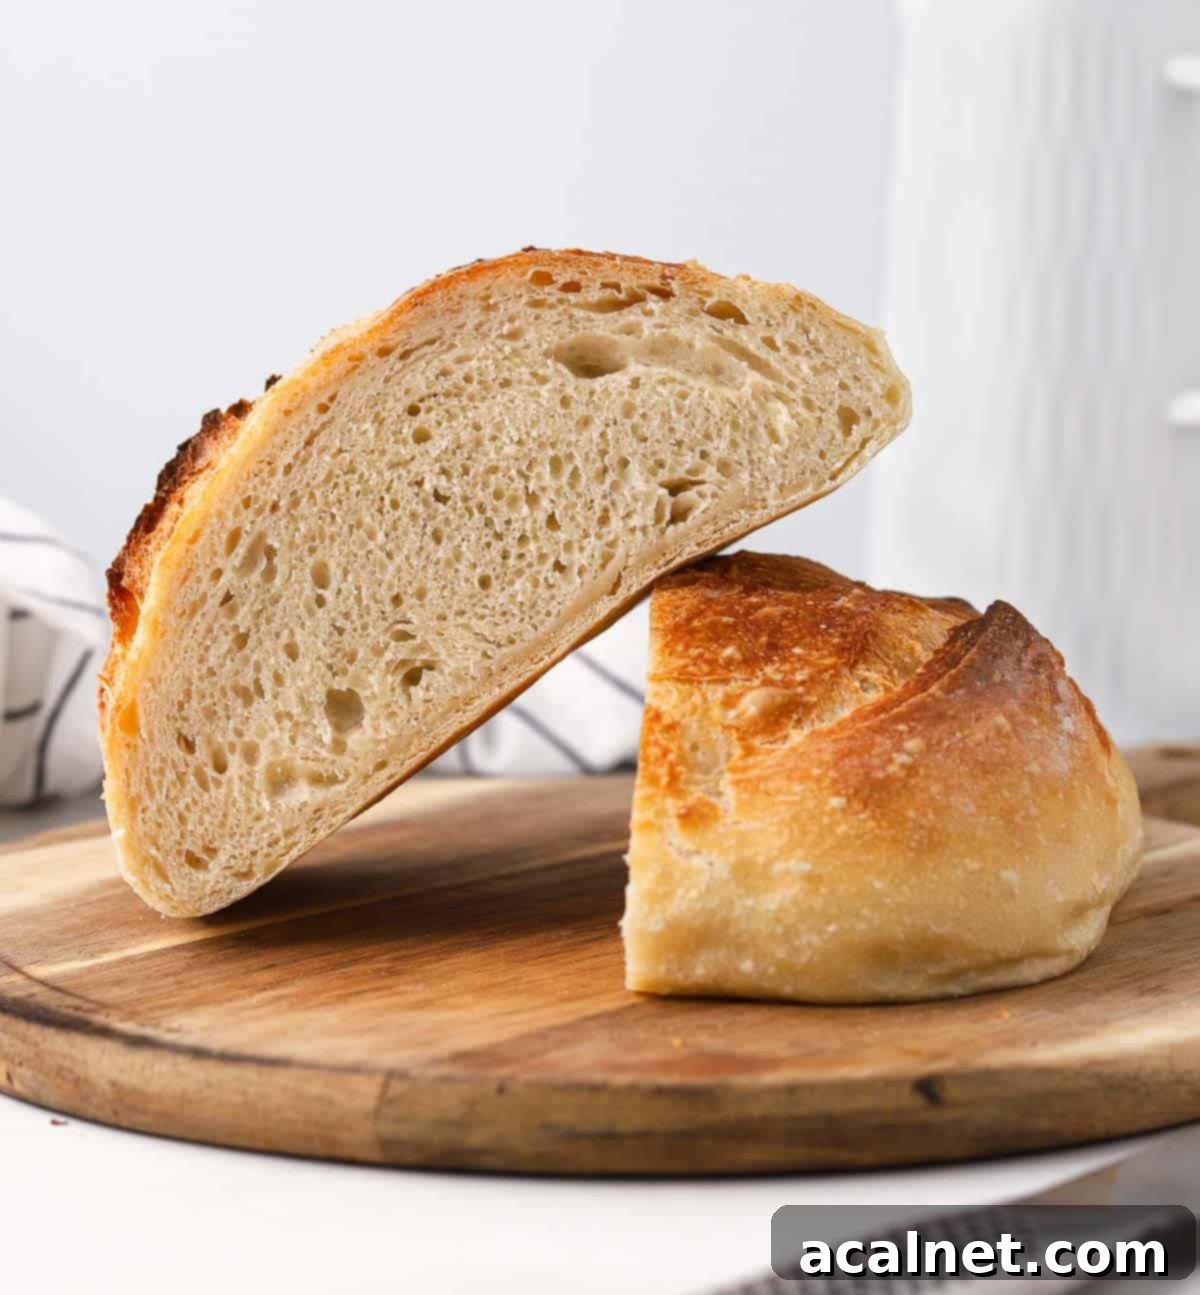
Prepare to discover the easiest and most versatile bread recipe you’ll ever encounter! This No-Knead Bread, expertly baked in a Remoska Tria, promises a perfectly crunchy crust and a wonderfully soft, airy crumb. What makes it truly revolutionary is its portability – imagine enjoying the aroma and taste of freshly baked bread whether you’re relaxing in your caravan, adventuring at a camping site, or simply enjoying your backyard garden. This overnight white bread recipe requires minimal effort, making gourmet-quality bread accessible to everyone, everywhere.
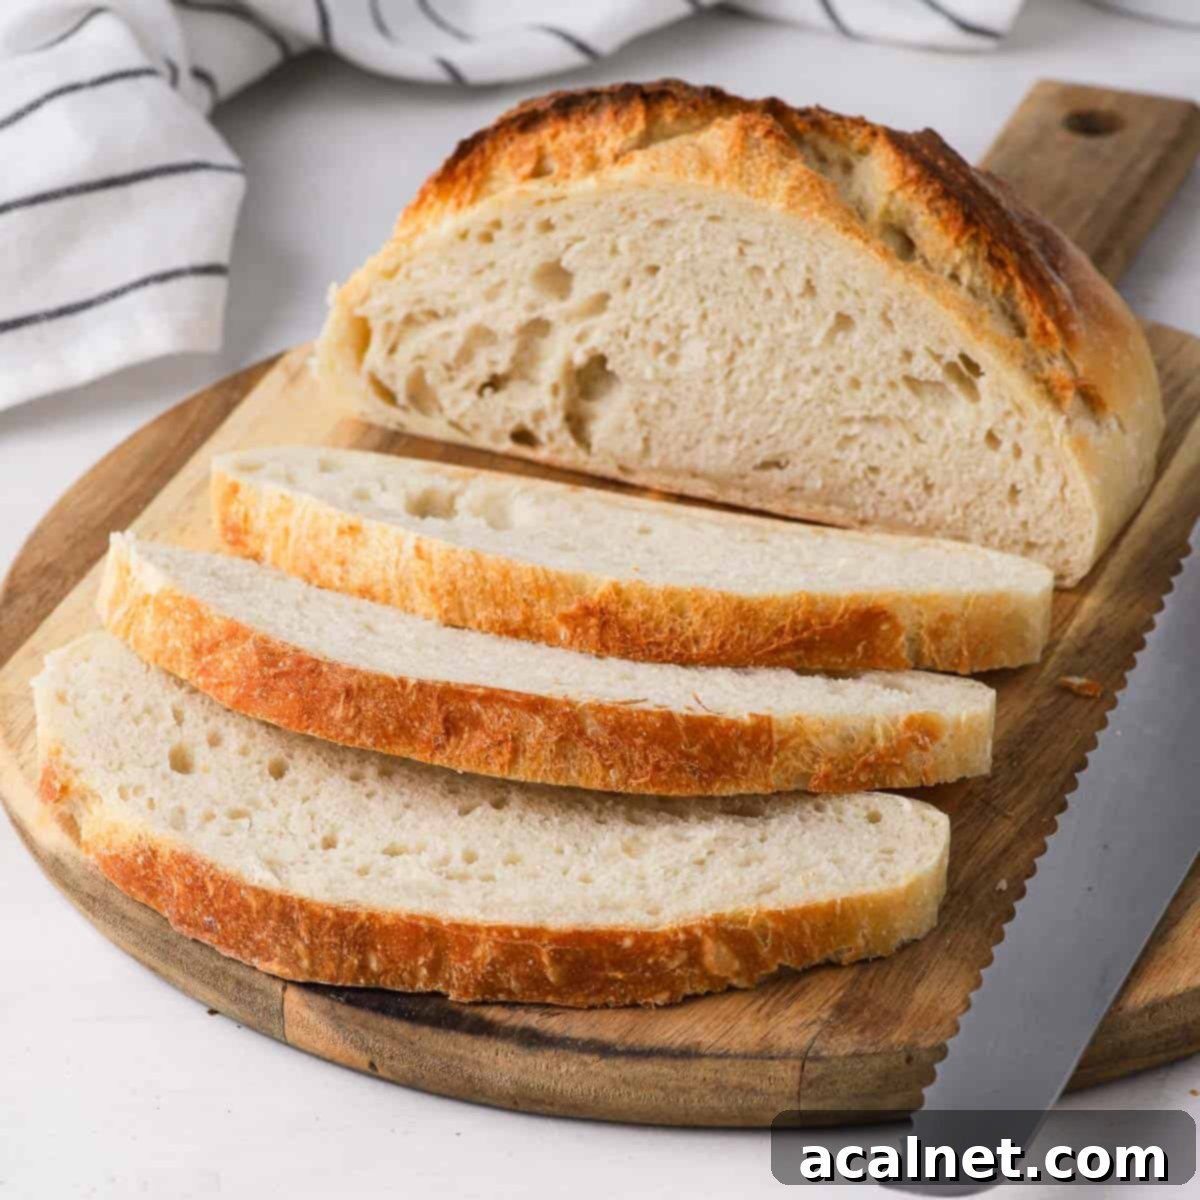
This recipe is sponsored by Remoska
[feast_advanced_jump_to]
Why You’ll Adore This Easy No-Knead Remoska Bread
Imagine waking up to the irresistible scent of warm, freshly baked bread wafting through your caravan or tent. With the innovative Remoska Tria, this dream becomes a delicious reality! This revolutionary portable oven allows you to enjoy homemade bread with a perfect crunchy crust and soft interior, no matter where your adventures take you.
The beauty of this no-knead bread lies in its sheer simplicity. It truly requires less than 10 minutes of active prep time, completely eliminating the need for a stand mixer, bread machine, or laborious kneading. All you do is combine four basic ingredients, let the dough slowly rise overnight (the secret to its incredible flavor and texture), and then bake it to perfection in your Remoska Tria. It’s a hands-off approach that yields professional-quality results every time.
The Remoska Tria is much more than just a portable oven; it’s a super versatile three-in-one cooker designed for ultimate convenience. It comes with three interchangeable lids, transforming it to suit your cooking needs:
- **Glass Lid**: Use the pot directly on your stove for simmering, sautéing, or boiling.
- **Soft-Pressure Lid**: Turn your Remoska into a slow cooker or pressure cooker, perfect for stews, soups, and tender meats.
- **Baking Lid**: This is where the magic happens for our bread! Plugged in, this lid converts the pot into a highly efficient, portable oven, ideal for baking everything from bread to cakes.
Beyond its incredible portability, the Remoska Tria boasts impressive energy efficiency. It consumes approximately five times less energy than a conventional oven, making it an eco-friendly and cost-effective choice for home use, as well as an essential companion for off-grid camping or caravaning where power consumption is a key consideration. This means you can indulge in delicious homemade bread without worrying about high energy bills or draining your limited power supply.
You can now pre-order the Remoska Tria and get 25% off plus free shipping when using the code “BakingJourney” at checkout! (valid only in Australia and New Zealand).
More Remoska Recipes to Explore:
- Basic Scones: Quick and fluffy, perfect for a Remoska bake.
- Cinnamon Rolls: Warm, gooey rolls, ideal for a sweet breakfast treat.
- Banana Bread Cake: Moist and flavorful, a family favorite.
- Baked Apples with Crumble Topping: A comforting dessert, effortlessly made.
Essential Ingredients for Your No-Knead Bread
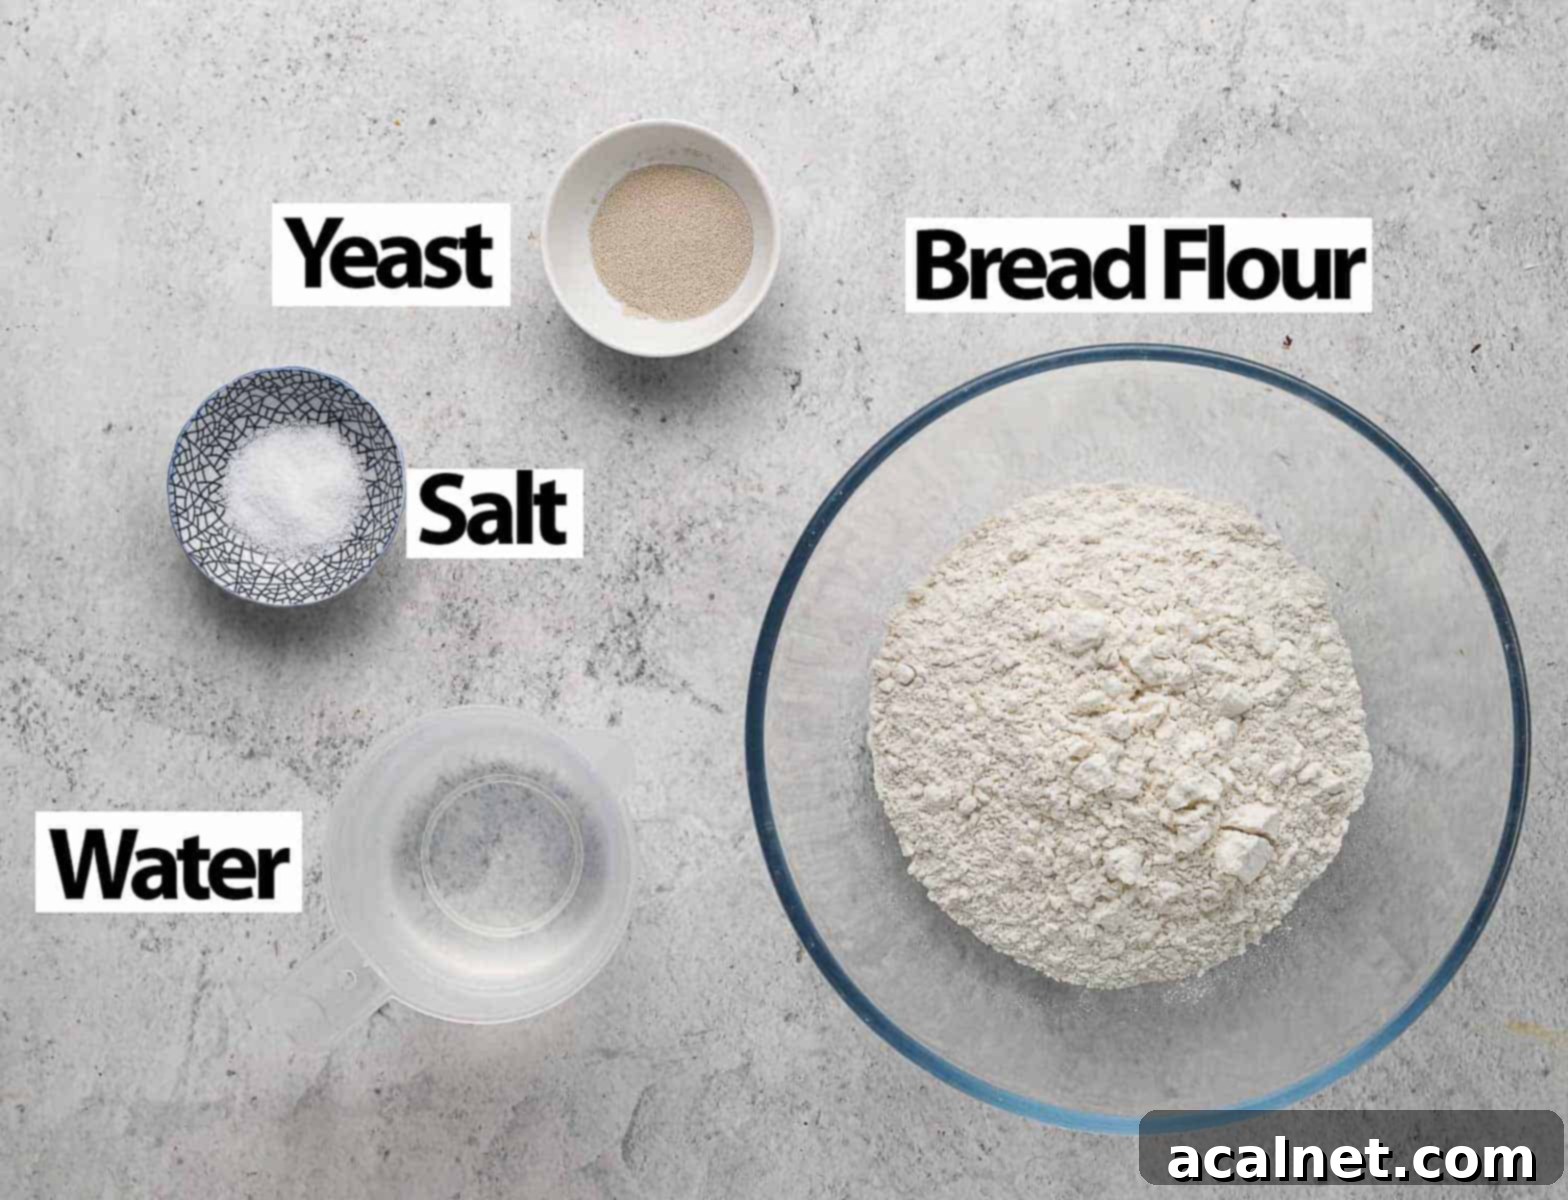
One of the many charms of this No-Knead overnight Bread is its reliance on just four incredibly basic ingredients, which you likely already have in your pantry. Simplicity is key to this recipe’s success and widespread appeal.
For precise quantities, please refer to the detailed recipe card provided below.
- Flour: For the best results, I highly recommend using **Bread Flour**. Its higher protein content leads to stronger gluten development, which is essential for achieving that beautifully soft, chewy crumb and robust structure that no-knead bread is famous for. If you only have Plain / All-Purpose Flour, you can certainly use it, but be aware that the final texture may be slightly less airy and chewy (see the FAQ section below for more details).
- Salt: A simple **Fine Table Salt** is all you need. Salt is crucial not just for flavor, enhancing the taste of the bread, but also for controlling the yeast’s activity, preventing it from over-fermenting too quickly.
- Yeast: This recipe calls for **Instant Yeast**. Instant yeast is incredibly convenient because it doesn’t require prior activation or “blooming” in water. You can mix it directly with your dry ingredients. If you opt to use Active Dry Yeast instead, you will need to dissolve it in the lukewarm water first and let it sit for a few minutes until it becomes foamy, indicating it’s active, before combining it with the flour.
- Water: The temperature of your water is critical. It should be **slightly warm** to activate the yeast effectively, but absolutely not hot, as excessively hot water will kill the yeast, preventing your bread from rising. Aim for a temperature around 105-115°F (40-46°C).
Optional Additions: Customize Your Loaf!
This basic no-knead bread recipe serves as an excellent canvas for your culinary creativity. You can easily elevate its flavor profile with a variety of additions, transforming it into a unique and personalized loaf. Consider incorporating:
- **Herbs and Spices**: Fresh or dried rosemary, thyme, oregano, garlic powder, onion powder, or a pinch of chili flakes can add a wonderful aromatic depth.
- **Seeds**: Sunflower seeds, pumpkin seeds, sesame seeds, flax seeds, or chia seeds can add texture, nutrients, and a nutty flavor.
- **Cheese**: Shredded cheddar, Parmesan, or a blend of Italian cheeses can create a savory and rich loaf.
- **Dried Fruits or Vegetables**: Sundried tomatoes, olives, dried cranberries, or raisins can introduce bursts of flavor and moisture.
For best results, incorporate herbs and fine spices from the very beginning with your dry ingredients. However, for “chunky” additions like cheese, olives, or larger seeds, it’s best to fold them in gently after the initial bulk fermentation stage (when the dough has risen overnight). This prevents them from interfering with the initial gluten development and ensures they are evenly distributed without tearing the delicate structure of the dough too much.
Step-by-Step Guide: Baking No-Knead Bread in Your Remoska Tria
You’ll be amazed at how straightforward it is to create a magnificent loaf of bread with this recipe. The preparation truly takes less than 5 minutes of your active time, followed by about 5 minutes to gently shape the dough after its long rise.
- Photo 1: Combine Dry Ingredients. Begin by placing your Bread Flour and Salt into a large mixing bowl. Whisk them together thoroughly to ensure the salt is evenly distributed throughout the flour. Then, create a visible well in the center of the dry mixture. This simple step helps keep the yeast separate from the salt initially, as salt can inhibit yeast activity if they come into direct contact for too long.
- Photo 2: Add Yeast. Carefully add the Instant Yeast directly to the bottom of the well you created in the flour mixture. This primes it for activation once the water is introduced.
Important Note for Active Dry Yeast: If you are using Active Dry Yeast, the process differs slightly. You will need to first mix the yeast with the lukewarm water in a separate small bowl. Let this mixture sit for 5-10 minutes until it becomes foamy and bubbly, indicating that the yeast is alive and active. Only then should you add this activated yeast mixture to your dry ingredients.
- Photo 3: Pour in Water. Gently pour the lukewarm Water directly over the yeast in the well. The warmth will begin to activate the yeast.
- Photo 4: Initial Mixing. Using a sturdy spatula or a wooden spoon, start mixing from the center of the bowl, gradually incorporating the flour from the sides into the wet mixture. Continue mixing until all the dry ingredients are moistened. At this stage, the dough will be quite shaggy, rough, and sticky – this is perfectly normal and exactly what you want for a no-knead dough. To ensure there are absolutely no pockets of dry flour left, I often switch from the spatula to my hands for the final few mixes, gently bringing everything together.
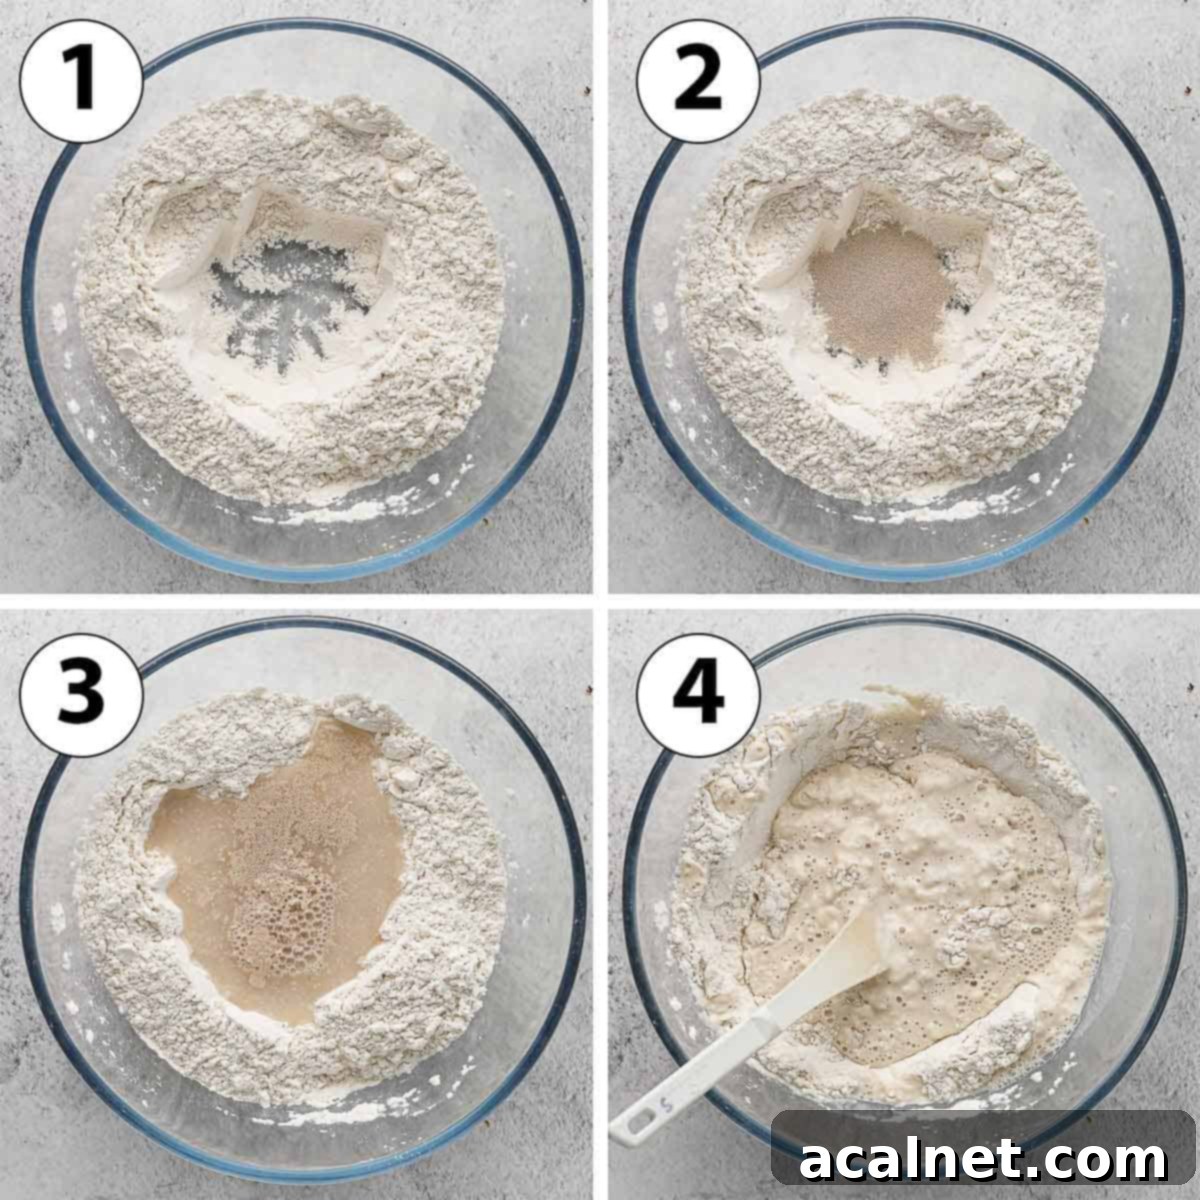
- Photo 5: Dough Consistency. Your dough will be rough and sticky at this point, far from smooth. This high hydration is key to the no-knead method and contributes to the open crumb structure. Just ensure there are no dry patches of flour remaining.
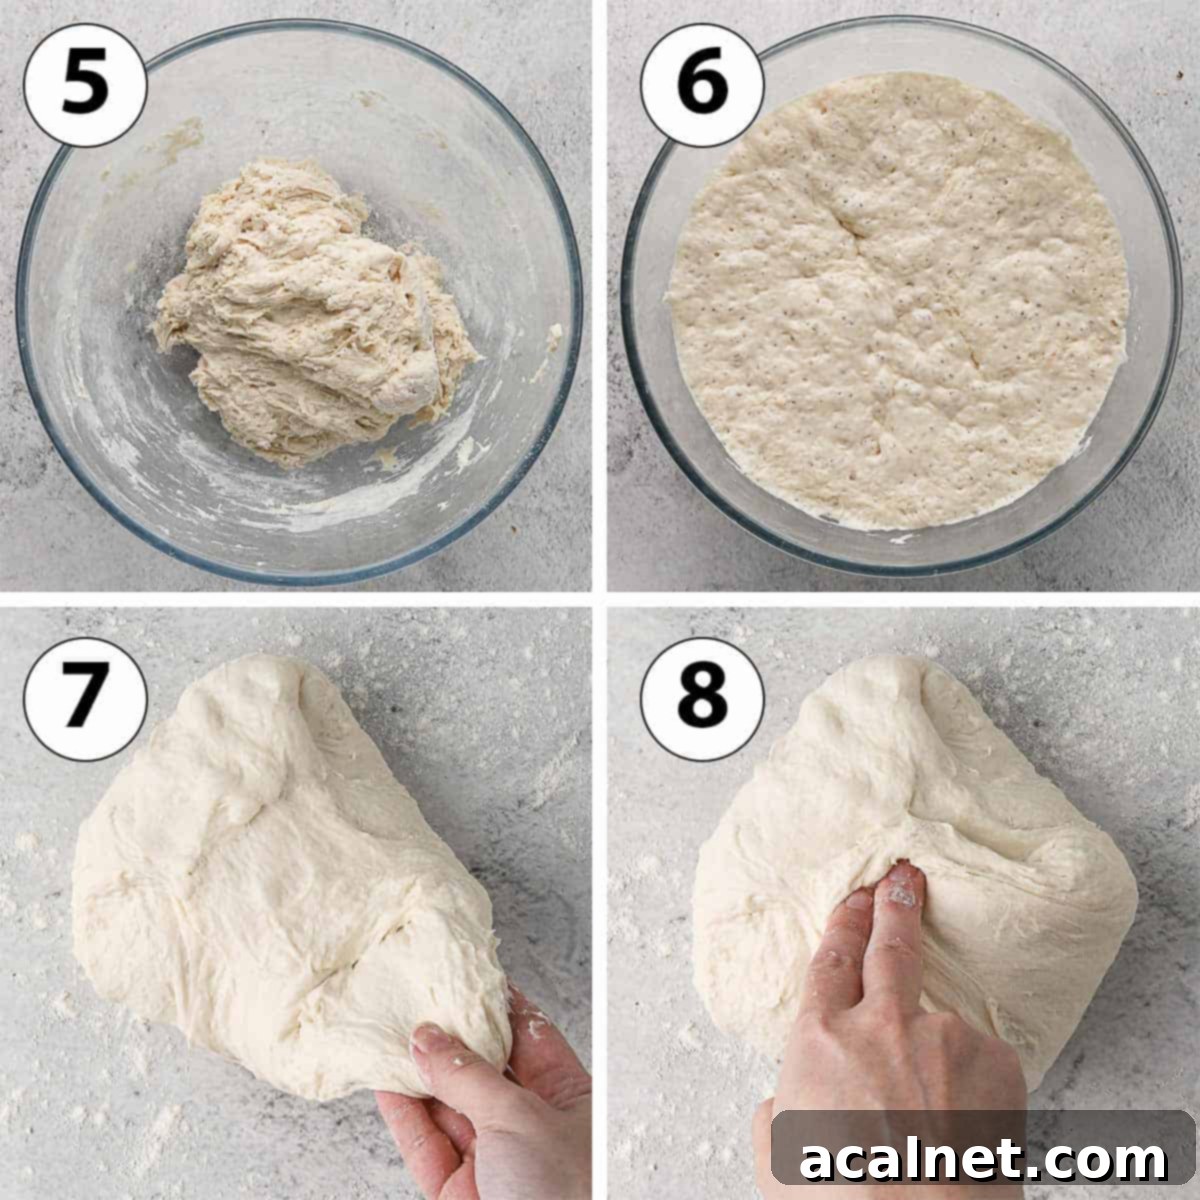
- Photo 6: The Overnight Rise (Bulk Fermentation). Cover your bowl with a clean tea towel. Leave the dough to proof at room temperature overnight, or during the day, for an extended period of 8 to 12 hours. The longer the proofing time, the more complex and developed the flavors of your bread will be. After this period, the dough should have significantly increased in volume, appearing bubbly and still slightly sticky. This long fermentation is where the gluten develops, creating that wonderful chewiness.
- Prepare for Shaping. Lightly flour a clean work surface. Gently transfer the risen, bubbly dough onto it. Coax it into a large, somewhat uniform ball. At this stage, the dough should feel quite soft and stretchy, a testament to the long fermentation.
- Photo 7 & 8: Shaping with “Stretch and Fold”. This technique is crucial for building tension and structure in your no-knead bread. Gently pull one side of the dough outwards, then fold it over towards the center of the dough. Rotate the dough 90 degrees and repeat the process. Continue this “stretch and fold” action several times (typically 4-5 rotations), working your way around the dough. You’ll know to stop when you start to feel significant resistance in the dough, and it begins to resist stretching or even slightly tear when pulled. This method effectively creates tension on the surface of the dough, which is vital for achieving a beautiful oven spring and a well-shaped loaf.
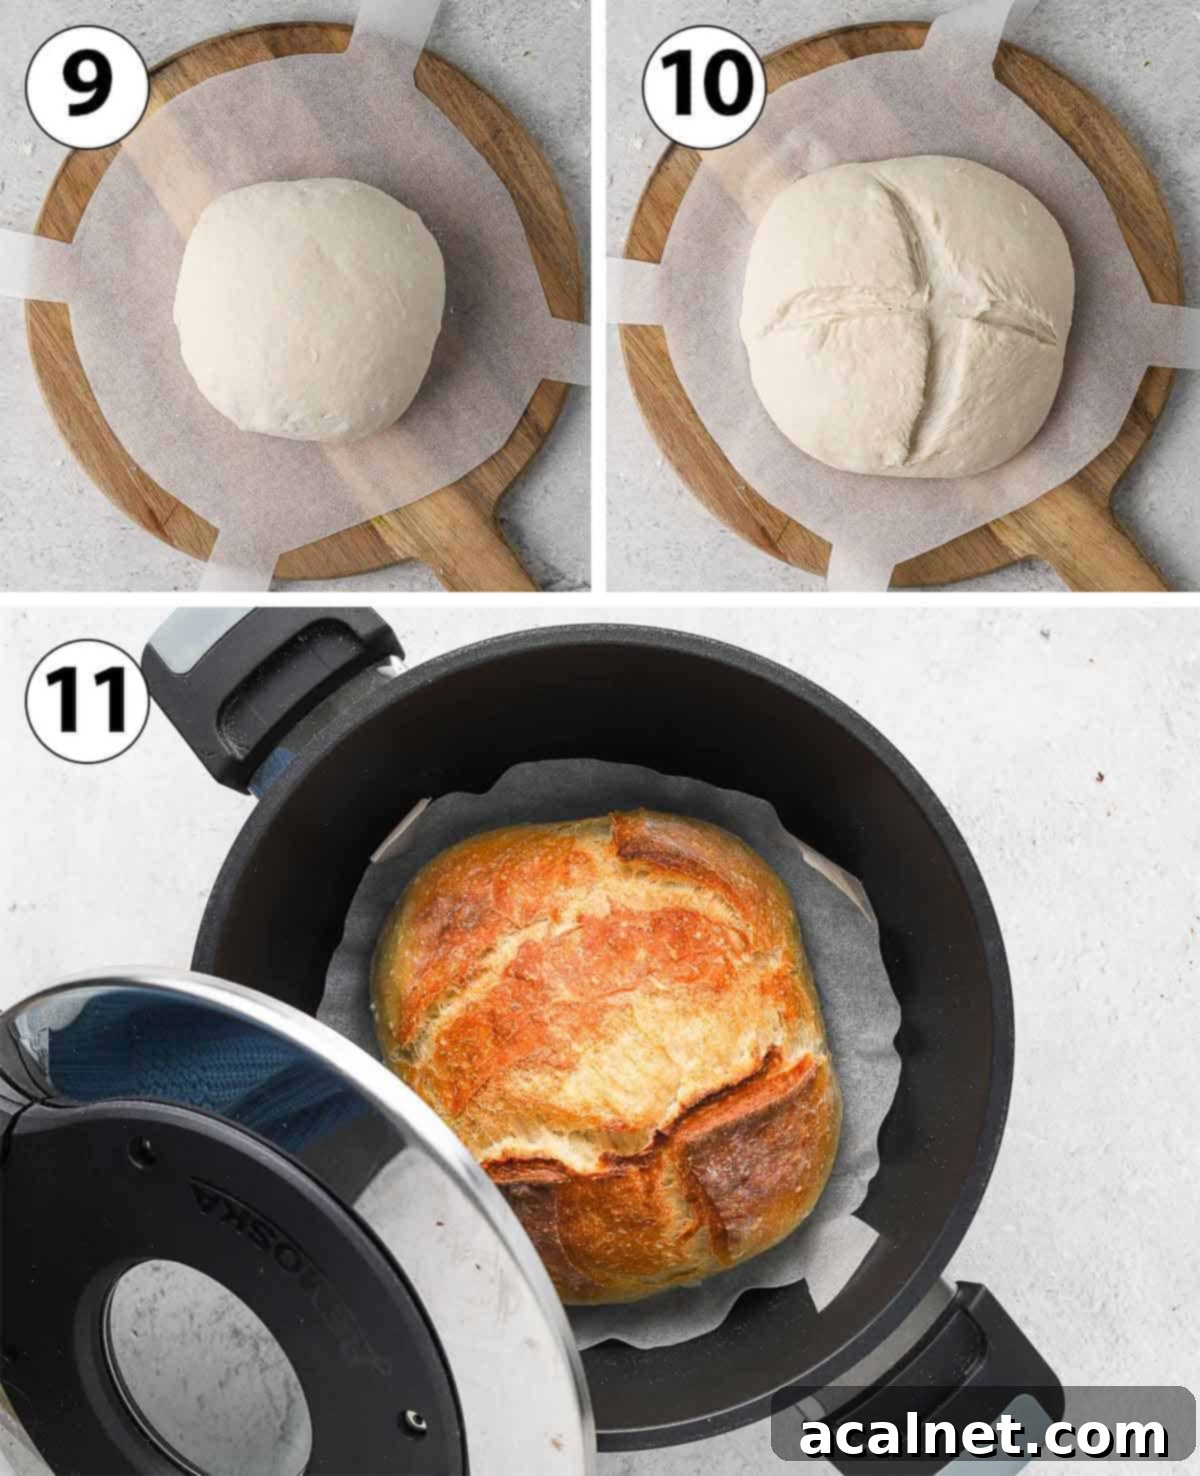
- Photo 9: Final Shaping and Second Rise. Flip the dough over so the seam side is down, creating a neat, smooth ball. Carefully place this dough ball onto a sheet of baking paper. I find it helpful to cut the baking paper into a round shape with a few longer strips on the sides; this acts as a sling, making it much easier to lift the bread in and out of the Remoska. Allow the dough to proof for a second time in a warm spot for another 30 to 45 minutes. During this period, it should increase in size and relax slightly, spreading out a bit.
- Photo 10: Preheat Remoska. Place the baking lid securely over your Remoska Tria pot. Turn it on and let it preheat for 5 minutes. This step is crucial for achieving a good “oven spring” and a wonderfully crispy crust.
- Optional: Scoring the Bread. Just before transferring the bread into the preheated Remoska, you can optionally score the top with a very sharp knife or a specialized scoring lame (bread blade). Scoring helps to control where the bread expands during baking, preventing uncontrolled cracks and adding a beautiful, professional touch to your loaf.
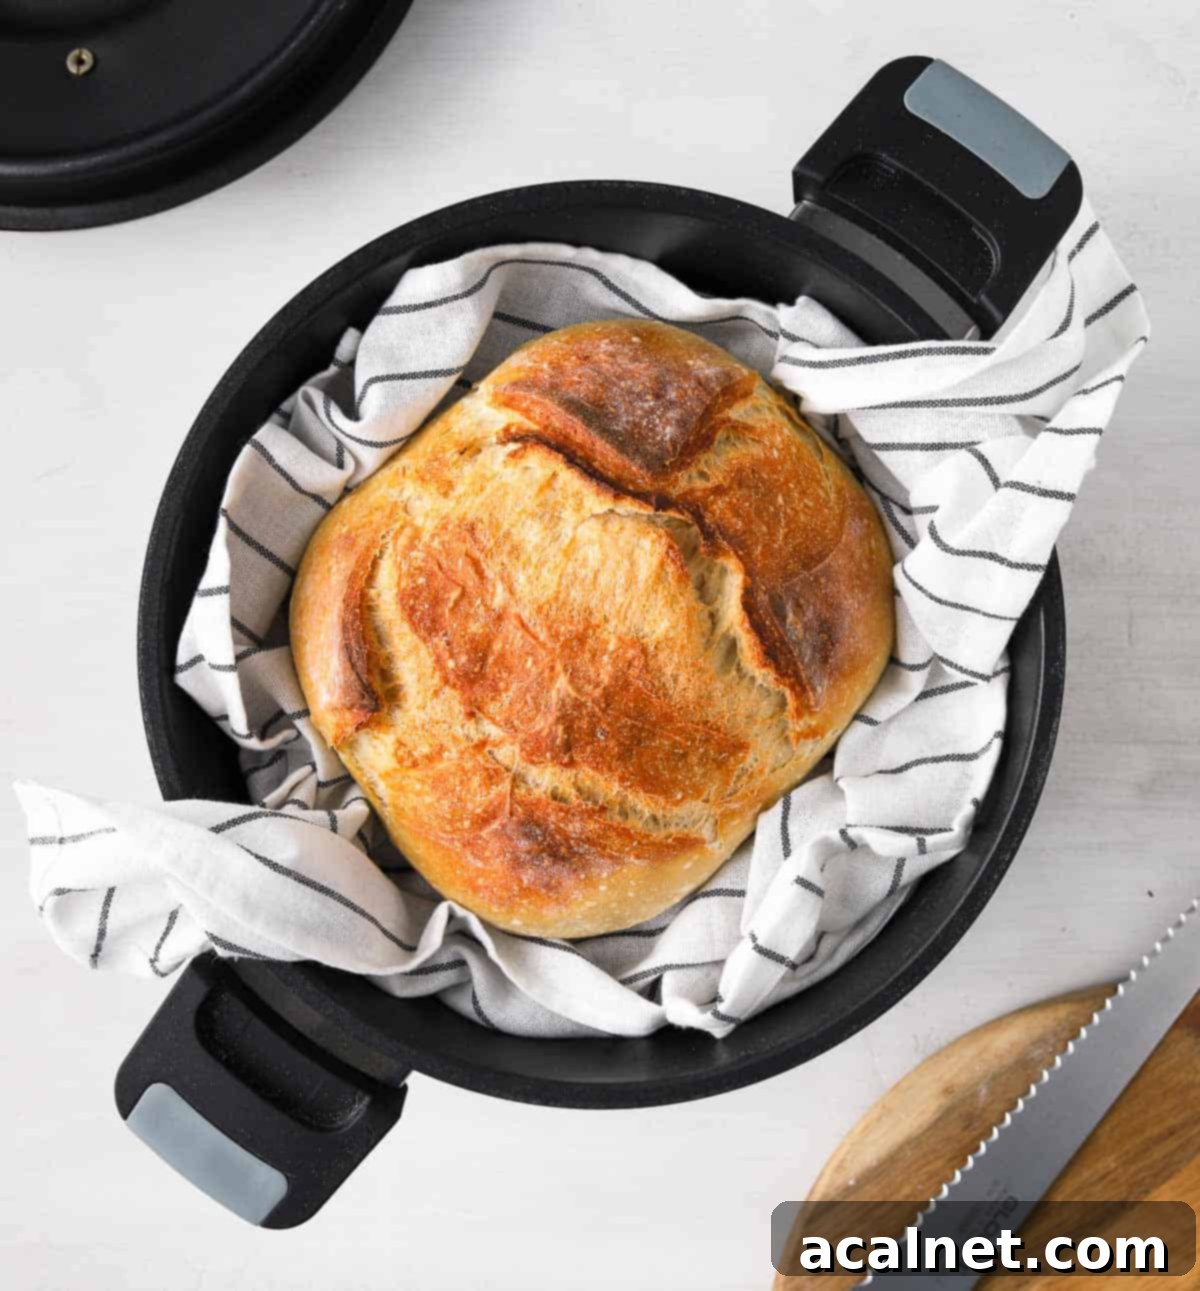
- Photo 11: Bake in Remoska. With extreme caution, remove the preheated baking lid (it will be very hot!). Gently lower the dough, along with its baking paper sling, into the hot Remoska pot. Immediately re-cover with the hot lid. Bake for 35 to 40 minutes. The Remoska creates a steamy environment, mimicking a Dutch oven, which is perfect for developing a deep, golden crust.
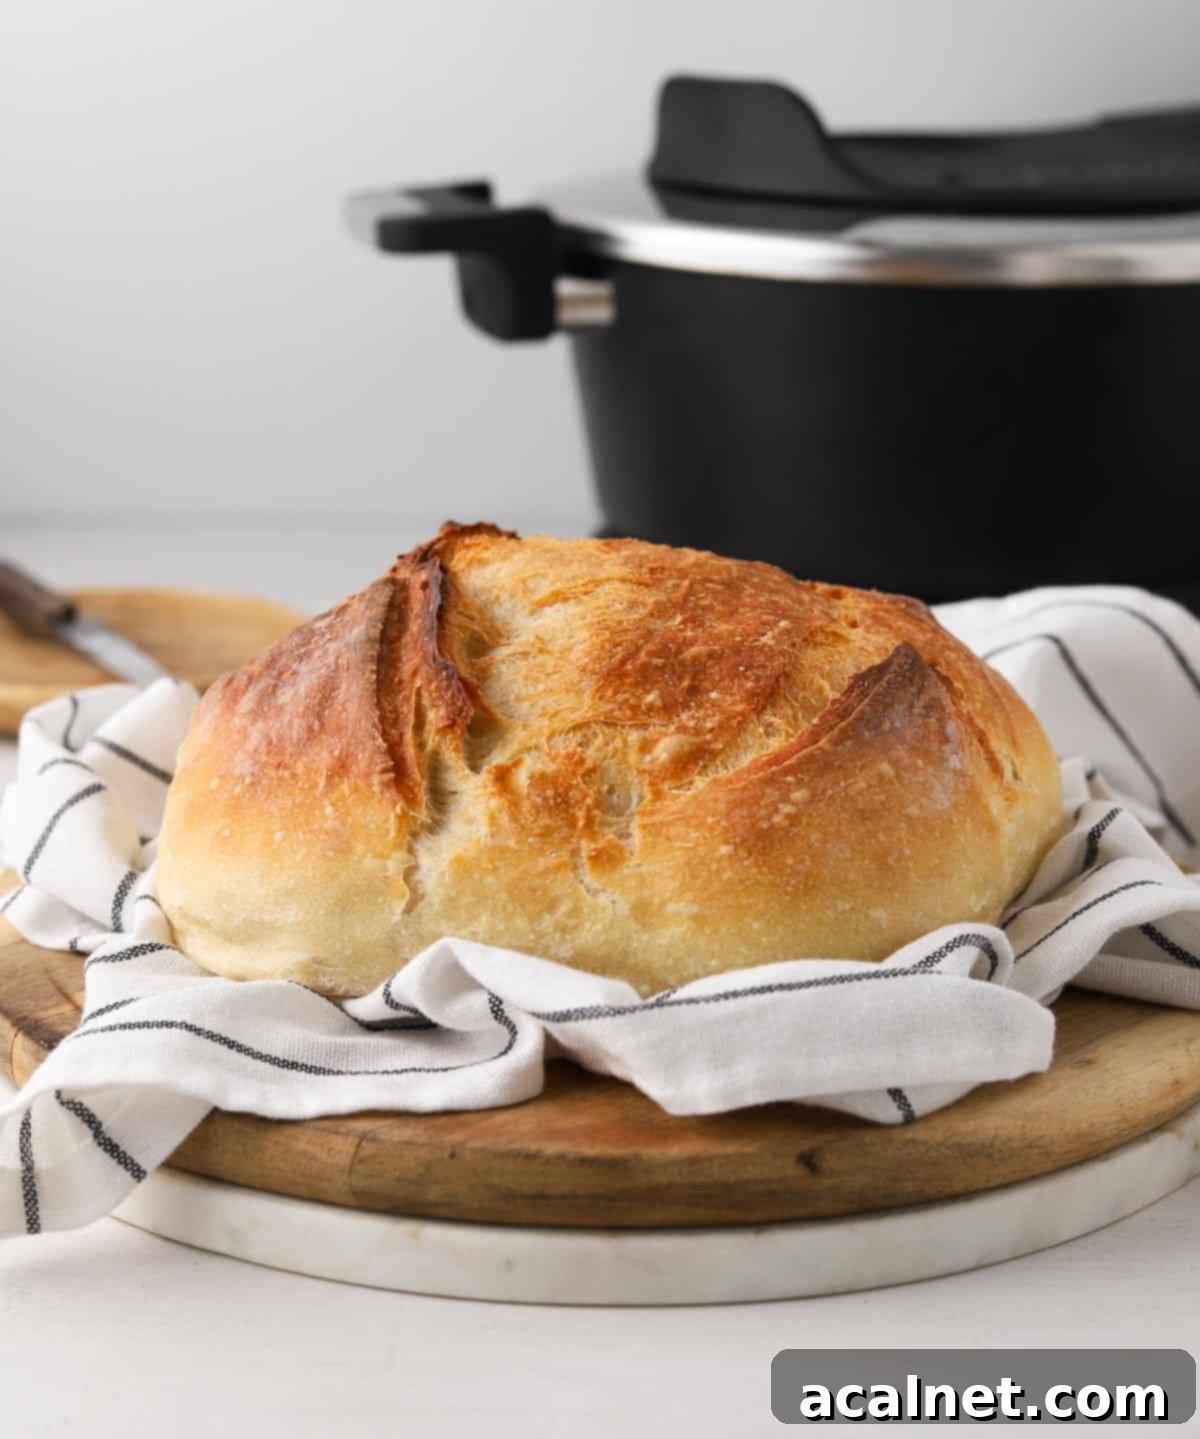
- Cooling Process. Once baking is complete, turn off the Remoska and carefully remove the baking lid. Be mindful that the lid will be extremely hot; avoid placing it face down on any surface that could melt or be damaged. Let the bread cool down inside the Remoska pot for 10 to 15 minutes. This allows the crust to set and prevents it from becoming too soft. After this initial cooling, use the baking paper strips to carefully lift the loaf out of the pot and transfer it to a wire cooling rack to cool down completely.
Crucial Cooling Tip: Resist the temptation to slice into your beautiful loaf while it’s still warm! If you cut the bread too soon, the steam trapped inside will escape rapidly, resulting in a drier, tougher crumb. Allowing it to cool completely on a rack ensures the internal moisture redistributes, giving you that perfectly soft, chewy interior.
No-Knead Bread FAQs: Your Questions Answered
Yes, absolutely, you can use plain or all-purpose flour for this recipe. However, it’s important to set your expectations regarding the final texture. Bread flour has a higher protein content, which translates to stronger gluten development, resulting in a lighter, chewier crumb and a more open internal structure. When using plain/AP flour, your bread will still be delicious and have a good crust, but the crumb tends to be a bit denser and less airy compared to a loaf made with bread flour. It’s a great alternative if bread flour isn’t available, but expect a slight variation in texture.
Yes, you can certainly proof your no-knead bread dough in the fridge! This is often referred to as a “cold proof” or “retarding” the dough. The colder temperature significantly slows down the fermentation process, which means the dough will need to proof for a much longer period – typically 18 to 24 hours, or even up to 2-3 days. A major benefit of cold proofing is that it allows for a more complex and developed flavor to emerge in the bread, similar to sourdough. It also offers greater flexibility, allowing you to fit bread baking into your schedule more easily. Just remember to bring the dough closer to room temperature for about 30-60 minutes before shaping and baking for optimal results.
While it’s technically possible to bake the bread after a shorter proofing period (I’ve experimented with as little as 3 hours), I highly recommend adhering to the 8-12 hour (or longer) proofing time. The extended bulk fermentation is fundamental to the success of a no-knead bread. During this long period, the gluten network develops naturally without any manual kneading, leading to a strong, elastic dough. A shorter proof will result in significantly less gluten development, making the bread much denser, with a tighter crumb, and lacking the characteristic airy texture and deep, complex flavors that define a truly great no-knead loaf. Patience is a virtue when it comes to this recipe!
Absolutely! Baking no-knead bread in the Remoska Tria with its baking lid creates an environment very similar to baking in a preheated Dutch Oven inside a conventional oven. If you’re using a regular oven, here’s how to adapt: Preheat your Dutch oven (with its lid on) in your conventional oven to 450°F (230°C) for at least 30 minutes. Carefully transfer the shaped no-knead dough into the hot Dutch oven, cover with the lid, and bake for 20 to 25 minutes. Then, remove the lid and continue baking for another 10 to 15 minutes, or until the crust is deeply golden brown and sounds hollow when tapped. The Dutch oven traps steam, which is essential for a crispy crust and a good oven spring.
Expert Tips for No-Knead Bread Perfection
Achieving a consistently excellent loaf of no-knead bread is simple when you keep these key tips in mind:
- Embrace the Long Proofing Time: The longer you allow your no-knead bread to proof, the more profound and complex the flavors will become. This extended bulk fermentation (typically 8-12 hours, or even up to 24 hours in cooler temperatures) allows enzymatic activity to break down starches, creating a richer taste and aroma. I personally find that around 10 hours of bulk fermentation yields an optimal balance of flavor and texture for this recipe.
- Master the “Stretch and Fold” for Tension: The shaping stage, particularly the “stretch and fold” method, is critical for building internal structure and surface tension in the dough. This tension is what allows the bread to expand beautifully in the oven, resulting in a lofty loaf with an appealing crust and open crumb. Don’t be shy; gently but firmly stretch and fold the dough until you feel significant resistance. This indicates you’ve developed enough tension for a successful bake.
- Resist Adding Too Much Flour During Shaping: No-knead dough is intentionally high in hydration, which contributes to its soft, chewy crumb. It’s normal for the dough to feel quite soft and slightly sticky after its long rise. When transferring it to a floured surface for shaping, use just enough flour to prevent it from sticking excessively to your hands and the work surface – a light dusting is usually sufficient. Over-flouring will dry out the dough, leading to a denser, tougher loaf.
- Monitor Your Water Temperature: As mentioned in the ingredients, the water temperature is crucial for yeast activity. Too cold, and the yeast won’t activate; too hot, and you’ll kill it. Aim for lukewarm water (around 105-115°F or 40-46°C) for optimal results. If you don’t have a thermometer, it should feel comfortably warm to the touch, not hot.
- Preheat Your Remoska (or Dutch Oven) Thoroughly: A hot Remoska pot is key to achieving a fantastic oven spring and a wonderfully crispy crust. Preheating ensures that the moment the dough hits the hot surface, it starts to bake rapidly, creating steam within the confined space which helps the crust develop beautifully. Don’t rush this step!
Storing & Freezing Your Homemade No-Knead Bread
To preserve the deliciousness of your freshly baked no-knead bread, proper storage is essential:
- Storing Fresh Bread: This bread will retain its optimal freshness for up to 3 to 4 days at room temperature. For best results, store it in an airtight container, a bread box, or a breathable linen bread bag. Avoid refrigerating whole loaves, as the cold temperature can actually cause bread to stale faster. If the crust starts to soften, a quick toast or a few minutes in a warm oven can bring back its crispness.
- Freezing for Longer Freshness: For extended storage, freezing is an excellent option. I highly recommend freezing individual slices rather than the entire loaf. This method offers unparalleled convenience; simply grab a slice or two as needed. To freeze, allow the bread to cool completely, then slice it. Place the slices in a single layer on a baking sheet and freeze until firm (this prevents them from sticking together). Once firm, transfer the frozen slices to a freezer-safe bag or airtight container, removing as much air as possible. Frozen slices can last for up to 3 months. To enjoy, simply pop a frozen slice directly into your toaster until warmed through and lightly golden.
Explore More Delicious Bread Recipes
If you’ve enjoyed this simple no-knead bread, you might love exploring these other fantastic bread recipes from our collection:
- Rosemary Focaccia: An aromatic and delightfully airy Italian classic.
- Cinnamon Scrolls: Indulgent, sweet, and perfect for breakfast or dessert.
- Chocolate Brioche Wreath: A show-stopping, rich, and buttery treat.
- Apple Cinnamon Pull Apart Bread: Fun to make and even more fun to eat!
- Chocolate Chip Brioche Bread: A sweet and comforting bread, loved by all.
- Sweet Potato Buns: Soft, slightly sweet, and incredibly versatile.
- Spinach & Ricotta Rolls: Savory and flavorful, great as a snack or side.
- Sesame Bagels: Achieve authentic, chewy bagels right in your kitchen.
Made this recipe?
Let us know if you liked it by leaving a comment below, and tag us on Instagram @a.baking.journey with a photo of your creation!
Recipe Card: No-Knead Bread in the Remoska Tria
No-Knead Bread in the Remoska Tria
Print Recipe
Ingredients
- 450 gr (3 cups) Bread Flour
- 11 gr (2 teasp.) Instant Yeast
- 6 gr (1 teasp.) Fine Table Salt
- 320 ml (1 1/3 cup) Water, lukewarm
Instructions
- In a large mixing bowl, combine the Bread Flour and Fine Table Salt. Mix well to distribute the salt. Create a well in the center of the dry ingredients. Add the Instant Yeast to the bottom of this well, then pour the lukewarm Water over it. This layering helps the yeast activate optimally.450 gr (3 cups) Bread Flour, 11 gr (2 teasp.) Instant Yeast, 6 gr (1 teasp.) Fine Table Salt, 320 ml (1 1/3 cup) Water
- Using a spatula, begin mixing from the center outwards, gradually incorporating the flour into the wet ingredients. Continue mixing until all ingredients are well combined and there are no visible pockets of dry flour. The dough will be rough and sticky – this is the desired consistency. You can use your hands to ensure everything is thoroughly mixed, as described in note 1.
- Cover the bowl with a clean tea towel and let the dough proof at room temperature for 8 to 12 hours (refer to note 2 for optimal timing and flavor development). This long, slow fermentation is crucial for flavor and texture.
- After proofing, the dough should have significantly risen, showing a bubbly, elastic texture, and still feel slightly sticky. Lightly flour your work surface and gently transfer the dough. Carefully bring it together into a large, cohesive ball, as detailed in note 3.
- Shape the bread using the “stretch and fold” method: gently pull a section of the dough outwards, then fold it towards the center, pressing slightly to adhere. Rotate the dough 90 degrees and repeat this action. Continue this process around the dough several times until you feel significant tension and resistance, as the dough begins to tighten (see note 4 for more guidance on this critical step).
- Flip the shaped bread over so the seam is underneath, creating a smooth top. Place it onto a sheet of baking paper (see note 5 regarding the use of baking paper). Allow it to proof for a final 30 to 45 minutes in a warm spot. It should relax and spread slightly.
- Place the baking lid onto your Remoska Tria pot, turn it on, and preheat for 5 minutes. Optionally, score the bread’s surface with a sharp knife or bread lame for controlled expansion and a rustic look. Carefully and quickly remove the hot baking lid, gently place the bread (using the baking paper as a sling) into the Remoska, then immediately re-cover with the lid. Bake for 35 to 40 minutes until golden brown and crusty.
- Once baked, turn off the Remoska and carefully remove the very hot lid (as instructed in note 6). Allow the bread to cool inside the pot for 10 to 15 minutes before carefully lifting it out using the baking paper and transferring it to a wire cooling rack. It is essential to let the bread cool down completely on the rack before slicing to ensure a soft crumb and prevent it from becoming dry or gummy.
Would you like to save this recipe?
We’ll email this post to you, so you can come back to it later!
Notes
Ingredient Notes:
- Bread Flour: Using bread flour, with its higher protein content, yields a superior light and chewy crumb due to better gluten development. While Plain / All-Purpose Flour can be substituted, anticipate a slightly denser texture in your final bread.
- Yeast: If your recipe calls for Active Dry Yeast instead of Instant Yeast, you must first “bloom” (rehydrate) it. To do this, mix the active dry yeast with the lukewarm water (specified in the recipe) and let it sit for about 5-10 minutes, or until it becomes noticeably foamy and bubbly. This confirms the yeast is active and ready to use before adding it to your dry ingredients.
Instruction Notes:
- When mixing, expect a rough, somewhat sticky dough rather than a smooth, uniform one. This texture is characteristic of high-hydration, no-knead doughs and is perfectly normal. The crucial part is to ensure that all dry flour has been thoroughly incorporated, leaving no unmixed pockets.
- Optimal proofing time significantly enhances the bread’s flavor. I typically prepare the dough in the evening and let it proof overnight for approximately 10 hours at room temperature. A longer proofing period allows for deeper flavor development and a more robust crumb structure.
- At this stage, your dough should feel notably soft, pliable, and stretchy due to the overnight fermentation. While it will still be a bit sticky, try to avoid the temptation to add excessive amounts of flour during shaping, as this can lead to a drier final product.
- I usually perform the stretch and fold method around 4 to 5 times. The goal is to build as much surface tension in the dough as possible. This tension is vital for achieving a good “oven spring” (how much the bread rises in the oven) and a beautifully structured, airy crumb in your baked bread. Stop when you feel significant resistance, and the dough starts to resist further stretching.
- For easier handling, I cut the baking paper into a round shape with a few longer strips extending from the sides. This creates a convenient sling to effortlessly lift the bread in and out of the Remoska Tria pot. While the Remoska’s pot is non-stick and you technically could bake directly in it, using baking paper simplifies the removal process, minimizing disturbance to your perfectly risen loaf.
- The Remoska Tria’s baking lid will become extremely hot during the preheating and baking process. Always handle it with extreme caution, using oven mitts or heat-resistant gloves. Crucially, do not place the hot lid face down directly onto any heat-sensitive surface, such as plastic countertops or tables, as it could cause damage or melting. Always rest it on a heat-proof surface.
Nutrition (per serving)
