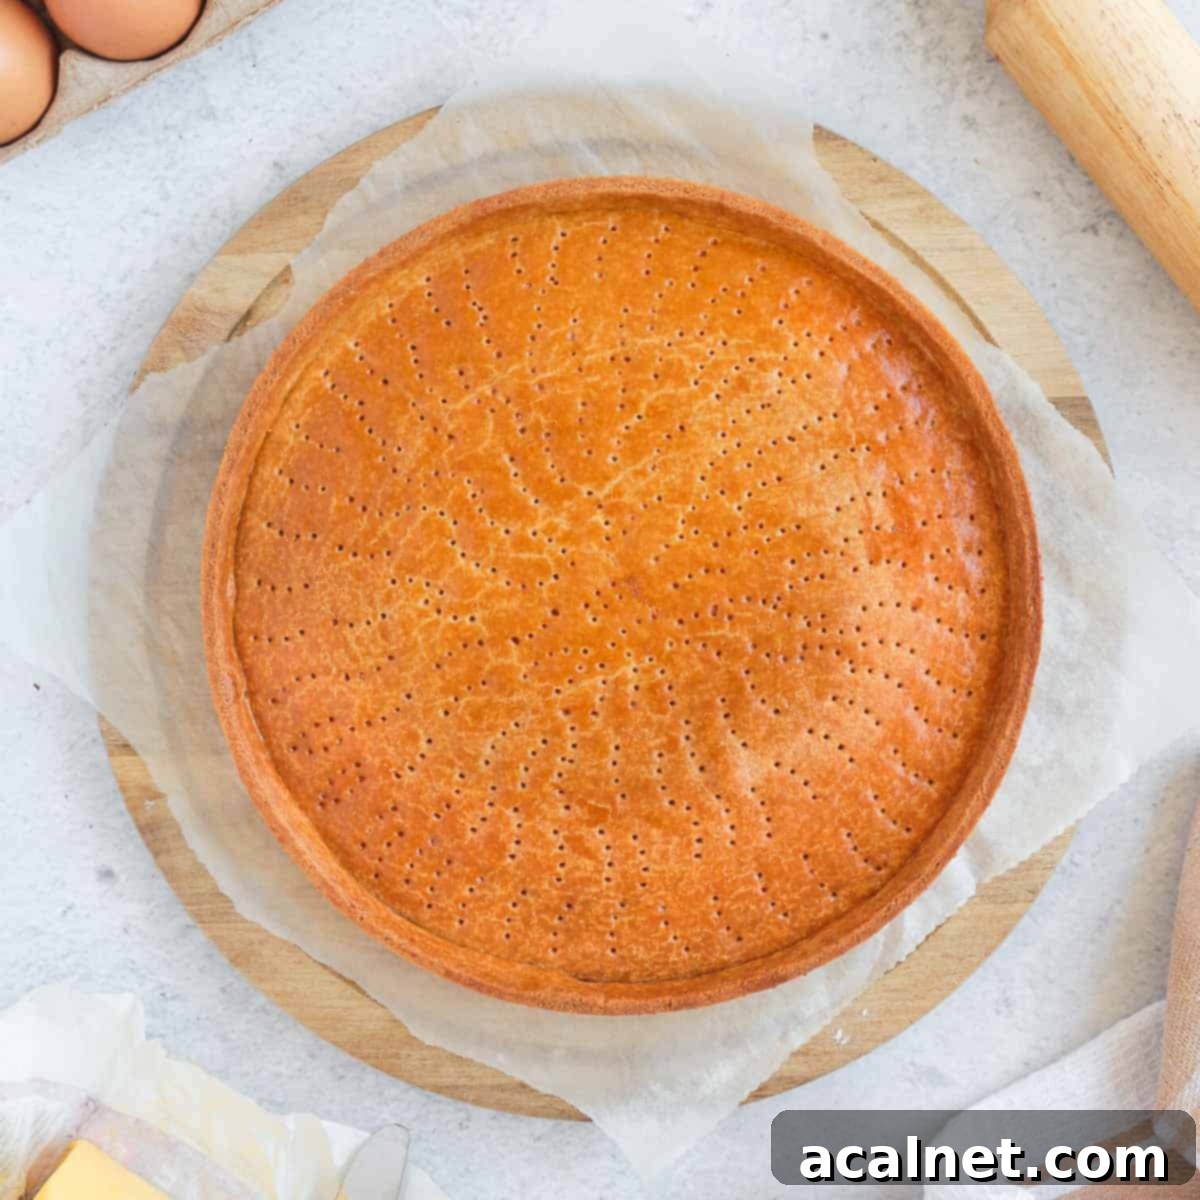
Pâte Sablée: The Ultimate French Shortcrust Pastry for Perfect Tarts
Dive into the world of classic French baking with Pâte Sablée, an exquisite all-butter shortcrust pastry that serves as the foundation for countless delightful tarts. Whether you’re dreaming of a vibrant fruit tart or a rich chocolate masterpiece, this versatile dough is your perfect starting point. Crafted with just five essential ingredients, Pâte Sablée is surprisingly straightforward to prepare, either by hand or with the aid of a food processor. Its distinctively crumbly, melt-in-your-mouth texture and subtle sweetness elevate any filling, making it a beloved choice among bakers for its reliability and delicious results.
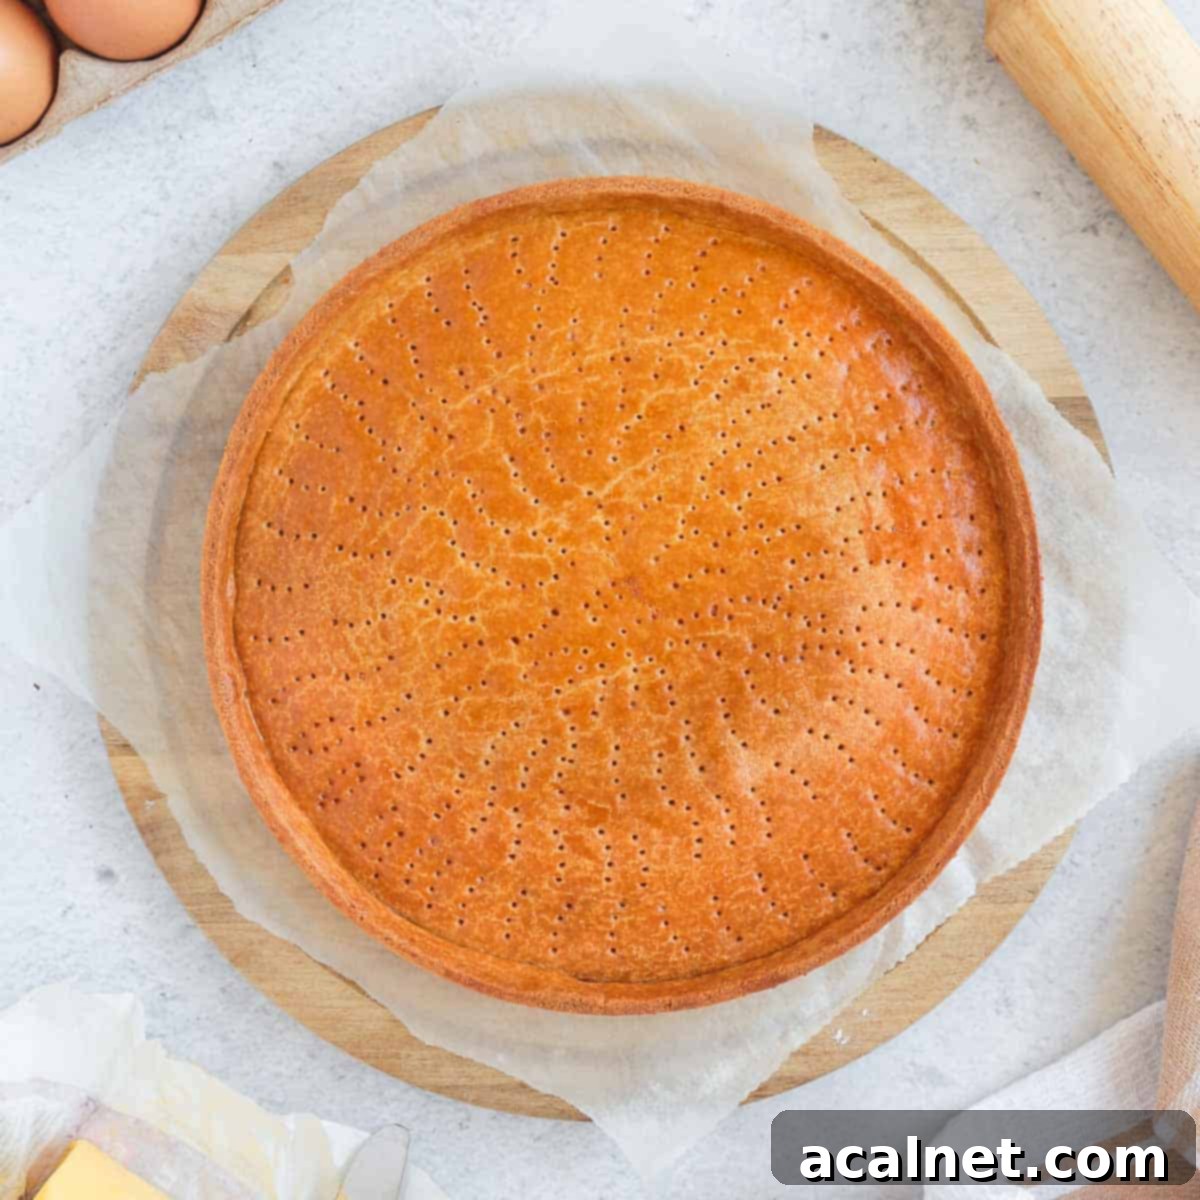
Why You’ll Adore This Pâte Sablée Recipe
Every truly great tart begins with an exceptional crust, and our Pâte Sablée recipe delivers just that. This classic French shortcrust pastry dough is a true baking gem, offering a perfect balance of rich butter flavor and a delicate, sandy texture that crumbles beautifully with every bite. Beyond its irresistible taste, this recipe is a favorite for several compelling reasons:
- Simplicity: You only need five basic ingredients to create this gourmet pastry. No fancy techniques or obscure components required!
- Versatility: Whether you’re crafting a classic fruit tart, an indulgent chocolate creation, or even delicate mini tartlet shells for Lemon Curd Tartlets, Pâte Sablée provides the ideal base. You can even customize it by adding cocoa for a rich Chocolate Pastry Dough.
- Ease of Preparation: This dough can be mixed effortlessly either by hand, ensuring a satisfying tactile experience, or quickly in a food processor for maximum convenience.
- Make-Ahead Friendly: Prepare the dough in advance and store it in the fridge or freezer, making tart assembly a breeze for any occasion. This flexibility ensures you can always have a homemade tart ready when inspiration strikes.
- Superior Texture: Unlike other pastry types, Pâte Sablée is renowned for its tender, slightly crumbly texture that truly melts in your mouth, providing a delightful contrast to creamy or fruity fillings.
Understanding Pâte Sablée: The “Sandy Dough”
Pâte Sablée (pronounced “Paht Sa-Blay“) is a cornerstone of French patisserie, translating literally to “Sandy Dough” or “Sand Pastry.” This evocative name refers to two key aspects: the distinctive, finely crumbly texture of the baked pastry, which indeed resembles sand, and the traditional technique used to create it, known as “Sablage.”
The Sablage technique is central to achieving Pâte Sablée’s unique consistency. It involves thoroughly combining cold butter with dry ingredients like flour until the mixture resembles fine breadcrumbs or sand. This process ensures that the butter remains in small, separate pieces, preventing the formation of long gluten strands when liquid is added. As the butter melts during baking, it leaves behind tiny pockets, resulting in the pastry’s characteristic tender and crumbly texture. This method stands in contrast to the “crémage” (creaming) method, often used for a Pâte Sucrée, where butter and sugar are creamed together first.
Once the butter and dry ingredients are “sablé” (sanded), a liquid, typically a whole egg, is introduced to bring the dough together. Unlike the cold water used in a Savoury Shortcrust Pastry (Pâte Brisée), the egg in Pâte Sablée contributes to its richer flavor and helps bind the delicate crumb structure. The resulting dough boasts a slightly sweet profile, a rich buttery taste, and a wonderfully thick, crumbly texture that holds its shape beautifully while still being incredibly tender – perfect for a wide array of sweet tart fillings.
Essential Ingredients for Pâte Sablée
Crafting the perfect Pâte Sablée requires just a handful of common ingredients. The key to success lies not only in the quality of these components but also in their proper temperature and preparation. Here’s what you’ll need:
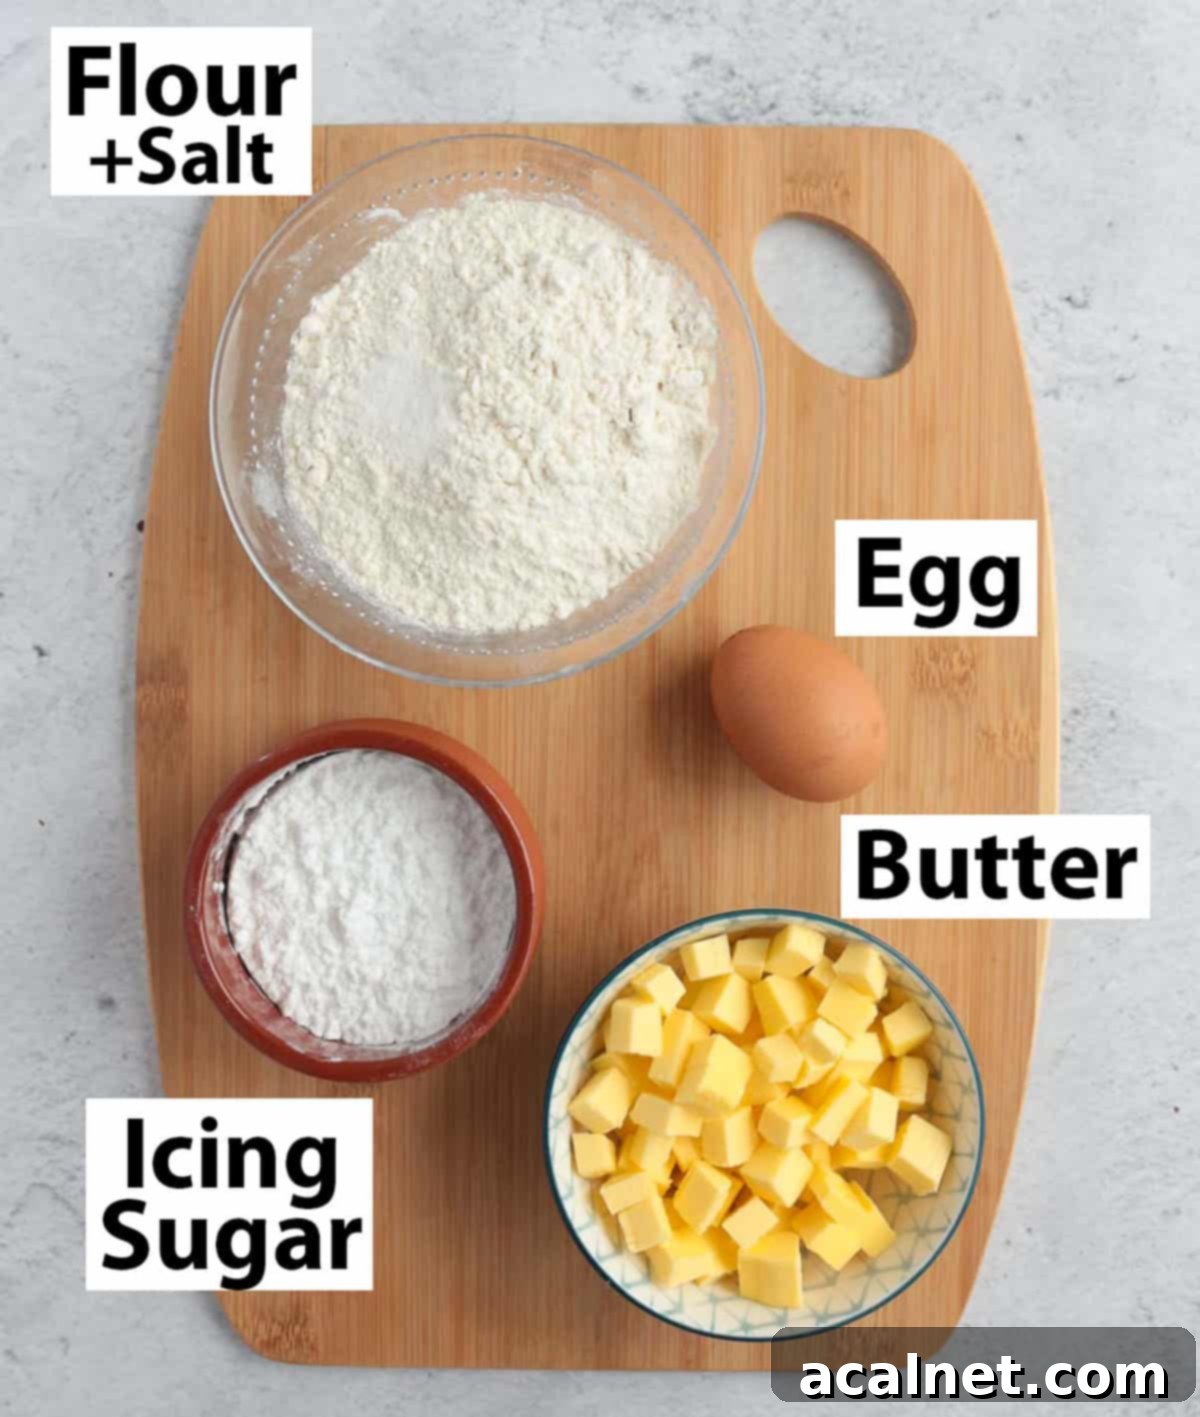
Scroll down to the recipe card below for exact quantities.
- All-Purpose Flour: Also known as Plain Flour. Always sift your flour to remove any lumps and ensure a lighter, airier dough. While all-purpose flour works perfectly, some bakers prefer pastry flour for an even more tender crumb.
- Icing Sugar: Powdered sugar is crucial for achieving the smooth, melt-in-your-mouth texture that Pâte Sablée is famous for. Unlike granulated sugar, which can leave a slightly grainy texture, icing sugar dissolves seamlessly into the dough. Remember to sift it before use, as it tends to clump in storage.
- Unsalted Butter: This is the heart of Pâte Sablée. It must be very cold and cut into small cubes. The cold temperature is vital for the “sablage” method, preventing the butter from fully incorporating into the flour too early, which is what gives shortcrust pastry its characteristic tender, crumbly texture. Unsalted butter allows you to control the salt content precisely.
- Large Egg: The egg acts as a binding agent, bringing the sandy mixture together to form a cohesive dough. It also adds richness and contributes to the golden color of the baked crust. For easier and more even incorporation, whisk the egg briefly in a separate small bowl before adding it to the dry ingredients.
- Salt: A small pinch of fine table salt is essential. It enhances the overall flavor of the pastry, balancing the sweetness of the sugar and complementing the richness of the butter.
Optional Additions & Flavor Variations
While delicious on its own, Pâte Sablée is incredibly adaptable to various flavor profiles. Don’t hesitate to experiment with these additions to customize your tart crust:
- Citrus Zest: Finely grated orange or lemon zest adds a bright, aromatic note that pairs wonderfully with fruit or cream fillings.
- Vanilla: A pinch of vanilla powder or a few drops of vanilla extract will deepen the pastry’s natural sweetness and fragrance.
- Cacao Powder: For a decadent twist, incorporate unsweetened cacao powder (as seen in our Chocolate Pâte Sablée) to create a rich, dark chocolate crust that’s perfect for chocolate ganache or berry tarts.
- Freeze-Dried Berries: Crushed freeze-dried berries can add a beautiful pop of color and a subtle fruity flavor.
- Nut Meals: A small amount of almond flour or hazelnut meal can add a delicate nutty flavor and an even more tender crumb, though this will technically lean closer to a Pâte Sucrée.
How to Make Pâte Sablée: A Step-by-Step Guide
Preparing this classic French pastry dough is simpler than you might think, with two primary methods to choose from: by hand or using a food processor. While I personally find the food processor quicker and results in a more consistently “sanded” texture, the hand-mixing method is equally effective and deeply satisfying.
A third, less common option for Pâte Sablée (though often used for Pâte Sucrée) is the creaming method, where butter and sugar are creamed first. However, to achieve the signature “sandy” texture, the sablage method, as detailed below, is preferred.
Making the Pastry With a Food Processor
Using a food processor is the quickest way to achieve a perfectly crumbly Pâte Sablée, minimizing handling and keeping the butter cold.
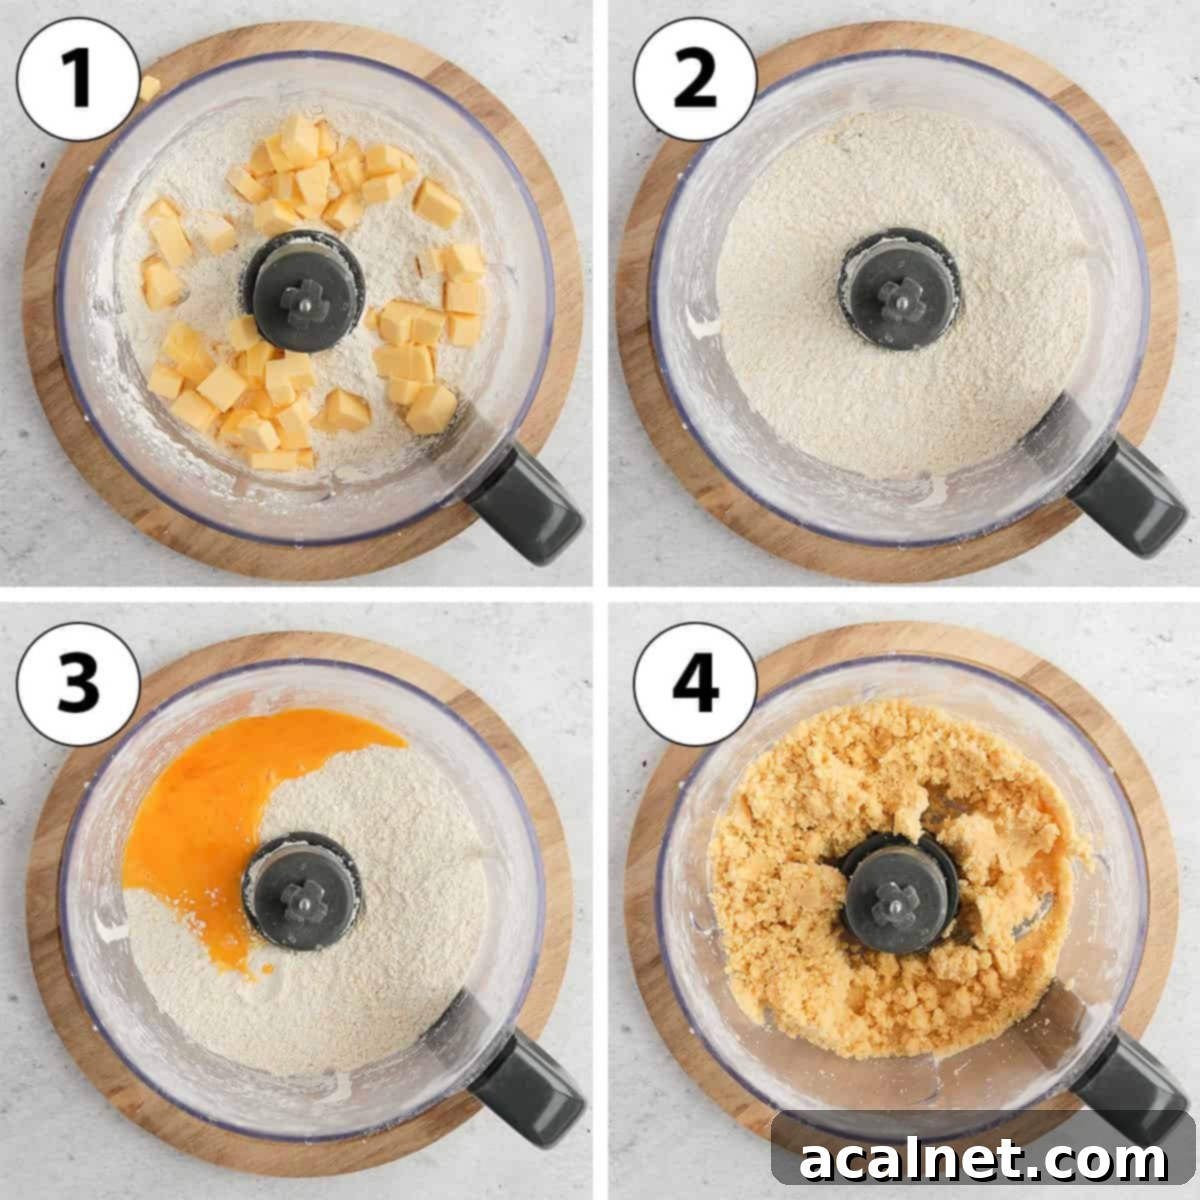
- Step 1 (Photo 1): In the bowl of your food processor, combine the sifted Flour, Icing Sugar, and a pinch of Salt. Pulse briefly to ensure they are well mixed. Then, add the very cold, cubed Butter.
- Step 2 (Photo 2): Pulse the mixture repeatedly until the butter is completely incorporated into the dry ingredients, and you achieve a texture resembling fine breadcrumbs or sand. Ensure there are no large chunks of butter remaining, as this is crucial for the “sablage” effect.
- Step 3 (Photo 3): Pour in the whisked Egg. Whisking it beforehand ensures it incorporates more evenly and quickly into the dough.
- Step 4 (Photo 4): Pulse again, just until the dough begins to come together. It will look like large clumps and crumbs at this stage. Avoid overmixing; as soon as the mixture starts to form a cohesive mass, stop. If you press a handful of the mixture, it should stick together.
- Carefully remove the dough from the food processor and gently bring it together into a smooth, slightly soft ball. Wrap it in plastic wrap and chill it as directed in the rolling section.
Making the Pastry By Hand
For those who prefer a more traditional approach or don’t have a food processor, making Pâte Sablée by hand is equally rewarding. The key is to work quickly to keep the butter cold.
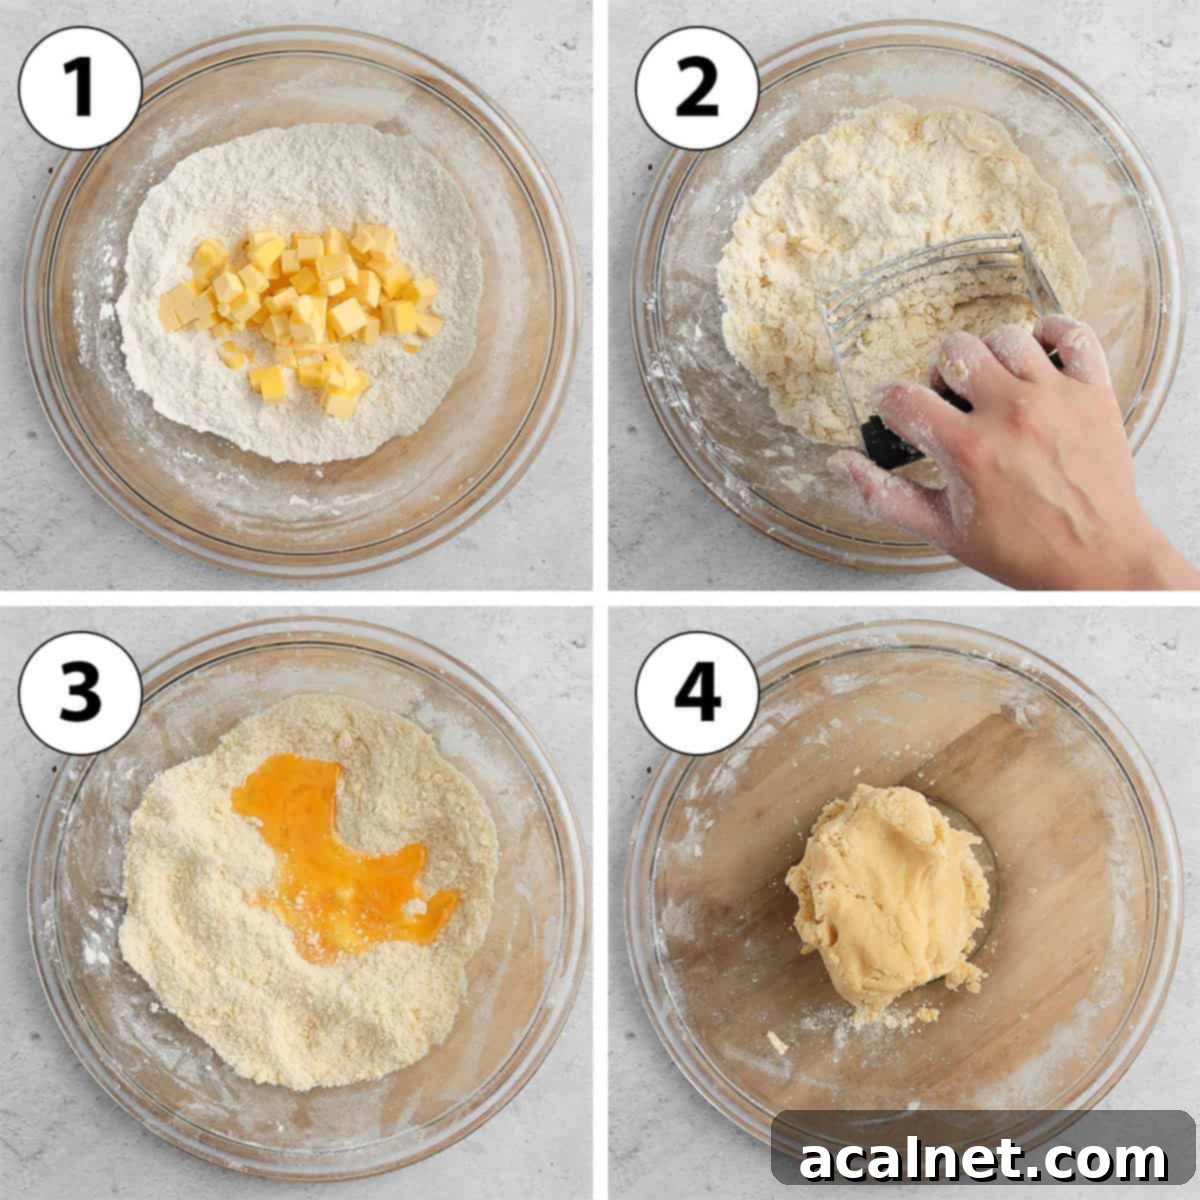
- Step 1 (Photo 1): Sift the Flour, Icing Sugar, and Salt into a large mixing bowl. Stir them together to ensure an even distribution. Add the very cold butter, cut into small cubes.
- Step 2 (Photo 2): Using your fingertips or a Pastry Blender, “cut” the butter into the dry ingredients. This is done by rubbing the small cubes of butter into the flour and sugar until the mixture resembles fine crumbs, and no large lumps of butter or dry pockets of flour remain. Work quickly to prevent the butter from warming up.
- Step 3 (Photo 3): Add the whisked Egg to the crumbly mixture.
- Step 4 (Photo 4): Mix the egg into the dough. This can be done directly in the bowl, but a more effective method is the “Fraisage” technique, performed on a clean work surface.
The “Fraisage” is a classic French baking technique used to homogeneously mix a liquid ingredient (like an egg or water) into a pastry dough without overworking the gluten. It’s performed by pressing small portions of the dough with the palm of your hand against a hard surface, pushing it away from you in a linear motion. This smears the butter and incorporates the liquid smoothly, resulting in a cohesive yet tender dough. For a more detailed guide, see this Fraisage technique tutorial.
Once the dough comes together, form it into a soft ball, wrap it tightly in plastic wrap, and chill it as described in the next section.
Rolling & Lining Your Tart Pan
Properly rolling and lining your tart pan is critical for a beautifully shaped and evenly baked crust. While some recipes suggest chilling the dough before rolling, I find it easier to roll Pâte Sablée immediately after mixing, while it’s still slightly soft and pliable.
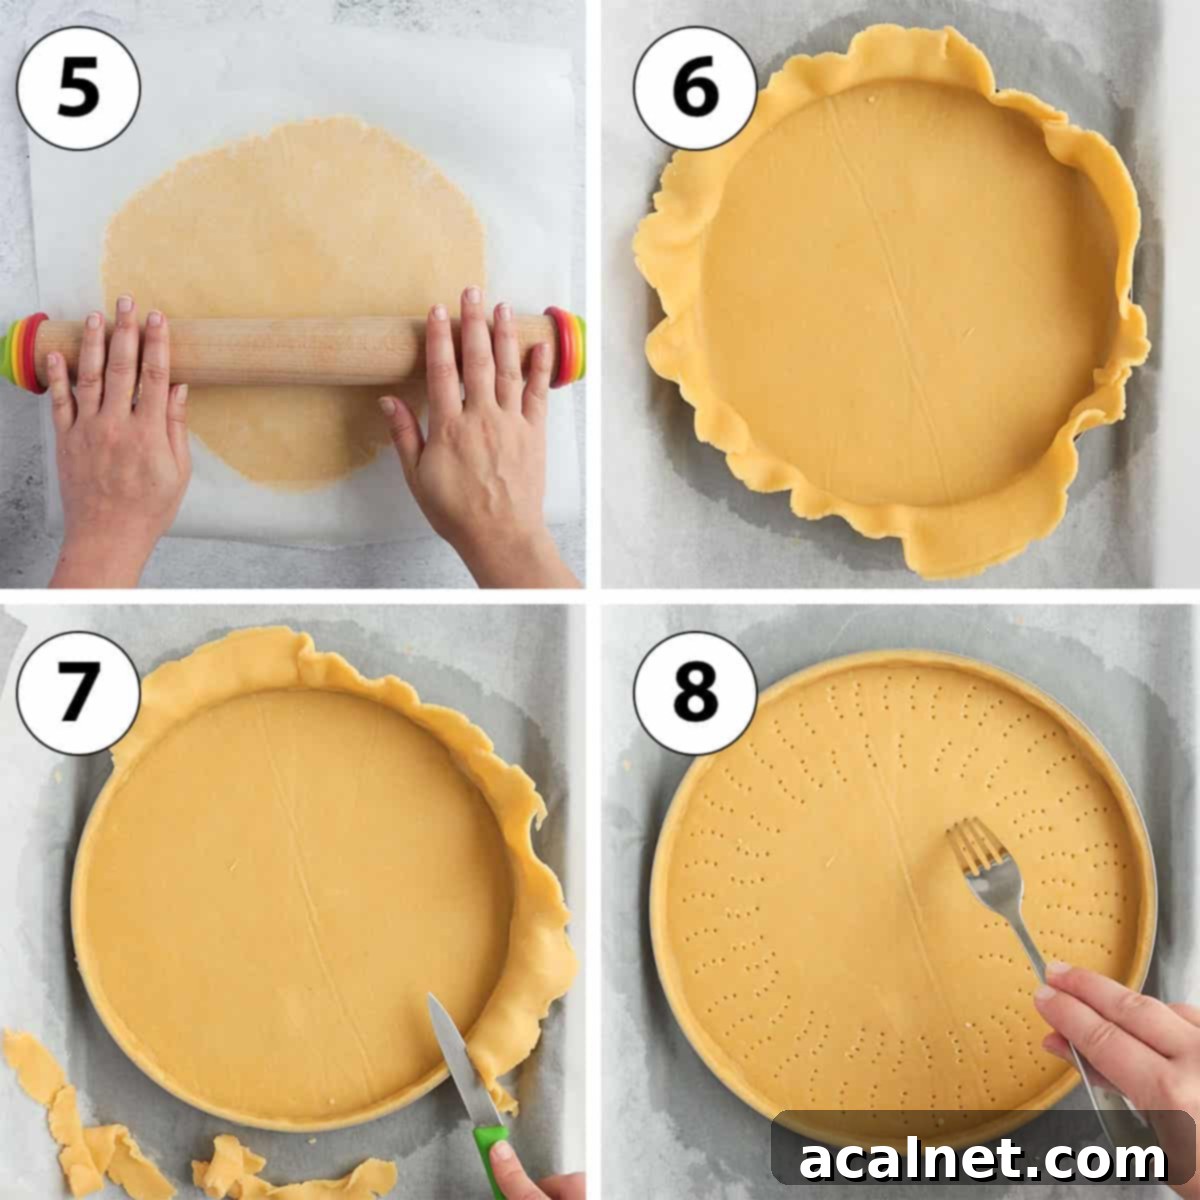
- Step 5 (Photo 5): Place the freshly made dough between two sheets of baking paper (parchment paper) or two silicone baking mats. Roll it out evenly into a large, thin circle using a rolling pin. The ideal thickness is about 4mm (1/8 inch), which provides a sturdy yet tender crust. If you have a rolling pin with thickness rings or rolling guides, they are excellent for achieving uniform thickness.
- Once rolled, transfer the dough (still between the baking paper) onto a flat tray and place it in the fridge. Allow it to rest and chill for at least 1 hour, or up to 24 hours. This crucial chilling period helps the gluten relax and the butter firm up, preventing shrinkage during baking.
- Step 6 (Photo 6): Carefully remove the top layer of baking paper. Invert the dough into your chosen tart ring or pan, then peel off the second layer of baking paper. Gently press the dough into the corners and up the sides of the pan, ensuring it forms a sharp 90-degree angle between the bottom and the sides. This creates crisp, professional-looking edges. If the dough is too stiff to work with, let it sit at room temperature for a few minutes to soften slightly. Conversely, if it becomes too soft, return it to the fridge for a few minutes.
- Step 7 (Photo 7): Use a small, sharp knife or your fingers to trim any excess dough from the edges of the tart pan. Any small cracks can be easily patched with leftover dough or by gently pressing with your fingers.
- Once lined, return the tart shell to the refrigerator for another rest and chill of at least 1 hour, or up to 24 hours. This double chilling process is vital for preventing the crust from shrinking in the oven. For best results, place it in the freezer for 15-20 minutes just before baking, while your oven preheats.
Baking Your Pâte Sablée Tart Shell
Baking Pâte Sablée requires careful attention to achieve a perfectly golden, crisp, and fully cooked crust. Depending on your tart filling, you’ll either par-bake (partially bake) or fully blind-bake the shell.
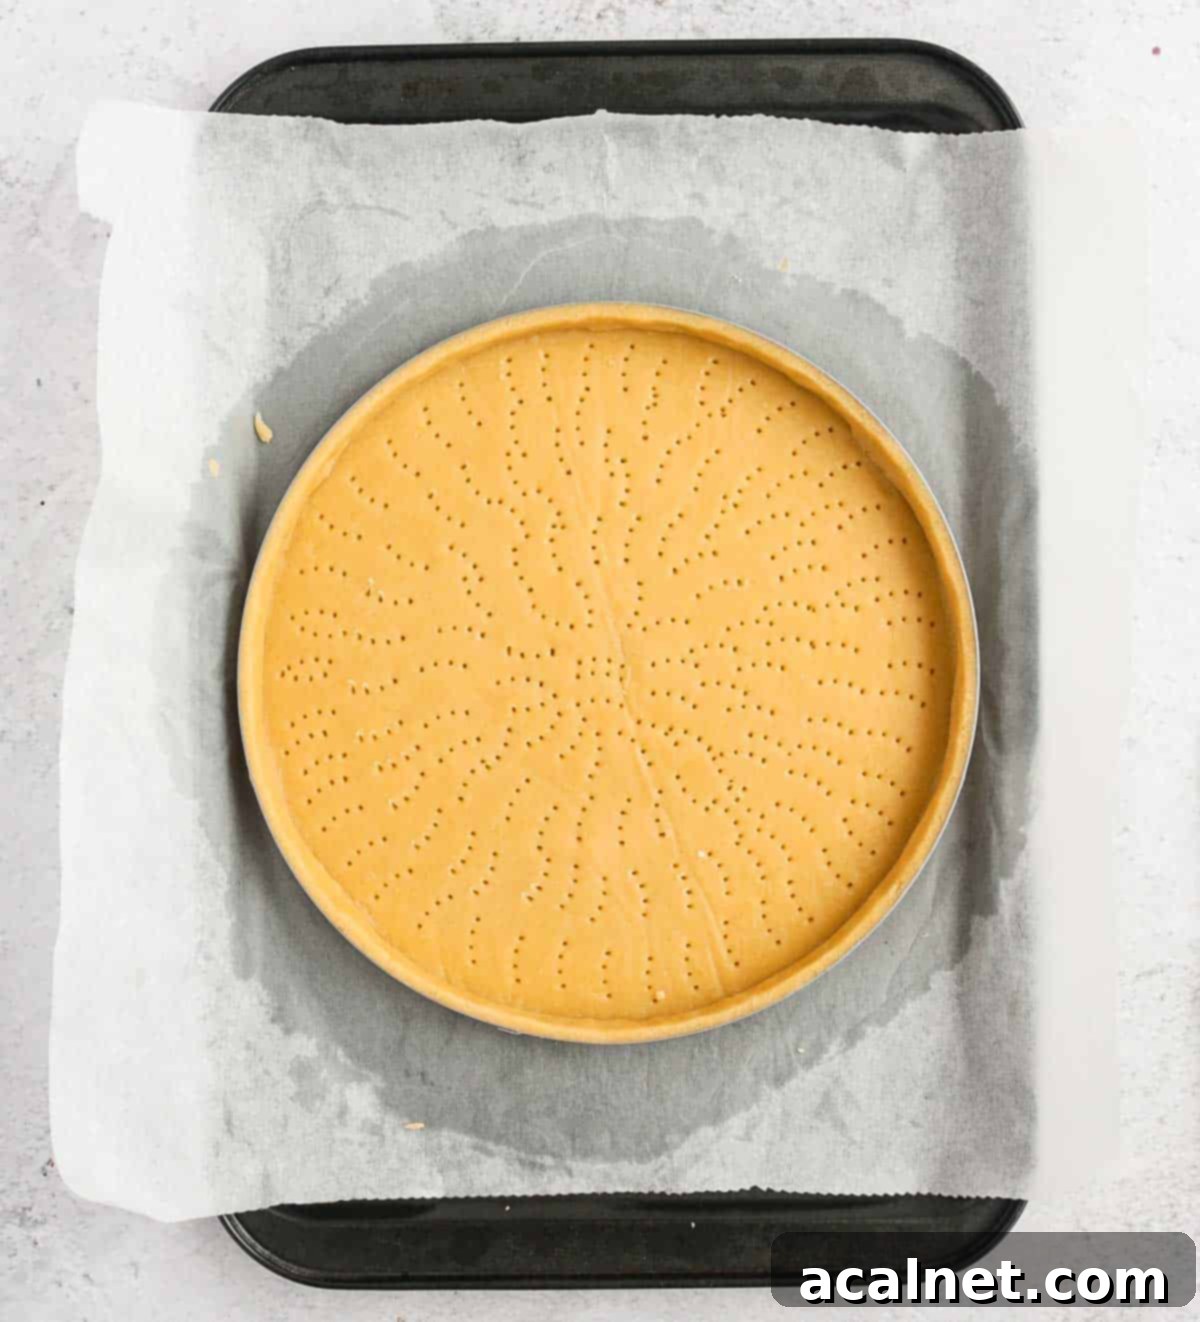
- Step 8 (Photo 8): Before baking, “dock” the bottom of the pastry by pricking it all over with a fork. This prevents air bubbles from forming and ensures an even bake.
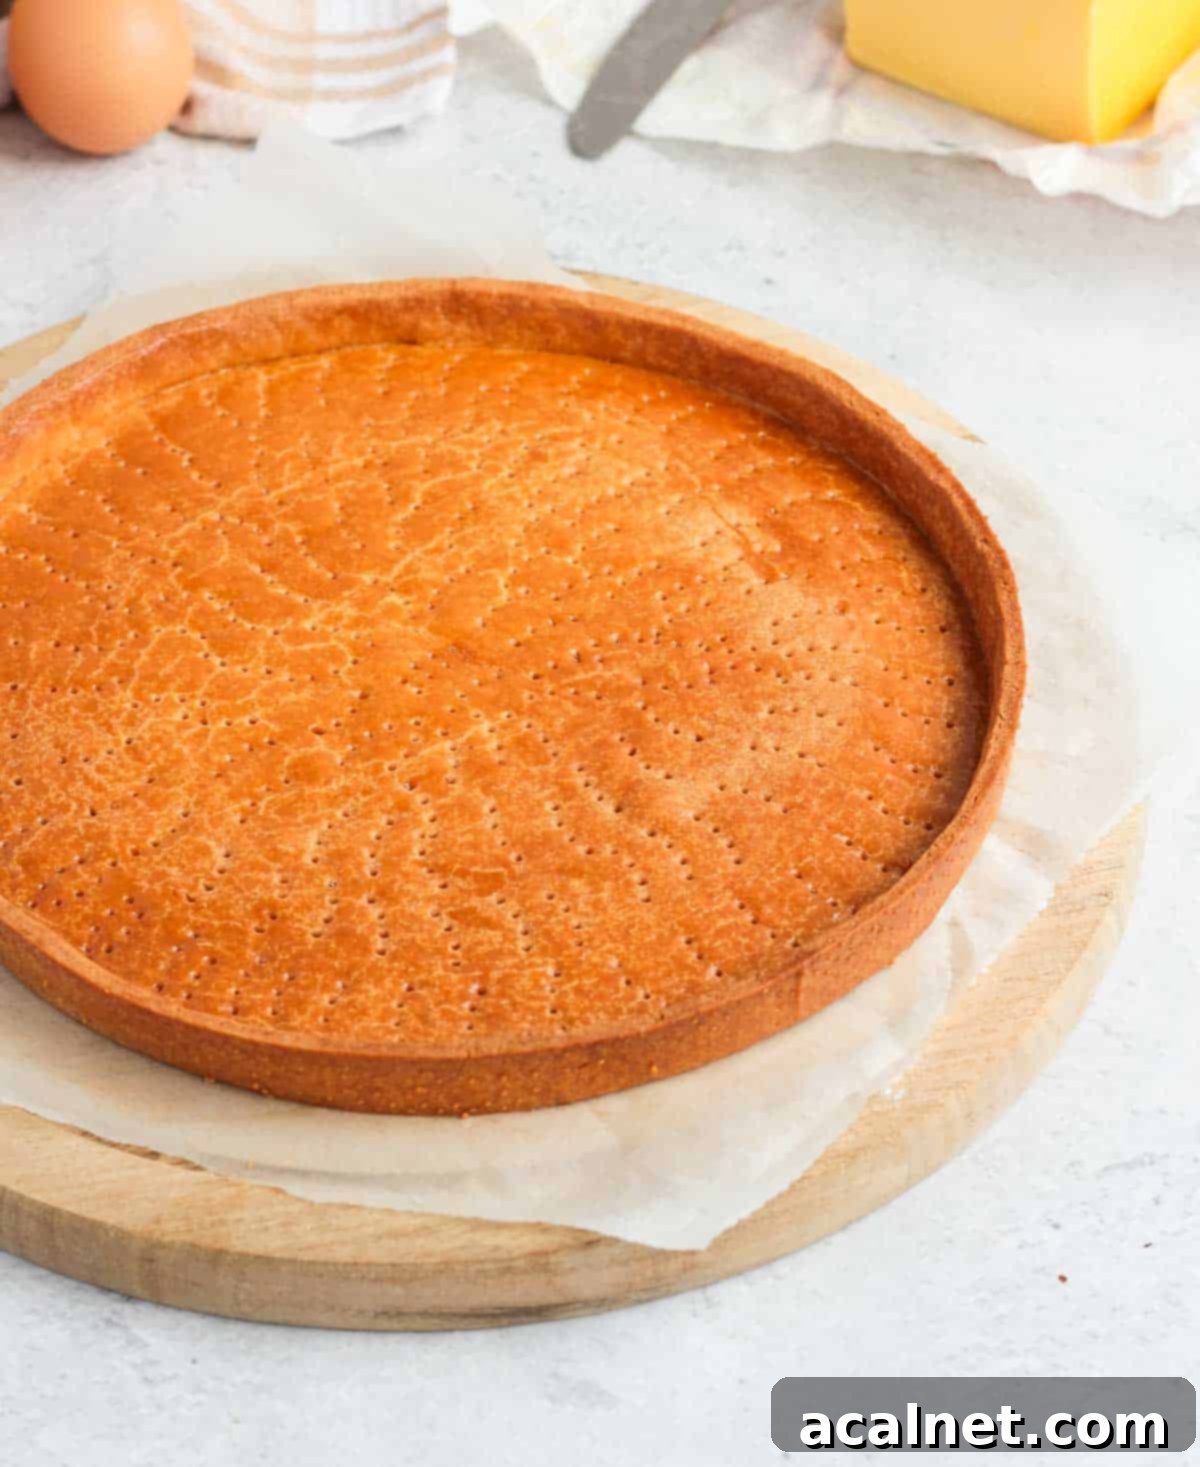
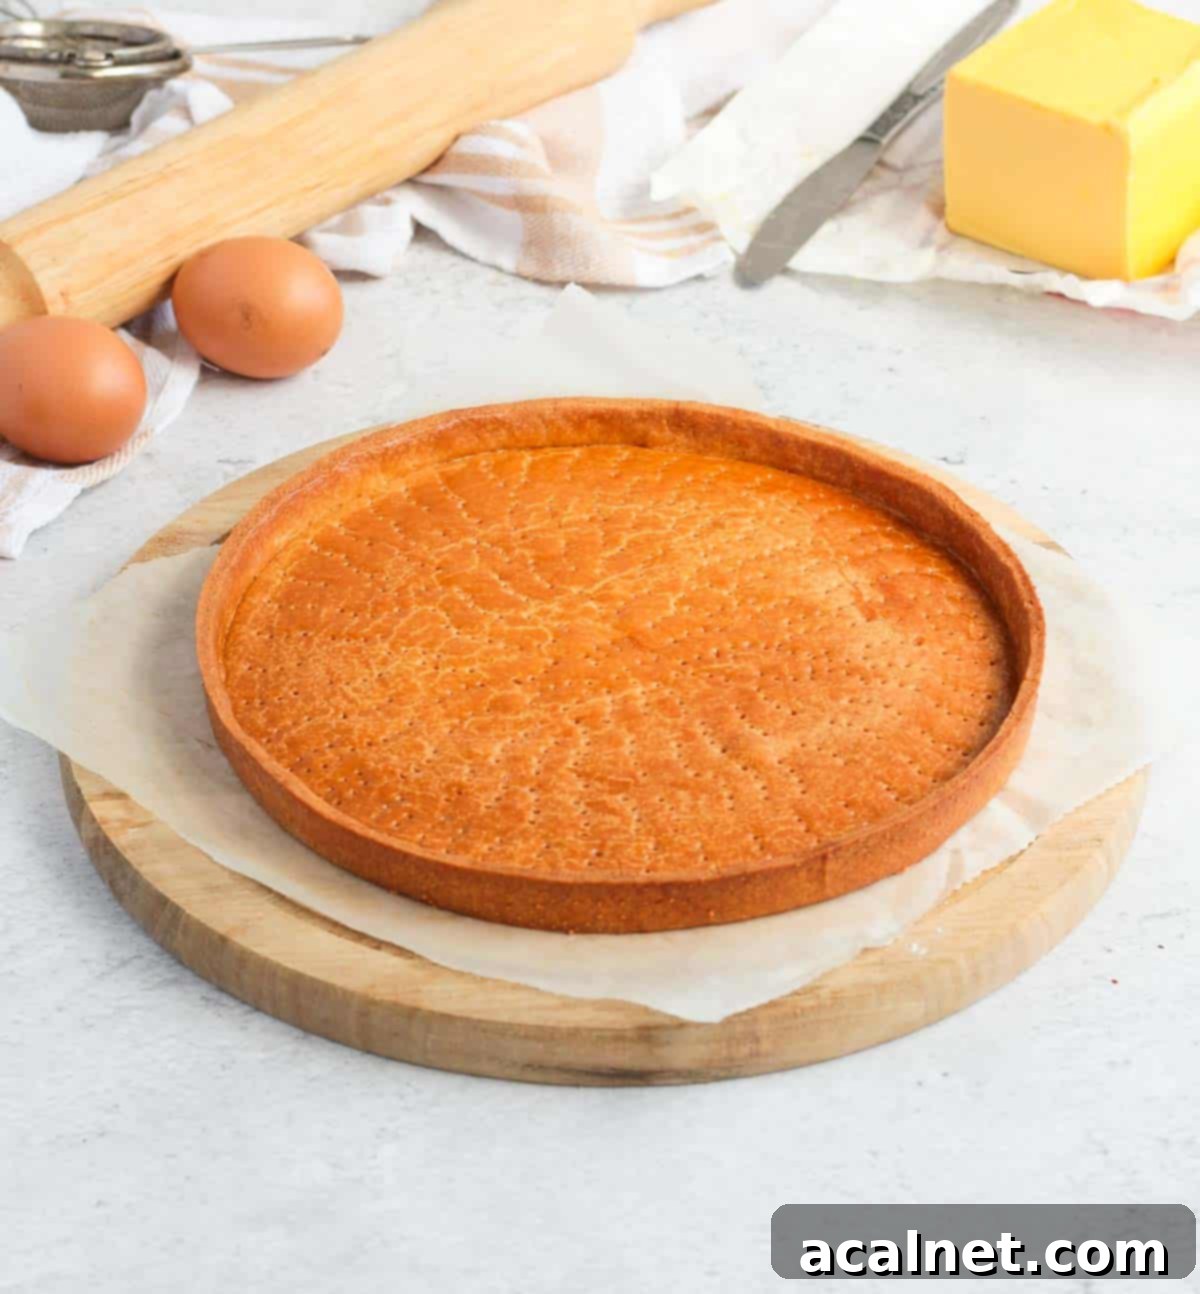
- Blind Baking (Full Bake): If your filling doesn’t require further baking (like a no-bake custard or fresh fruit tart), you’ll need to fully blind-bake the crust. Preheat your oven to 160 degrees Celsius (325 degrees Fahrenheit). Bake for approximately 35 to 40 minutes, or until the crust is beautifully golden brown and completely dry to the touch. Let it cool completely before adding your filling.
- Par-Baking (Partial Bake): If your tart filling will be baked inside the crust (such as an almond cream filling), you’ll par-bake the crust first. Preheat your oven to 160 degrees Celsius (325 degrees Fahrenheit). Bake for about 15 to 20 minutes, or until lightly golden. Remove from the oven, let it cool slightly, add your filling, and continue baking according to your filling recipe’s instructions.
- Optional Seal (Prevent Soggy Crust): For tarts with very wet fillings, consider brushing the par-baked pastry with an egg wash (egg yolk for golden, egg white for invisible) halfway through its initial bake. Return it to the oven to finish baking. This creates a protective barrier, preventing the crust from becoming soggy.
Due to its high butter content and proper chilling, Pâte Sablée tends to hold its shape well during baking. Therefore, baking beans or pie weights are often not strictly necessary, especially if using a perforated tart pan. However, if you prefer, you can use them for the first 15-20 minutes of baking to ensure no movement.

Expert Tips for a Perfect Pâte Sablée
Achieving a flawless Pâte Sablée is within reach with these essential tips:
- The Importance of Cold Butter and Chilling: This cannot be stressed enough! Cold butter is the secret to a tender, crumbly shortcrust pastry. It ensures that the butter doesn’t melt into the flour too quickly, creating those desirable pockets of flakiness. The repeated chilling steps (after rolling and after lining the pan) are crucial. They allow the gluten to relax, preventing the pastry from shrinking in the oven, and keep the butter firm, contributing to that signature “sandy” texture.
- Don’t Overwork the Dough: Whether using a food processor or your hands, stop mixing as soon as the dough comes together. Overworking develops the gluten, which will result in a tough, chewy crust instead of a tender one.
- Sift Dry Ingredients: Sifting flour and icing sugar ensures there are no lumps and helps them incorporate more smoothly with the butter, creating a finer texture.
- Par-Baking vs. Blind Baking: Always refer to your tart filling recipe for specific baking instructions.
- Full Blind Baking is typically required for fillings that don’t need baking (like Pastry Cream or fresh fruit fillings) or those that bake very quickly.
- Par-Baking is for fillings that will be baked inside the crust, such as an Almond Cream Filling or quiches.
- Preventing a Soggy Bottom: If your filling is particularly moist, brush the par-baked crust with an egg wash (egg yolk for golden, egg white for invisible) halfway through its initial bake. This creates a seal that prevents moisture from the filling from seeping into the crust, keeping it perfectly crisp.
- Use a Perforated Tart Pan: For the best results, especially if you struggle with soggy bottoms, invest in a perforated tart ring or pan. The small holes allow hot air to circulate evenly, ensuring a crispier, more uniformly baked crust.
Common Pâte Sablée Problems and Solutions
Even experienced bakers can encounter issues. Here are common problems with Pâte Sablée and how to fix them:
- The dough is too sticky: This usually means there’s too much liquid or the butter has warmed up too much.
- Solution: Gently sprinkle in a very small amount of all-purpose flour (about 1/2 tablespoon at a time) and gently knead until the desired consistency is achieved. An excellent tip is to roll the dough between two sheets of parchment paper; this prevents sticking to your counter and makes it much easier to handle and transfer.
- The dough is hard & crumbly: This indicates insufficient liquid.
- Solution: Mix in a tiny bit of very cold water (about 1 teaspoon at a time) until the dough just comes together. Be careful not to add too much, as this can make the dough tough.
- The pastry cracks when lining the tart pan: This often happens when the dough is too cold and the butter is too firm, making the dough brittle.
- Solution: Simply let the pastry sit at room temperature for a few minutes. The butter will soften slightly, and the dough will become more pliable. If it becomes too soft and difficult to handle, pop it back into the fridge for a few minutes. Any small cracks can be easily patched up by gently pressing them together with your fingers.
- The crust shrank or collapsed in the oven: This is almost always due to the dough not being properly rested and chilled for long enough.
- Solution: Pâte Sablée requires at least two chilling periods: one after rolling it flat (at least 1 hour) and another after lining the tart pan (at least 1 hour). This allows the gluten to relax, preventing shrinkage. For an extra safeguard, place the lined tart shell in the freezer for 15-20 minutes while your oven preheats, ensuring the butter is as cold as possible before baking.
- The tart crust burned before it was fully baked: This can occur if your oven temperature is too high, or if the pastry was rolled too thinly.
- Solution: Oven temperatures can vary significantly, so always consider baking times as indicative and keep an eye on your pastry. If it starts browning too quickly, you can loosely cover the edges or the entire tart with aluminum foil to shield it, then continue baking until it’s fully cooked through. Next time, consider a slightly lower oven temperature or roll the dough a tiny bit thicker.
Frequently Asked Questions About Pâte Sablée
All three are classic French pastry doughs, but they differ in composition and texture.
- Pâte Sablée: Our featured “sandy dough,” made with cold butter cut into dry ingredients (sablage method) and often an egg for richness. It has a high butter content, resulting in a distinctly tender, crumbly, and slightly flaky texture, reminiscent of a delicate shortbread. It’s less sweet than Pâte Sucrée.
- Pâte Sucrée: Meaning “sweet dough,” this pastry is typically made using the creaming method (butter and sugar creamed together first). It often includes almond meal and has a slightly lower butter-to-flour ratio than Pâte Sablée. Its texture is crispier, more akin to a sugar cookie, and it’s sweeter.
- Pâte Brisée: This is a savory “broken pastry” often made with cold water and butter, using the sablage method. It’s less sweet, sometimes includes a pinch of sugar but can be entirely savory, and has a flakier texture, similar to traditional American pie crusts, making it ideal for quiches and savory tarts.
Pâte Sablée is your go-to pastry for most sweet tarts, particularly those with creamy, fruity, or chocolate fillings. Its tender texture and rich flavor perfectly complement a wide range of desserts. It also works beautifully for creating delicate Mini Tartlet Shells.
Here are some delicious tart recipes where Pâte Sablée shines:
- Chocolate Raspberry Tart
- Strawberry Custard Tart
- Lemon Curd Tart
- Chocolate Ganache Tart
- Mini Meringue Lemon Tarts
Did you know you can also use Pâte Sablée to make cookies? The recipe is very similar to traditional shortbread or French cookies like Sablés Bretons Cookies, or even Almond Shortbreads.
This specific Pâte Sablée recipe relies on eggs for both its unique structure and flavor. The egg acts as a crucial binder, helping the dough come together and contributing to its tender crumb. While there might be egg-free pastry recipes, I have not personally tested this particular Pâte Sablée recipe without eggs, and substituting them could significantly alter the texture and consistency.

Recommended Tools for Perfect Pâte Sablée
Having the right tools can make a significant difference in the ease of preparation and the quality of your finished tart crust. Here are some highly recommended utensils for making shortcrust pastry:
- Perforated Tart Ring or Pan: For a professional-grade, perfectly crisp crust, a perforated tart ring is indispensable. The small holes allow hot air to circulate freely, ensuring even baking and preventing a soggy bottom. They come in various shapes and sizes, ideal for individual tartlets or larger family-sized tarts.
- Rolling Pin with Thickness Rings or Rolling Guides: To achieve a consistently even thickness, which is crucial for uniform baking, use a rolling pin with adjustable thickness rings or separate rolling guides. This eliminates guesswork and ensures your crust bakes evenly.
- Perforated Baking Mat & Tray: To maximize the benefits of a perforated tart ring, bake it on a perforated silicone baking mat placed on a perforated baking tray. This setup further promotes optimal heat flow around the entire crust, leading to superior crispness and a beautiful golden color.
- Food Processor: (Optional, but highly recommended for speed and ease) As discussed, a food processor makes quick work of incorporating the cold butter into the dry ingredients, minimizing handling and keeping the dough cool.
- Pastry Blender: (Optional, for hand method) If you’re mixing by hand, a pastry blender can be very helpful for cutting cold butter into flour efficiently, saving your hands from getting too warm.
Storage Instructions for Pâte Sablée
One of the many advantages of Pâte Sablée is its excellent make-ahead and storage capabilities, both raw and baked. This flexibility makes it a fantastic option for busy bakers.
- Raw Dough (Chilled): You can prepare the dough in advance and keep it wrapped tightly in plastic wrap in the refrigerator for up to 3 days. Once you’ve rolled it out and lined your tart pan, the unbaked shell can also be kept refrigerated, well-covered, for up to 24 hours before baking.
- Baked Shell (Room Temperature): After blind-baking, allow the tart shell to cool completely. Store it at room temperature, loosely covered with plastic wrap or in an airtight container, for up to 24 hours before adding your chosen filling. This helps maintain its crispness.
Freezing Pâte Sablée for Future Use
Pâte Sablée freezes beautifully, allowing you to always have a homemade tart crust on hand. Freezing the dough, either raw or as a lined shell, is a smart way to streamline your baking process.
- Freezing Raw Dough: Form the dough into a disc, wrap it tightly in a layer of plastic wrap, and then a layer of aluminum foil. Label and freeze for up to 3 months. Thaw overnight in the refrigerator before rolling and lining.
- Freezing Lined Tart Shells: This is a highly recommended method for ultimate convenience. Line your tart pan or ring with the dough as described in the instructions. Place the entire pan with the unbaked crust into the freezer until solid (usually a few hours). Once frozen solid, you can carefully remove the crust from the pan (if using a tart ring with a removable bottom) and wrap it thoroughly in plastic wrap, followed by aluminum foil. Store in the freezer for up to 3 months. When ready to use, simply place the frozen crust back into its pan (if removed), dock it, and bake directly from frozen.
- Baking from Frozen: There’s no need to thaw a frozen, lined tart shell completely before baking. Simply add an extra 5-10 minutes to the recommended baking time to allow it to thaw and bake through in the oven. Keep an eye on it to prevent over-browning.
Explore More Delicious Tart Recipes
Once you’ve mastered this versatile Pâte Sablée, the possibilities for creating stunning tarts are endless. Here are some of our favorite tart recipes that would be beautifully complemented by this classic French shortcrust pastry:
- Zesty French Orange Cream Tart
- Elegant Pear Frangipane Tartlets
- Quick & Easy Puff Pastry Apple Tarts (Note: This specific recipe uses puff pastry, but Pâte Sablée could be a delicious alternative base for an apple tart!)
- Decadent Baked Chocolate Tart
- Sweet & Tangy Rhubarb Custard Tart
- Simple French Apple Tart
- Classic Lemon Curd Tart
- Rich French Chocolate Ganache Tart
Made this recipe?
Let us know if you liked it by leaving a comment below, and tag us on Instagram @a.baking.journey with a photo of your creation!
Recipe Card: Pâte Sablée (French Shortcrust Pastry)

Pâte Sablée (French Shortcrust Pastry)
Print Recipe
Ingredients
- 250 gr (1 2/3 cup) Plain / All-Purpose Flour
- 50 gr (1/2 cup) Icing Sugar, or Powdered Sugar
- 1 pinch Table Salt
- 120 gr (1/2 cup) Butter, very cold
- 1 large Egg
Instructions
Making the Pastry in the Food Processor
- Mix the Flour, Icing Sugar and Salt in the bowl of your Food Processor. Add the cold Butter cut into small cubes, then pulse to blend until you get very thin crumbs. You shouldn’t see any large lumps of butter anymore.
- Add the Egg, preferably pre-whisked, and slowly blend until the dough starts to form (see note 1). Remove from the food processor and bring the dough together into a ball.
Making the Pastry By Hands
- Sift the Flour, Icing Sugar and Salt into a large mixing bowl. Stir to combine, then add the cold Butter cut into small cubes. Cut the butter into the dry ingredients using your fingers or a Pastry Blender (see note 2).
- Add the Egg, preferably pre-whisked, and work it with the rest of the ingredients with your fingers, either in the mixing bowl or on your kitchen bench (see note 3). You should get a smooth, slightly soft dough.
Rolling, Resting & Lining the Tart Pan
- Assemble the dough into a large ball and place it between two sheets of baking paper. Roll into a large circle that is 4mm thick (1/8-inch) with a Rolling Pin (see note 4). Place the rolled pastry over a flat tray and leave in the fridge to rest and chill for at least an hour, or up to 24 hours.
- Remove the two layers of baking paper and place the pastry inside your Tart Ring or Pan. Slide the dough along the edges of the pan and try to make sure you get a sharp 90 degree angle between the bottom and the sides of the pan (see note 5).
- Place back in the fridge to rest and chill for at least an hour, or up to 24 hours.
- Dock the Pastry by pricking the bottom with a Fork. Optionally, cover with baking paper and cover with baking weights, rice or beans.
- To par-bake: Preheat your oven on 160 degrees Celsius / 325 degrees Fahrenheit and place the tart crust in the freezer in the meantime. Bake for 15 to 20 minutes. Leave to cool down before adding the filling and placing back in the oven.
To fully blind bake: Preheat your oven on 160 degrees Celsius / 325 degrees Fahrenheit and place the tart crust in the freezer in the meantime. Bake for 35 to 40 minutes, or until golden and dry to the touch. Leave to cool down completely before adding your choice of filling.
- Optional: to seal the pastry, take the crust out of the oven halfway through the baking and brush it with an egg yolk (for a golden finish) or an egg white. Place back in the oven to finish baking.
Would you like to save this recipe?
We’ll email this post to you, so you can come back to it later!
Notes
Instruction Notes:
- At this point, you should see large lumps and crumbs of dough. If you press the lumps in your hands, they should stick together. Try not to over-mix the pastry at this point.
- That is done by rubbing the small cubes of butter into the powders until you get small crumbs and can’t see large lumps of butter or loose powders.
- You can use the “fraisage” technique, which is done by pressing small chunks of dough against a hard surface with the palm of your hands in a linear movement. This mixes the egg, butter and dry ingredient very homogeneously. If too dry to combine, add a little bit of very cold water, 1/2 tablespoon at the time. If too sticky, add a little bit of flour, 1/2 tablespoon at the time.
- The thickness is up to you and can be rolled thicker if preferred. I don’t recommend going thinner that 4mm or the tart might burn in the oven,
- If using a Pastry Ring, do that step oven a lined flat tray. You might need to let the pastry come back to room temperature for a few minutes if it seems to hard to handle or starts to crack. If it becomes very soft and difficult to handle, place back in the fridge for a few minutes.
Nutrition (per serving)
