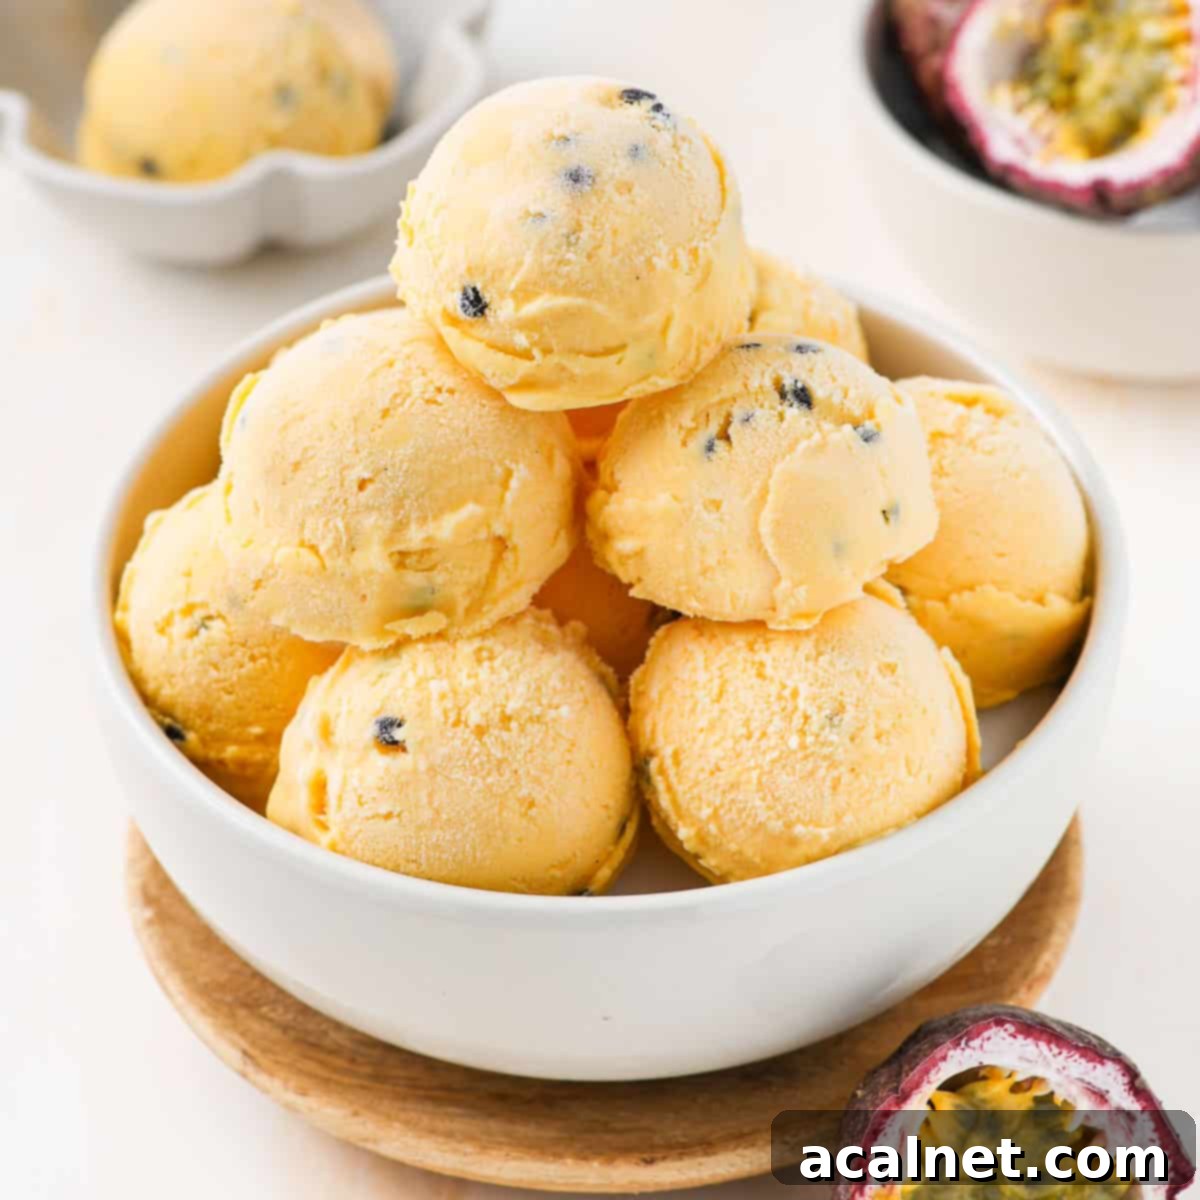
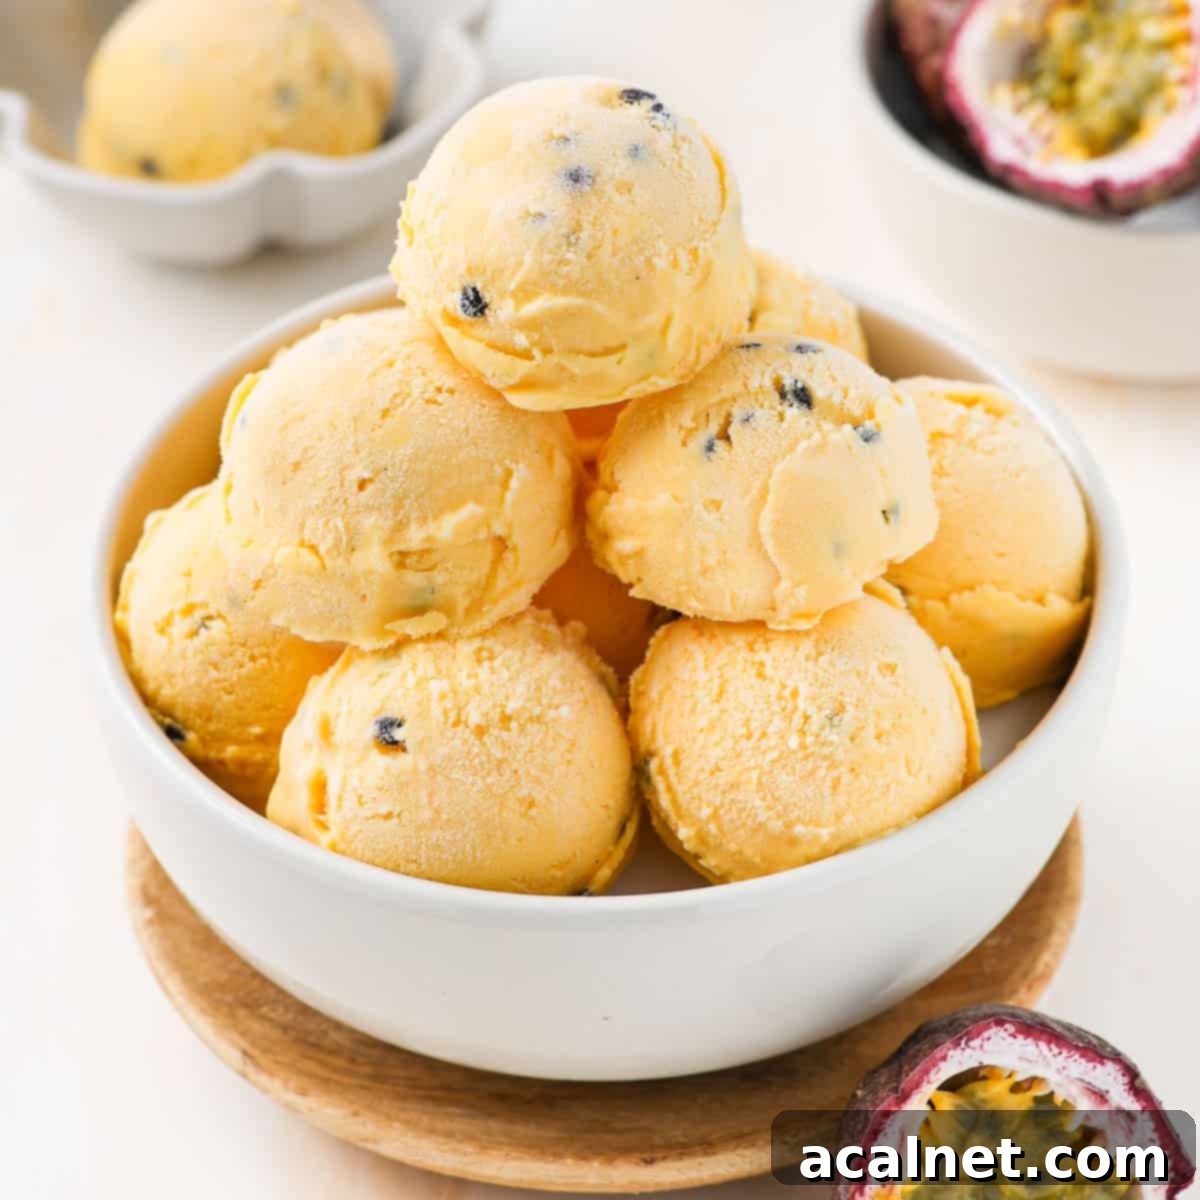
Homemade Passion Fruit Ice Cream: Your Guide to a Tangy, Creamy, Tropical Delight
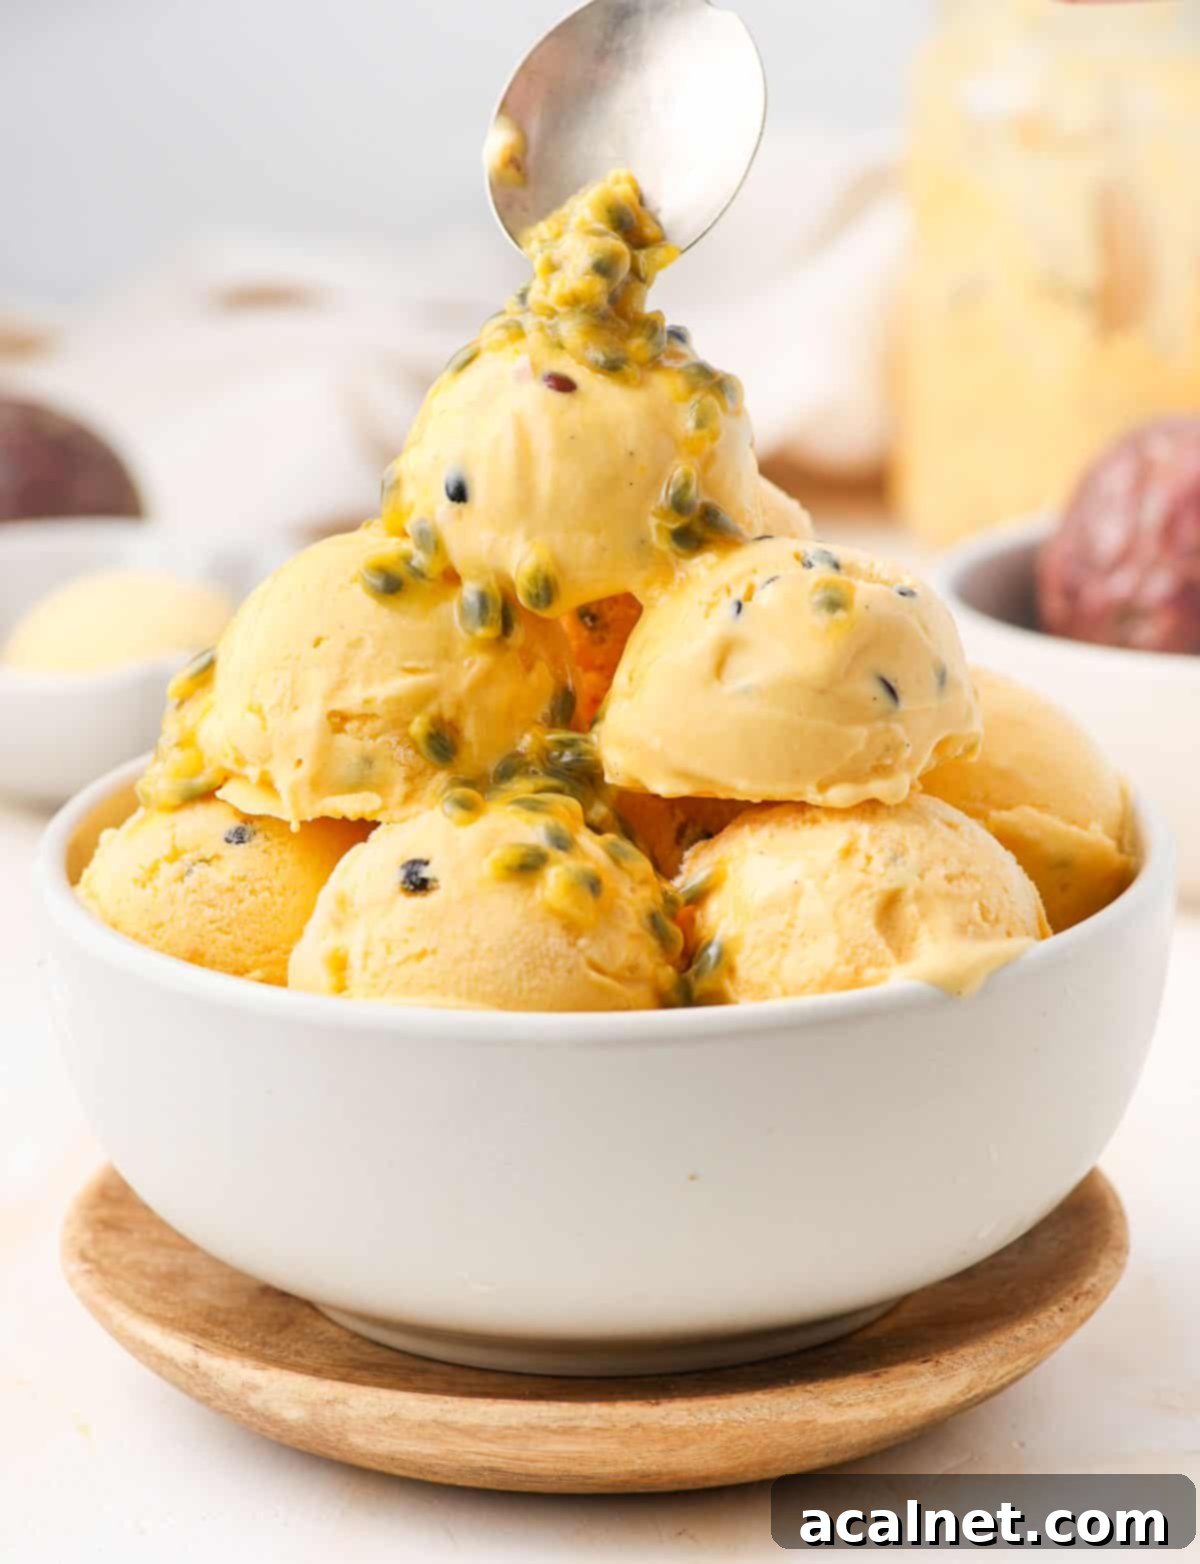
Imagine a scoop of ice cream that’s not just cold, but exhilaratingly fresh, incredibly creamy, and bursting with a perfect balance of tangy and sweet. This easy homemade churned Passion Fruit Ice Cream delivers exactly that! It’s the quintessential frozen dessert, offering a delightful tropical escape that’s absolutely perfect for cooling down on a warm day. Forget store-bought; once you taste this vibrant, homemade version, you’ll never look back!
[feast_advanced_jump_to]
Why You’ll Adore This Homemade Passion Fruit Ice Cream Recipe
This churned passion fruit ice cream recipe is more than just a sweet treat; it’s a perfectly balanced symphony for your palate. We absolutely love it because it masterfully combines an exquisite flavor profile with a truly delightful texture. It starts with an initial burst of sweetness, beautifully complemented by the refreshing tart and tangy notes inherent in fresh passion fruit. Beyond its vibrant taste, the texture is wonderfully creamy, yet it holds a unique and satisfying crunch provided by the tiny, edible passion fruit seeds. This delightful contrast of smooth and crunchy makes every spoonful an experience, elevating it far beyond typical frozen desserts.
At its heart, this recipe merges a classic, rich custard-based vanilla ice cream with the bright, zesty character of fresh passion fruit pulp. The subtle warmth of vanilla provides a comforting foundation, allowing the tropical fruit to truly shine and transport you to sun-drenched beaches. For an even more indulgent and intensely tropical dessert, we highly recommend serving this incredible ice cream with a generous drizzle of homemade Passion Fruit Coulis or a dollop of our luscious Passion Fruit Curd. These pairings amplify the exotic flavors, making it an unforgettable ending to any meal.
More Irresistible Ice Cream Recipes to Try:
- Biscoff Cookie Butter Ice Cream – a wonderfully spiced and crunchy indulgence.
- Mascarpone Ice Cream – for a decadent, velvety smooth Italian-inspired treat.
Essential Ingredients for Perfect Passion Fruit Ice Cream
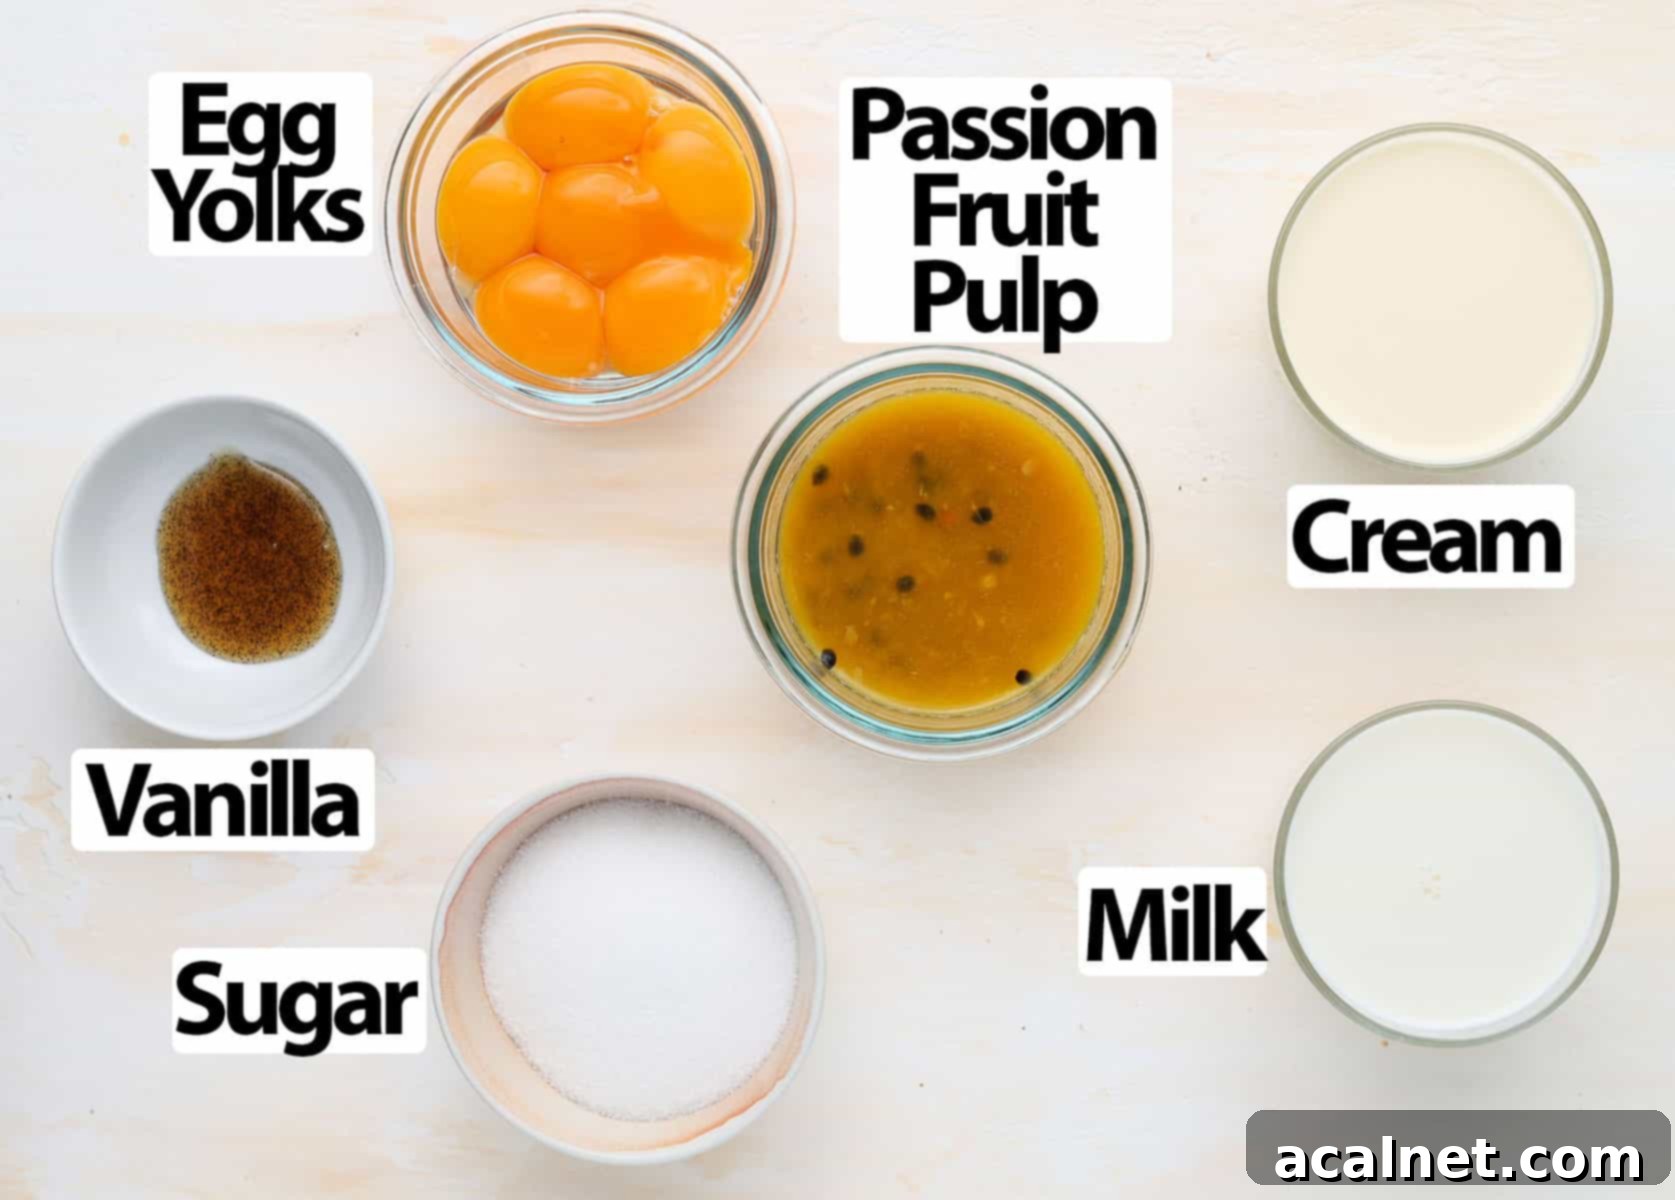
Creating truly exceptional churned ice cream starts with understanding the role each ingredient plays. For this delightful passion fruit ice cream recipe, you’ll need the foundational elements of a classic custard-based ice cream, perfectly complemented by the star of the show: passion fruit.
- Milk + Cream: The cornerstone of a creamy ice cream! For optimal flavor and that luxurious, smooth texture, always opt for **Full Cream / Whole Milk** and **Thickened / Heavy Cream** with a minimum fat content of 30%. The higher fat content is crucial as it helps prevent the formation of large, icy crystals during freezing, resulting in a much silkier, richer mouthfeel. Avoid any low-fat or reduced-fat dairy products, as these will lead to an icier and less satisfying final product.
- Vanilla: While vanilla may seem like a supporting character, its presence truly enhances and harmonizes with the vibrant passion fruit notes. If possible, a fresh **Vanilla Bean** yields the most profound and complex aroma. Simply slice it lengthwise, scrape the aromatic seeds, and add both to the milk mixture to infuse. Alternatively, a good quality **Vanilla Paste** provides excellent flavor and those desirable visible specks. While **Vanilla Extract or Essence** can be used, they offer a less intense and nuanced flavor.
- Egg Yolks: These are the emulsifying heroes of our custard base. Egg yolks contribute significantly to the ice cream’s richness, help create a smooth, stable emulsion, and prevent iciness. Always use yolks from medium-sized eggs and ensure they are at **room temperature**. This allows them to blend more smoothly with the sugar and hot liquids, reducing the risk of scrambling. Don’t discard the leftover egg whites! They’re perfect for baking other delicious treats like delicate Financiers or fluffy meringues.
- Sugar: We recommend using **Caster Sugar / Fine White Granulated Sugar** because its fine crystals dissolve quickly and evenly into the custard, ensuring a silky-smooth texture without any graininess. Beyond sweetness, sugar plays a critical role in ice cream making by lowering the freezing point of the mixture, which is essential for achieving a scoopable consistency rather than a rock-hard block. We have not tested this specific recipe with natural sweetener substitutes, so we cannot guarantee the same textural or flavor results.
- Passion Fruit Pulp: This is the star ingredient that gives our ice cream its signature tangy-sweet tropical flavor! You’ll need the entire pulp, including the vibrant flesh, the tangy juices, and the crunchy edible seeds scraped directly from fresh passion fruit. The seeds add a fantastic textural contrast that many find delightful. If fresh passion fruit is unavailable or out of season, high-quality **Frozen Passion Fruit Pulp** (or puree) works perfectly. Just remember to thaw it completely before use.
When selecting frozen passion fruit pulp, sometimes labeled as passion fruit puree, it’s crucial to check the ingredient list. Ensure it states **100% pure passion fruit juice/pulp**, with no added sugars, syrups, or other preservatives, to maintain the intended balance of flavors in your homemade ice cream.
Tropical Flavor Substitutions & Exciting Variations
Want to lean even further into the tropical vibe? You can effortlessly substitute the dairy Milk and Cream with **Coconut Milk and Coconut Cream** (always use full-fat versions, not light!) for a wonderfully dairy-free and intensely coconut-passion fruit ice cream. This substitution pairs beautifully with the passion fruit’s natural acidity. Beyond this, consider blending in a small amount of other tropical fruit purees, such as mango or pineapple, for a multi-layered fruit experience. When experimenting with other fruits, you might need to adjust the sugar content slightly to maintain the perfect sweet-tangy balance.
Step-by-Step: How to Make Dreamy Passion Fruit Ice Cream
Crafting the Velvety Passion Fruit Custard Base
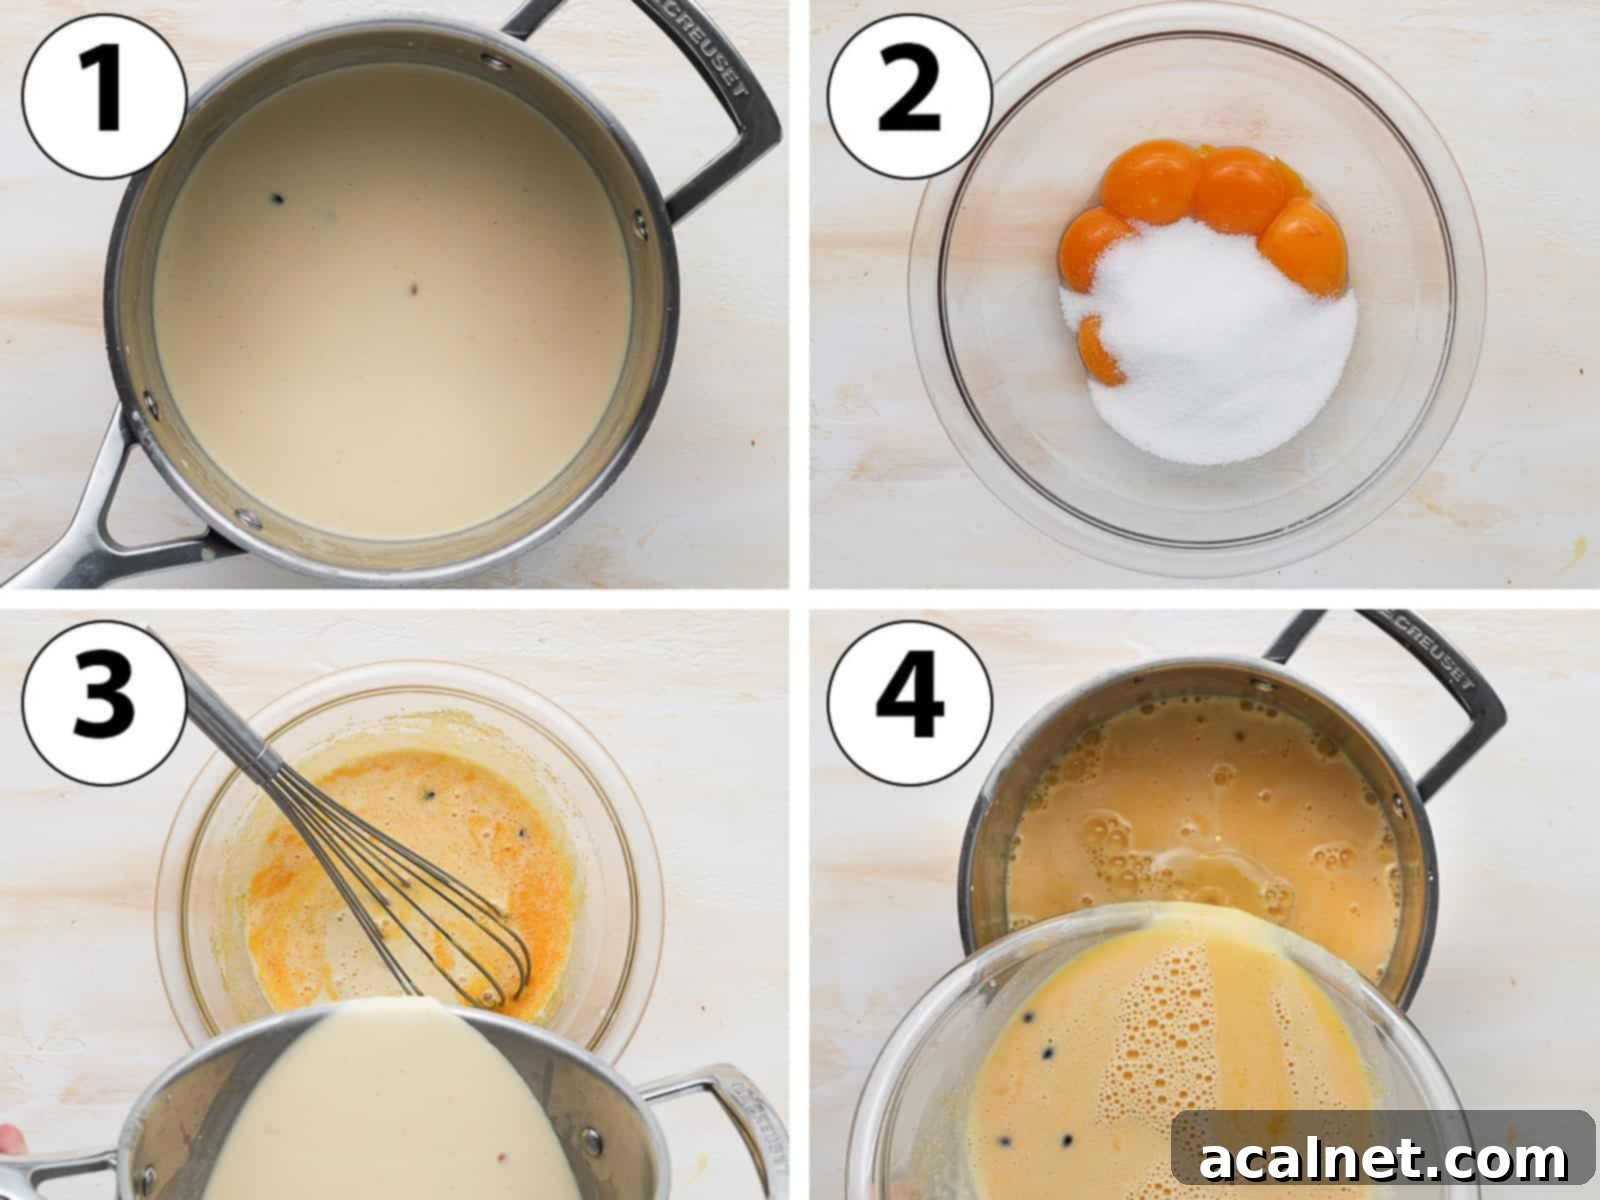
The initial and perhaps most crucial phase of this recipe is the creation of the silky smooth egg yolk custard base, commonly known as a pouring custard or “crème anglaise.” This carefully prepared base is what grants churned ice cream its characteristic richness and exquisite texture.
Essential Pre-Preparation: If you are using an ice cream maker with a freezer bowl (one that requires pre-freezing), it is paramount to place the bowl in your freezer for at least 12 hours – ideally 24 hours – before you plan to begin churning. Compressor ice cream makers, which freeze as they churn, do not require this step. Always consult the specific manufacturing instructions for your particular machine to ensure optimal performance.
- Photo 1: Infuse and Heat the Liquids Begin by combining the Full Cream Milk, Heavy Cream, vibrant Passion Fruit Pulp, and your choice of Vanilla (bean, paste, or extract) in a medium-sized saucepan. Give the mixture a thorough whisk to ensure all ingredients are well incorporated. Place the saucepan on your stove over low to medium-low heat. Gently heat the mixture until it just begins to simmer, indicated by small bubbles forming around the edges of the pan. Avoid bringing it to a rapid boil. If you’re using a fresh Vanilla Bean, carefully slice it in half lengthwise, scrape out the fragrant seeds, and add both the seeds and the spent pod to the saucepan. Once it reaches a simmer, remove the saucepan from the heat, cover it with a lid, and allow the liquid to infuse for 10 to 15 minutes. This step extracts maximum vanilla flavor. Remember to remove the vanilla pod before moving on.
- Photo 2: Prepare the Egg and Sugar Mixture While your milk and cream mixture is heating and infusing, turn your attention to the egg yolks. Place the room-temperature Egg Yolks and Caster Sugar into a large, heat-proof bowl. Whisk these ingredients together vigorously until the mixture transforms into a pale yellow, thick, and creamy consistency. This process not only combines the ingredients but also incorporates air, preparing the yolks for the tempering process.
- Photo 3: Temper the Egg Yolks (Crucial Step!) This step is critical for preventing your egg yolks from scrambling when introduced to the hot liquid. Carefully and slowly pour a thin stream of the hot milk and cream mixture over the egg yolk and sugar mixture in the bowl. As you pour, continuously whisk the egg mixture. This gradual addition gently raises the temperature of the egg yolks, allowing them to acclimate to the heat without cooking prematurely. Continue whisking until the entire mixture is smooth and thoroughly combined.
- Photo 4: Thicken the Custard Now, transfer all the combined custard mixture back into the saucepan. Return it to the stove over low to medium heat. Cook the custard for approximately 5 to 10 minutes, stirring continuously with a whisk or wooden spoon. The goal is for the custard to visibly begin to thicken. It should lightly coat the back of your spoon, but not become overly thick or clumpy.
Mastering the Cooking of the Ice Cream Mixture
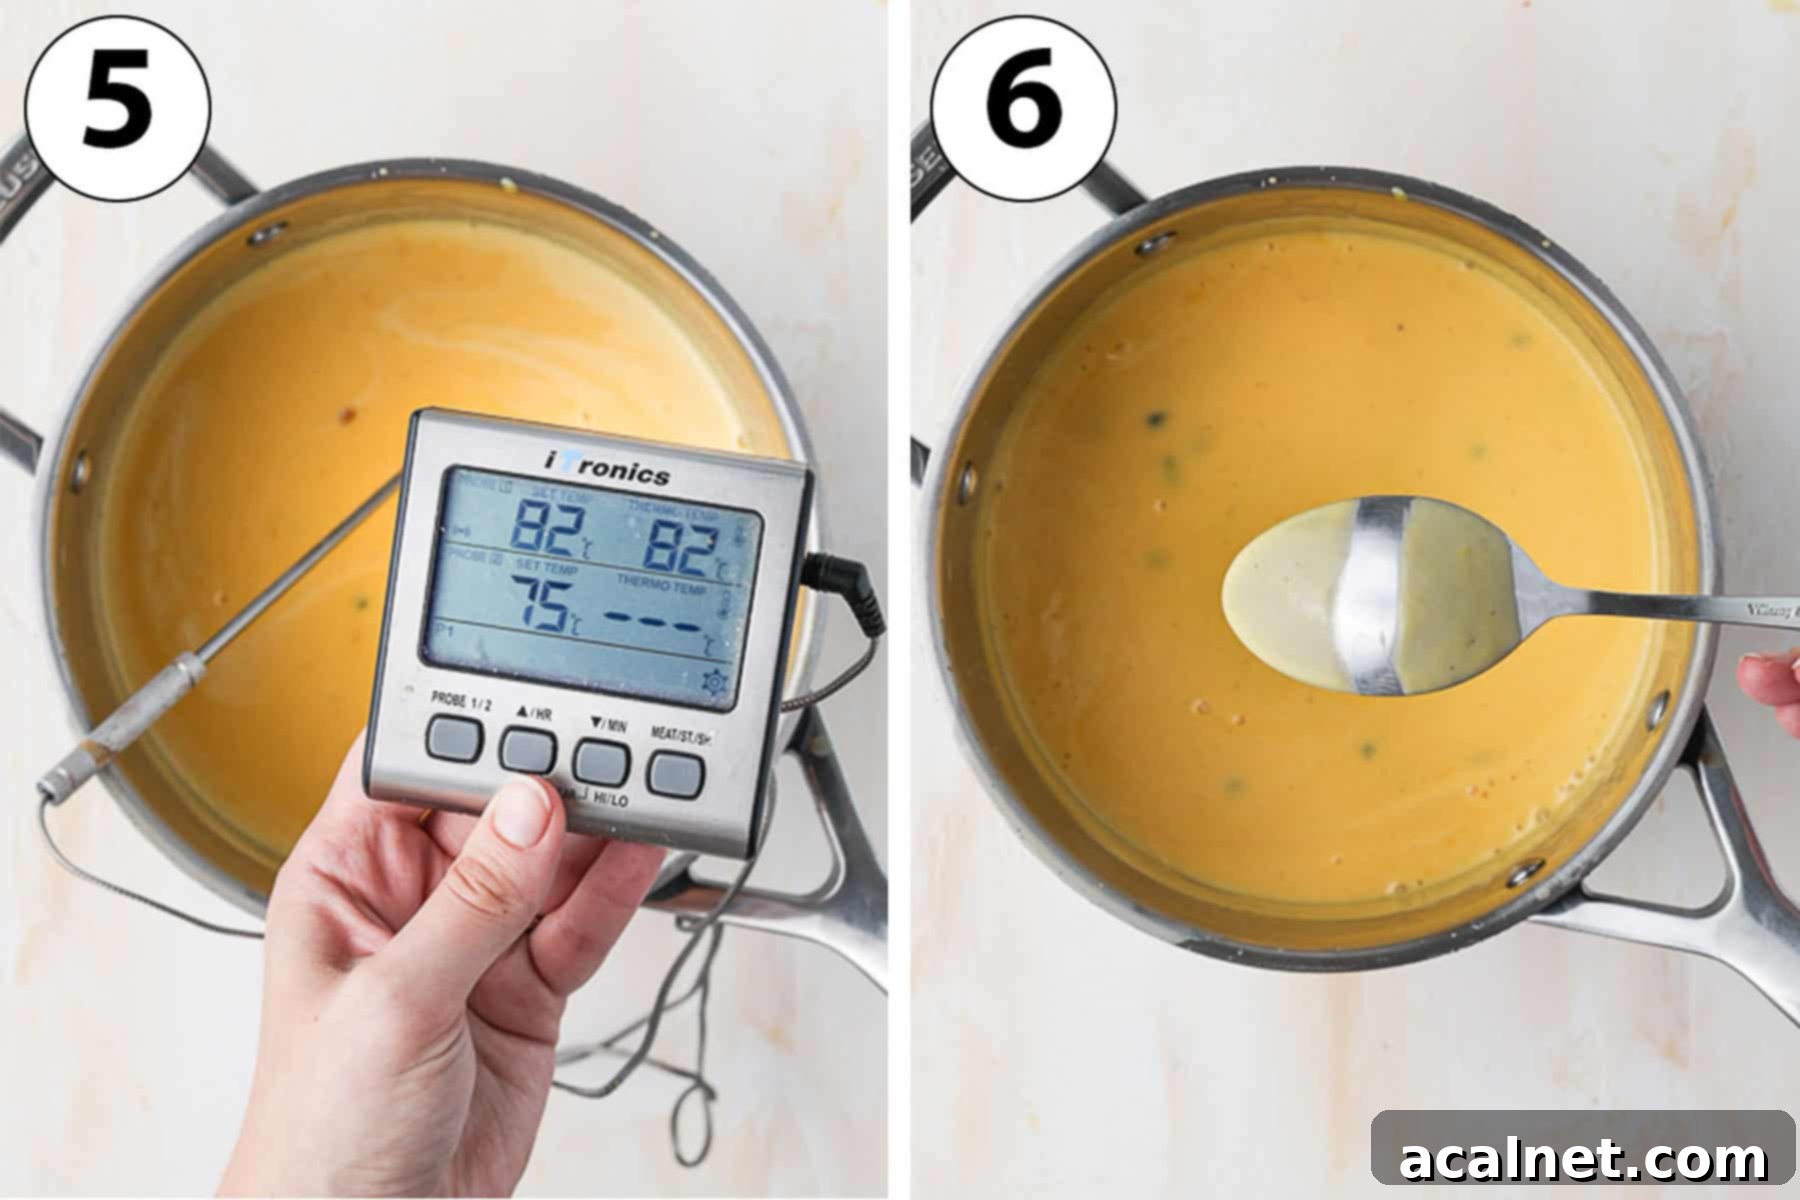
It’s incredibly important to cook your passion fruit custard base slowly and to stir or whisk it continuously. This diligent attention prevents the eggs from overcooking and coagulating into undesirable scrambled bits. Patience and constant stirring are your best tools for achieving a perfectly smooth and luscious custard.
There are two highly reliable methods to determine when your custard is perfectly cooked and ready for the crucial chilling phase:
- Photo 5: Precision with a Kitchen Thermometer The most accurate way to check for doneness is by using a reliable kitchen thermometer. The custard mixture is perfectly cooked when it consistently reaches a temperature of **82 degrees Celsius (180 degrees Fahrenheit)**. It is essential not to let the custard come to a vigorous boil or even a strong simmer, as this will almost certainly overcook the delicate egg yolks and ruin the texture.
- Photo 6: The “Nappe” Test (Spoon Test) If you don’t have a thermometer, the traditional “nappe” test is an excellent visual and tactile indicator. Dip the back of a clean spoon (a wooden spoon is ideal) into the custard mixture. Carefully draw a clear line through the custard on the back of the spoon with your finger (be cautious, as the custard will be hot!). Then, slightly tilt the spoon downwards. If the custard is still very thin and liquid and immediately runs over the line, it requires more cooking time. If the line remains distinct and the custard appears lightly thick, coating the spoon without dripping excessively, then it’s ready.
Troubleshooting Tip: Should you accidentally overcook the custard, it will typically appear lumpy or curdled. Don’t lose hope entirely! You can try to salvage it by immediately pouring the mixture through a thin mesh sieve to remove any cooked egg bits, which will help improve its texture. Furthermore, if you desire a perfectly smooth ice cream without any textural contrast from the passion fruit seeds, you can deliberately pour the custard through a sieve at this stage to remove them.
The Crucial Steps: Chilling & Churning for Perfect Consistency
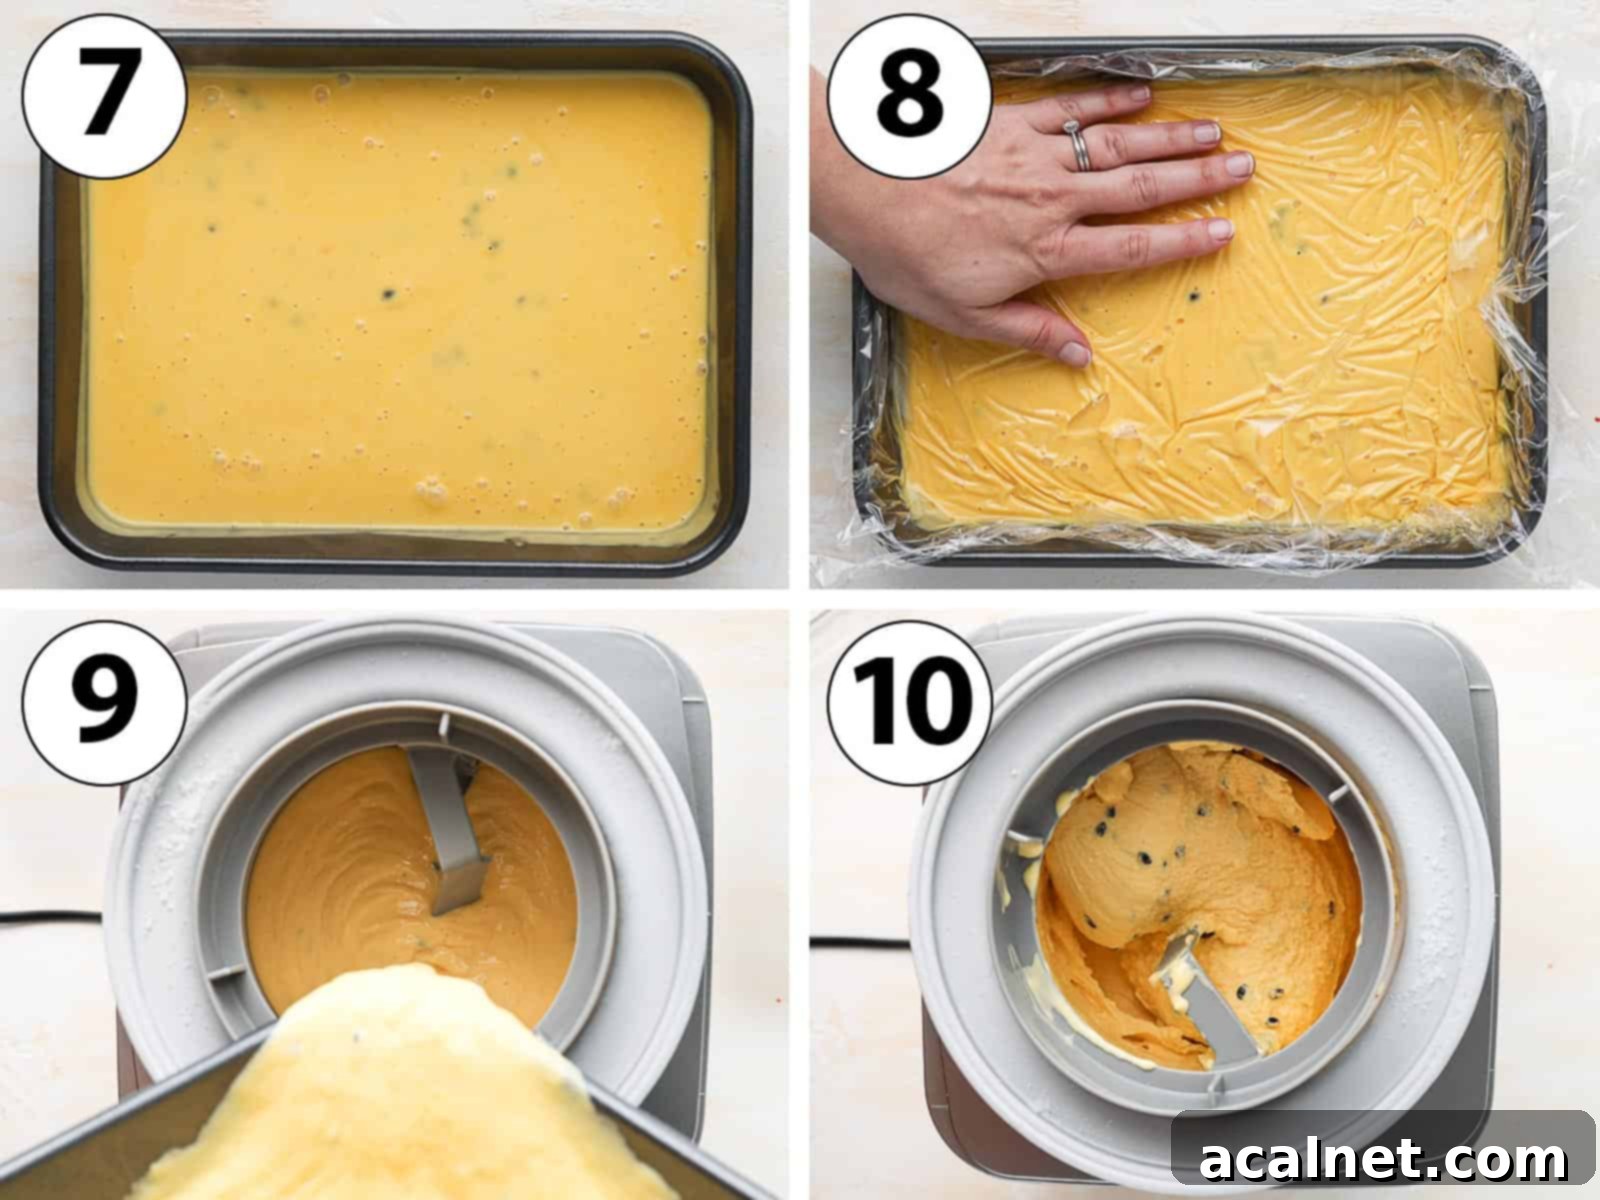
Once your beautifully cooked custard base is ready, the next phases—chilling and churning—are paramount for developing the incredibly smooth, scoopable texture characteristic of homemade ice cream. These steps ensure minimal ice crystal formation and optimal creaminess.
- Photo 7: Prompt and Even Cooling Immediately after cooking, transfer the warm custard mixture into a clean bowl or container. We highly recommend using a shallow vessel, such as a brownie pan or a large loaf pan. This increases the surface area, allowing the mixture to cool down much more rapidly and evenly. Quick cooling is not only beneficial for food safety but also helps to prevent bacterial growth and prepares the custard more efficiently for chilling.
- Photo 8: Prevent a “Skin” To avoid the formation of an undesirable “skin” on the surface of your cooling custard (which can lead to lumps and an uneven texture), cover the custard with plastic wrap. Ensure the plastic wrap is pressed directly onto the surface of the mixture, creating an airtight barrier.
- Place the covered custard in the refrigerator to chill thoroughly for at least 3 hours. For truly superior results and the creamiest possible texture, chilling it **overnight** is highly recommended. The colder the mixture is before it enters the ice cream maker, the smaller the ice crystals will be during churning, resulting in a significantly smoother and more luxurious ice cream. For an extra boost just before churning, you can place the chilled custard in the freezer for a quick 30-minute chill.
- Photo 9: Prepare for Churning Once your custard is perfectly chilled, retrieve the pre-frozen bowl of your ice cream machine from the freezer and securely fit it into your ice cream maker according to your manufacturer’s instructions. Now, carefully pour the wonderfully cool ice cream custard mixture into the churner bowl and switch the machine on.
- Photo 10: Churning to Perfection Allow the ice cream to churn for approximately 15 to 20 minutes. The exact churning time can vary based on your specific machine model and the initial temperature of your custard base, so it’s best to monitor its progress. You are aiming for a consistency similar to thick whipped cream or soft-serve ice cream. During the churning process, it’s normal to observe the ice cream going through different phases, and some parts might appear thicker than others. This is a natural part of the freezing process, where ice crystals are actively forming, and the machine is constantly working to incorporate air and keep those crystals exceptionally small.
- Once your ice cream has reached this ideal soft, thickened consistency, promptly transfer it into a clean, freezer-friendly container. For a firm, scoopable ice cream that holds its shape beautifully, freeze it for at least 3 hours before you plan to serve it. This final freezing period allows the ice cream to set completely.
Passion Fruit Ice Cream: Your Questions Answered
Absolutely! Frozen passion fruit pulp is a fantastic and convenient alternative when fresh passion fruit is not readily available or out of season. Simply ensure you thaw it completely before incorporating it into your ice cream base. When it comes to canned passion fruit, you can use it, but there’s a crucial caveat: you must ensure the can contains only the pure pulp or puree. Many canned passion fruit products are preserved in sugary syrups, which would significantly alter the sweetness level and overall flavor balance of our homemade ice cream. Always meticulously check the ingredient list to confirm you’re getting 100% pure fruit.
Yes, this recipe is adaptable for those following a dairy-free diet! To achieve a similar creamy and rich texture, you can simply substitute the dairy milk and cream with your preferred plant-based milk and cream alternatives. For the best results, it’s essential to use **full-fat** plant-based options, such as full-fat coconut milk and coconut cream, or a rich oat or cashew milk blend. Reduced-fat or “light” versions of plant milks and creams will yield a less creamy and potentially icier ice cream. Keep in mind that the inherent flavor of your chosen plant-based milk and cream may subtly influence the overall taste profile of the ice cream.
No, unfortunately, this specific recipe is meticulously designed for churning in an ice cream machine. The churning process is fundamental for two main reasons: it continuously incorporates air into the mixture (creating that light, airy texture) and, more importantly, it breaks up ice crystals as they form, resulting in the incredibly smooth, creamy consistency characteristic of this custard-based ice cream. Without an ice cream maker, the mixture would likely freeze into a dense, solid, and unpleasantly icy block. If you don’t own an ice cream machine, we recommend seeking out a dedicated “no-churn passion fruit ice cream” recipe, which typically uses whipped cream or sweetened condensed milk to achieve a similar, softer texture without the need for special equipment.
This vibrant passion fruit ice cream is absolutely divine on its own, offering a refreshing and intensely tropical flavor experience. For an extra touch of freshness and visual appeal, sprinkle some additional fresh passion fruit pulp directly over your scoops. It also pairs wonderfully with a variety of fruity toppings. Consider a drizzle of homemade Mango Coulis for a complementary tropical note, or enhance the passion fruit flavor even further with an Easy Passion Fruit Coulis. For a delightful contrast, a vibrant Raspberry Compote adds a lovely berry tang, or elevate it to gourmet levels with a rich spoonful of Passion Fruit Curd! Beyond toppings, this ice cream makes a fantastic accompaniment to other desserts, such as a slice of our Passion Fruit Tart, or as a light and refreshing counterpoint to richer, heavier chocolate creations.
Top Tips for Homemade Passion Fruit Ice Cream Success
Achieving perfectly creamy, flavorful homemade ice cream is straightforward when you follow these expert tips, ensuring a delightful treat every time:
- Taste and Adjust Sweetness: The natural sweetness and tartness of passion fruits can vary considerably based on their ripeness and where they come from. It’s highly recommended to taste your custard mixture once it has been cooked and cooled slightly. If you find the flavor too tart for your preference, you can gently whisk in a little more caster sugar (start with one tablespoon at a time) until you reach your desired balance. Conversely, a tiny squeeze of fresh lemon or lime juice can sometimes help to balance an overly sweet custard, although aiming for the right balance from the outset is ideal.
- Ensure Proper Custard Doneness: The consistency of your custard base is absolutely critical to the final texture of your ice cream. To confidently confirm it’s properly cooked, you have two reliable methods: utilize a dependable kitchen thermometer (the custard should consistently reach 82°C or 180°F) or perform the classic “nappe” test. This involves coating the back of a spoon with the custard; it should be thick enough to cling to the spoon and a clear line should remain when you run your finger through it, without the custard dripping back. This ensures the egg yolks are safely cooked and the base has achieved its ideal thickness.
- For a Super Smooth Texture, Strain: While the passion fruit seeds add a delightful crunch for many, if you prefer your homemade passion fruit ice cream to be utterly smooth and free of any textural elements, simply pour the prepared custard through a fine-mesh sieve. Do this before you begin the chilling process to effectively remove all the passion fruit seeds. This small step guarantees a purely creamy and velvety mouthfeel.
- Chill Thoroughly Before Churning: This is arguably one of the most vital steps for achieving ultra-creamy, perfectly scoopable ice cream. It is paramount that your custard mixture is exceptionally cold before it enters the ice cream machine. For optimal results, we highly recommend refrigerating the custard overnight. To give it an extra boost just before churning, place the bowl of thoroughly chilled custard in the freezer for about 30 minutes. The colder your base mixture is, the smaller the ice crystals will be during the churning process, resulting in a significantly smoother, richer, and more luxurious ice cream.
Storing Your Homemade Passion Fruit Ice Cream
This exquisite passion fruit ice cream is undeniably at its peak when enjoyed fresh, ideally within a few days (up to a week) of being made. During this period, its creamy texture and vibrant flavors are most pronounced. While it will certainly remain safe to eat for a longer duration in the freezer—typically several weeks to a couple of months—it’s important to understand that its delightful consistency will gradually change over time. The longer homemade ice cream is stored in the freezer, the more susceptible it becomes to the formation of larger ice crystals, which can result in a slightly rougher, icier, and less creamy texture. To best preserve its quality, always store it in an airtight container, and for an extra layer of protection against freezer burn and ice crystals, press a sheet of plastic wrap directly onto the surface of the ice cream before sealing the container. This minimizes air exposure and helps maintain its luscious texture for as long as possible.
Explore More Delicious Passion Fruit Recipes
If you’re as enchanted by the unique, tropical tang of passion fruit as we are, you’ll undoubtedly fall in love with these other fantastic recipes that celebrate this incredible fruit:
- Passion Fruit Cheesecake – a stunningly creamy and tangy dessert that’s consistently a crowd-pleaser and perfect for special occasions.
- 3 Ingredients Passion Fruit Coulis – a vibrant, simple sauce that makes the perfect topping for countless desserts, from ice cream to panna cotta.
- Passion Fruit Curd – a rich, zesty, and versatile spread that’s excellent in tarts, as a cake filling, or simply spread on toast.
- Raspberry Passion Fruit Cheesecake – a delightful fusion of sweet, juicy raspberries and tropical passion fruit, creating an irresistible dessert.
Made this recipe?
We’d love to hear your thoughts! Please let us know if you liked it by leaving a comment below, and don’t forget to tag us on Instagram @a.baking.journey with a photo of your delicious creation!
Recipe Card: Homemade Passion Fruit Ice Cream

Passion Fruit Ice Cream
Print Recipe
Equipment
- 1 Ice Cream Maker (Ensure the bowl is frozen for 12-24 hours prior if not a compressor model)
Ingredients
- 180 ml (3/4 cup) Full Cream / Whole Milk
- 180 ml (3/4 cup) Heavy / Thickened Cream
- 120 gr (1/2 cup) Passion Fruit Pulp, fresh or thawed frozen, 100% pure
- 1 1/2 teaspoon Vanilla Paste, or seeds from 1 vanilla bean
- 6 Egg Yolks, medium size, at room temperature
- 80 gr (1/3 cup) Caster Sugar, (fine white granulated sugar)
Instructions
- Prepare your Ice Cream Maker: Place the bowl of your ice cream maker in the freezer for 12 to 24 hours before you plan to churn the ice cream. This step is only required for freezer-bowl machines; if you have a compressor ice cream maker, you can skip this. Always follow your machine’s specific instructions.
- Simmer Liquids: In a medium saucepan, combine the Full Cream Milk, Heavy Cream, Passion Fruit Pulp, and Vanilla. Whisk them together until well combined. Place the saucepan over low to medium-low heat and gently bring the mixture to a simmer (small bubbles forming around the edges). Do not boil. Remove from heat. If using a vanilla bean, infuse it for 10-15 minutes, then remove the pod.
- Whisk Eggs & Sugar: In a separate large, heat-proof bowl, combine the room-temperature Egg Yolks and Caster Sugar. Whisk vigorously until the mixture is pale yellow, smooth, and slightly thickened.
- Temper the Eggs: Slowly and carefully, pour the hot milk mixture into the egg yolk mixture while continuously whisking. This gradual addition prevents the eggs from scrambling. Once combined and smooth, pour all the mixture back into the saucepan.
- Cook Custard: Cook the custard mixture on low to medium-low heat for 5 to 10 minutes, stirring constantly. Continue cooking until it begins to slightly thicken and coats the back of a spoon (see note 1 for details on checking for doneness). If you prefer a smooth ice cream without seeds, pour the custard through a fine-mesh sieve at this point.
- Chill Thoroughly: Transfer the cooked custard into a clean bowl or a shallow pan. Cover the surface directly with plastic wrap to prevent a skin from forming. Place it in the fridge to chill for at least 3 hours, or preferably overnight, until it is very cold. For an extra cold boost, put it in the freezer for 30 minutes just before churning.
- Churn the Ice Cream: Take the frozen bowl from your ice cream machine and fit it into the maker. Pour the thoroughly chilled passion fruit custard mixture into the bowl and turn on the machine. Churn for 15 to 20 minutes, or until the ice cream reaches the consistency of thick whipped cream or soft-serve (see note 2).
- Freeze to Firm: Transfer the churned, soft ice cream into a clean, freezer-friendly container. Cover it tightly and freeze for at least 3 hours (or until firm) before serving your delicious homemade passion fruit ice cream.
Would you like to save this recipe?
We’ll email this post to you, so you can come back to it later!
Notes
- There are two ways to accurately check if your custard is cooked to perfection:
(1) Using a Kitchen Thermometer: The most precise method is to use a kitchen thermometer. The custard mixture is perfectly cooked when it consistently reaches 82 degrees Celsius (180 degrees Fahrenheit). Ensure it doesn’t boil.
(2) The “Nappe” or Spoon Test: Dip the back of a spoon into the custard. Carefully draw a clear line through the custard with your finger (it will be hot!). Tip the spoon down. If the custard is still thin and runs over the line, it requires more cooking. If the line remains distinct and the custard lightly but visibly coats the spoon, it’s ready. - The exact churning time for your ice cream can vary depending on several factors, including the precise temperature of your custard, how well your ice cream machine’s bowl was frozen, and the specific model of ice cream maker you are using. It’s completely normal for the ice cream to go through different phases during churning, and you might notice some sections appearing thicker than others. This simply indicates the natural process of ice crystals starting to form and air being incorporated, both essential for that creamy texture!
Nutrition (per serving)
Passion Fruit Ice Cream Story
