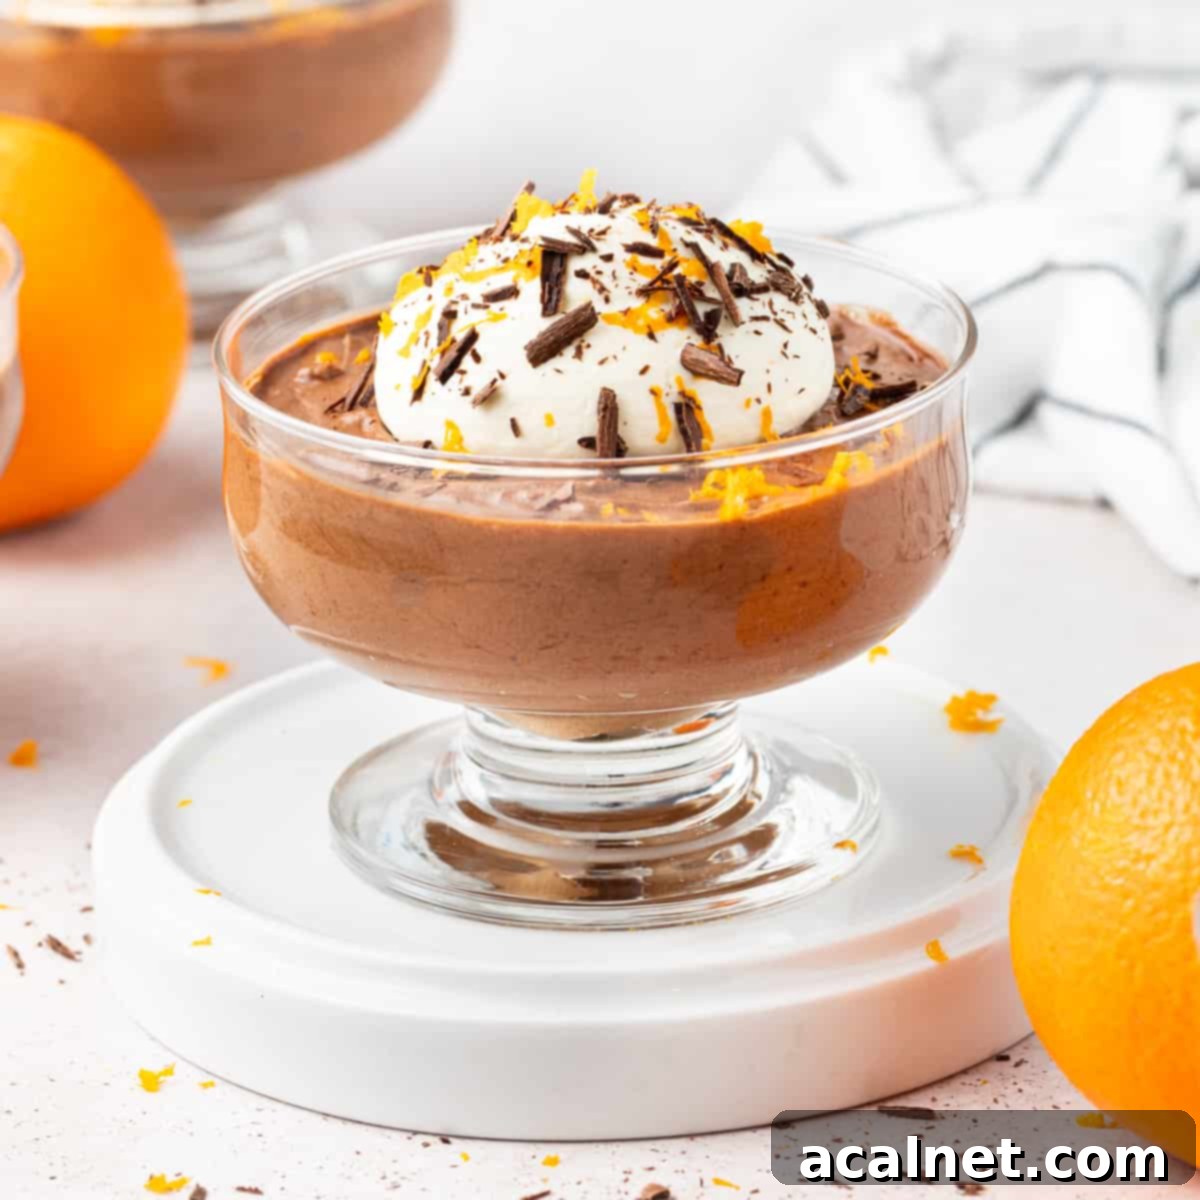
Decadent Chocolate Orange Mousse Cups: The Ultimate Light & Zesty French Dessert Recipe
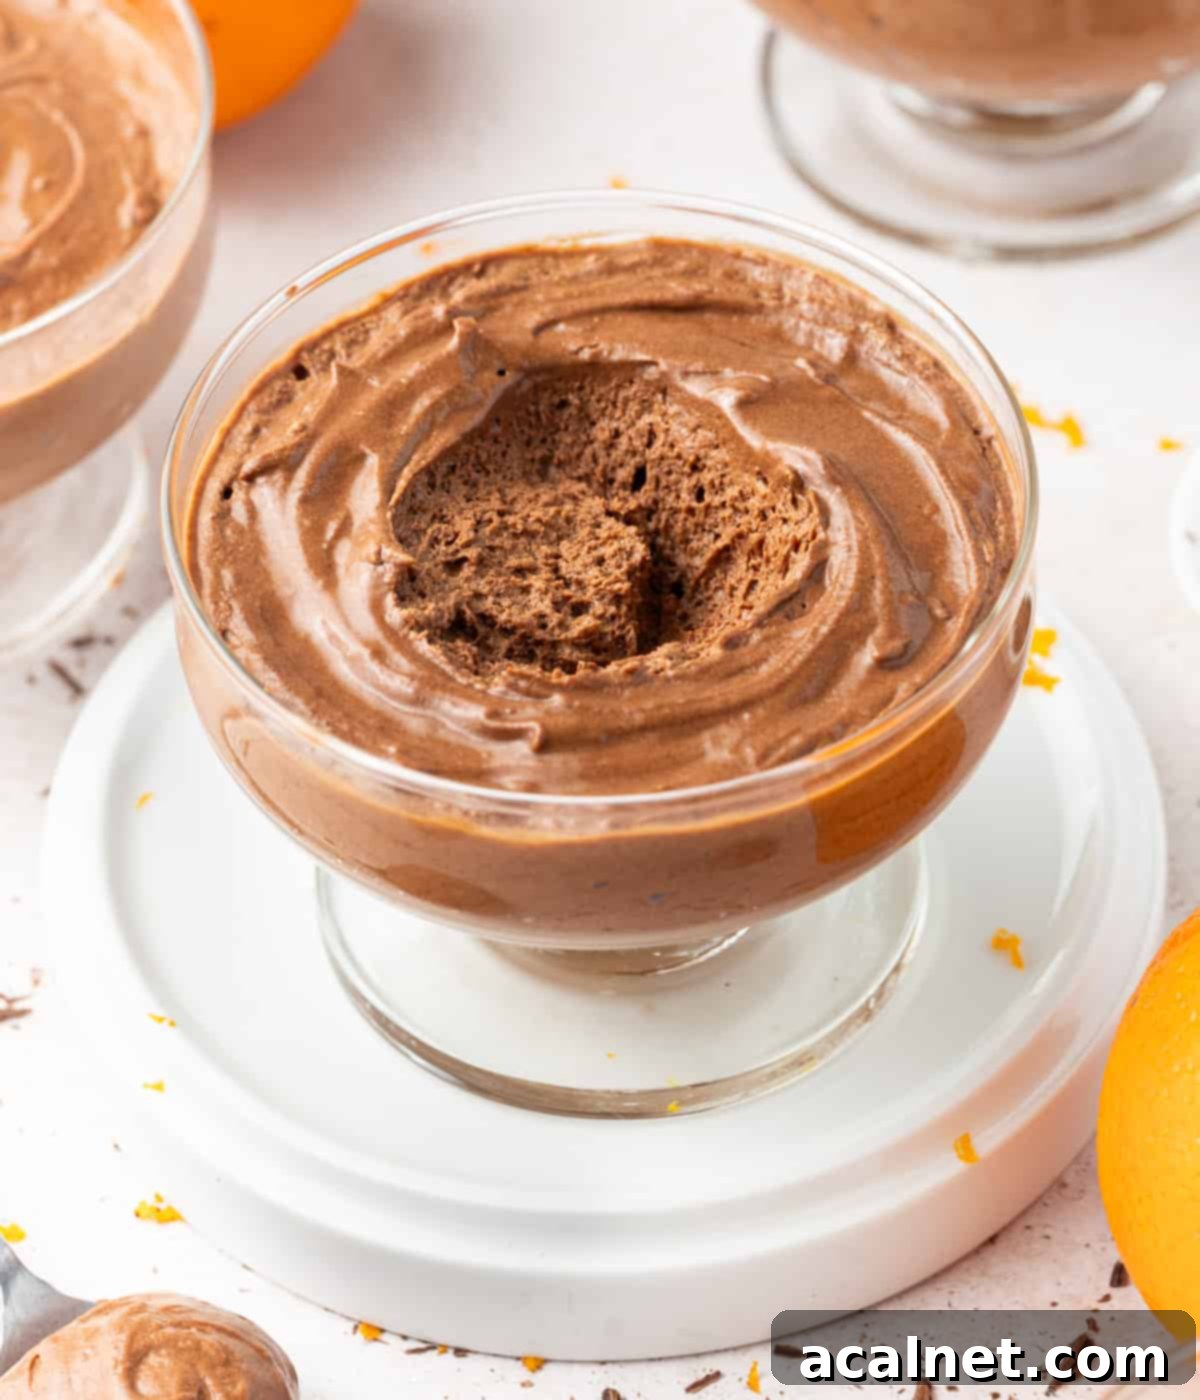
Prepare to tantalize your taste buds with these exquisite Chocolate Orange Mousse Cups. This classic French dessert masterfully combines the intense, rich flavor of dark chocolate with the bright, refreshing zest of fresh oranges. Each spoonful offers a delightfully light and airy texture that simply melts in your mouth, leaving a harmonious balance of deep cocoa notes and vibrant citrus. Perfect for elegant dinner parties, special celebrations, or simply when you crave a sophisticated treat, this mousse is not only incredibly delicious but also a fantastic make-ahead option, allowing you to focus on your guests while a stunning dessert chills to perfection in the refrigerator.
Why You’ll Adore This Chocolate Orange Mousse Recipe
If the enchanting flavour combination of rich dark chocolate and vibrant orange holds a special place in your heart, then this recipe is an absolute must-try! Our French Chocolate Orange Mousse is a truly delightful dessert that encapsulates the best of both worlds. It brings together the luscious, airy texture of a traditional chocolate mousse with the invigorating zest and subtle sweetness of fresh oranges.
What makes this recipe truly special is its adherence to the classic French method, utilizing only five core ingredients to achieve its signature light and fluffy consistency. By folding in meticulously whipped egg whites, we create those iconic tiny air bubbles that define a perfect mousse, resulting in a dessert that feels luxurious yet surprisingly delicate. It’s a testament to the power of simple, high-quality ingredients transformed into something extraordinary. This recipe promises not just a dessert, but an experience – a journey through contrasting yet complementary flavours and textures that will impress at any gathering.
Explore more irresistible chocolate and orange dessert recipes:
- Decadent Chocolate Orange Cheesecake
- Zesty Orange Brownies
- Elegant Chocolate Orange Tartlets
Understanding the Art of Mousse: A Culinary Delight
The term “mousse” hails from the French word for “foam,” a perfect descriptor for this culinary preparation renowned for its exceptionally airy and light texture. Whether sweet or savoury, a mousse is characterized by its delicate, cloud-like consistency, achieved through the careful incorporation of a whipped element.
At its heart, the art of mousse-making lies in creating a stable foam. This foam is typically generated from either whipped cream or whipped egg whites, which are then gently folded into a flavourful base. The tiny air bubbles introduced during the whipping process are what give mousse its characteristic lightness and melt-in-your-mouth quality. There are several types of mousse: French mousse, which often relies on whipped egg whites for its lift; Italian mousse, which may use an Italian meringue (egg whites whipped with hot sugar syrup); and Bavarian cream, a custard-based mousse stabilized with gelatin. This particular recipe follows the French tradition, harnessing the power of perfectly whipped egg whites for that authentic, light-as-air feel. If you’re eager to try a citrusy variant, be sure to check out my delightful Orange Mousse Cups!
Are you a devoted fan of mousse desserts?
Discover more inspiration with my comprehensive 15+ Delicious Mousse Recipes round-up!
Essential Ingredients for Your Perfect Chocolate Orange Mousse
Crafting this exquisite chocolate orange mousse requires just a handful of quality ingredients. Each component plays a vital role in achieving the harmonious balance of flavor and the signature light texture. Here’s a closer look at what you’ll need and why each element is important:
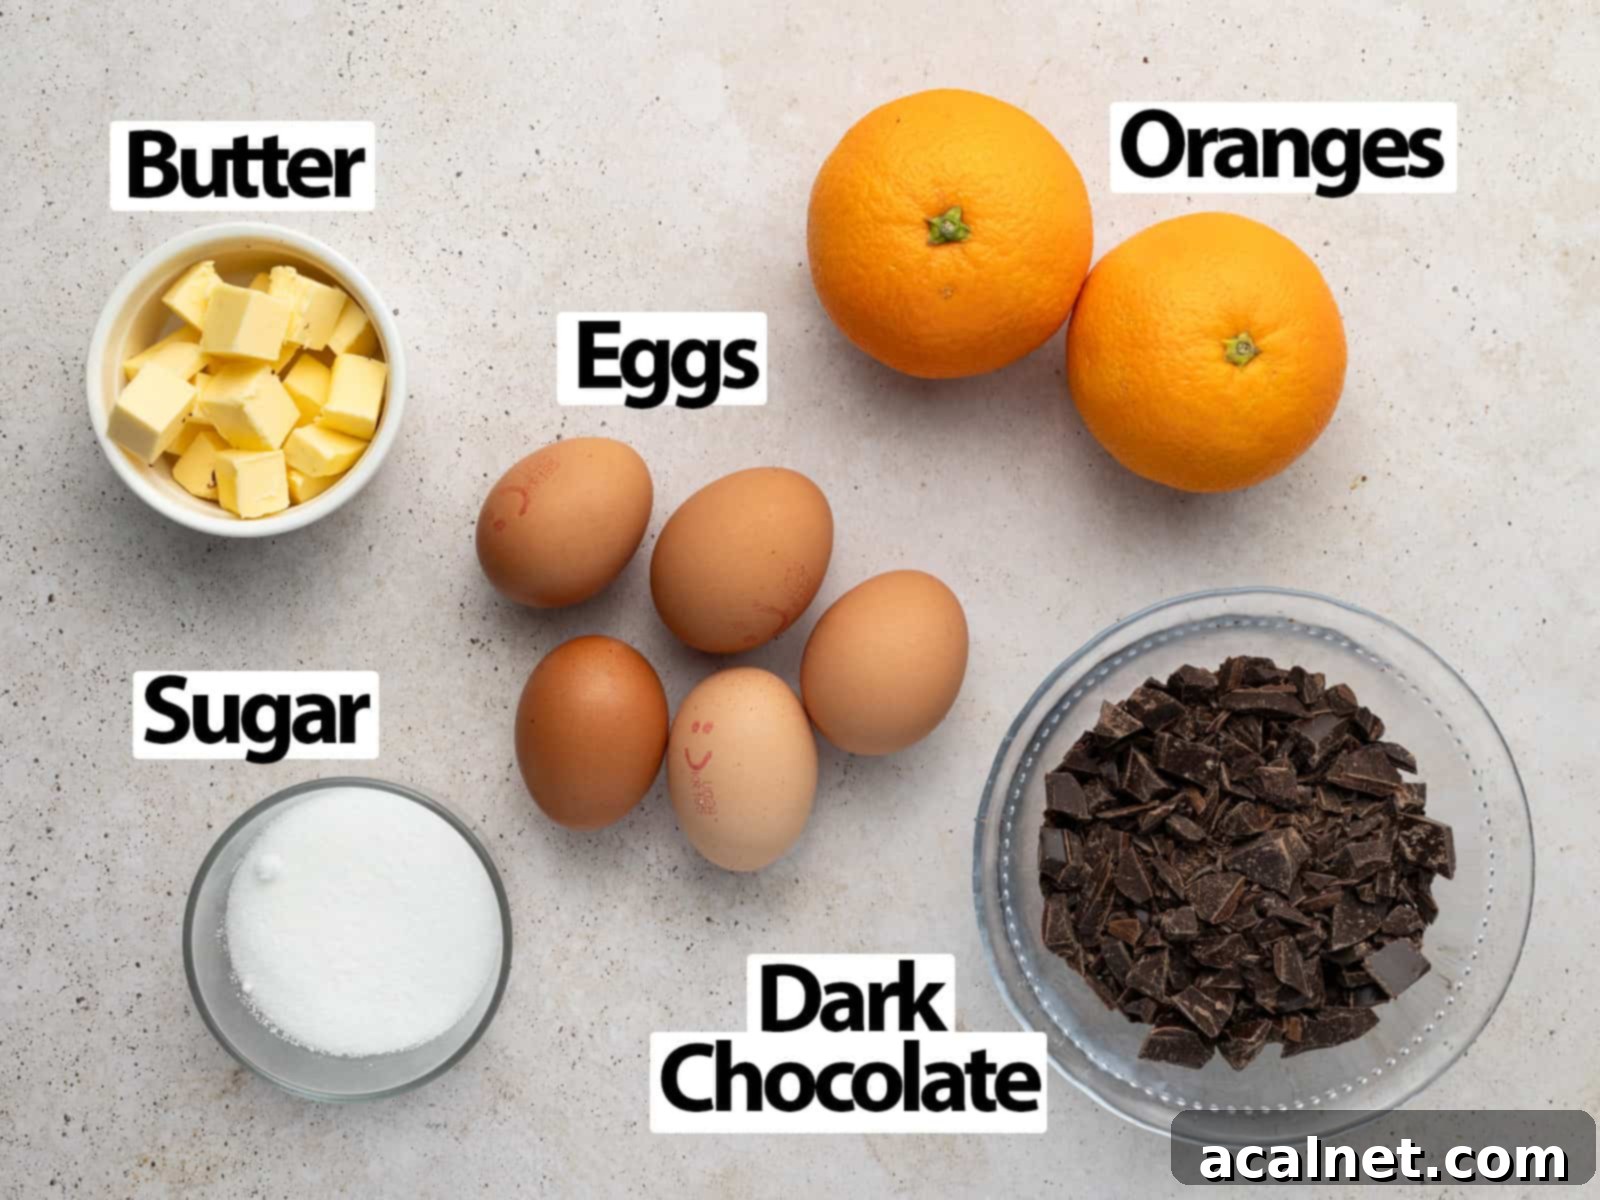
For precise quantities, please refer to the recipe card located below.
- Dark Cooking Chocolate: The quality of your chocolate directly impacts the depth of flavour in your mousse. I highly recommend using a high-quality dark chocolate with at least 70% cocoa solids for a truly rich and intense chocolate experience. If you prefer a slightly sweeter dessert, a dark chocolate with 60-65% cocoa content can also work beautifully. Crucially, opt for cooking chocolate (couverture chocolate in callets or bars) rather than eating chocolate bars or chocolate chips, which often contain stabilizers that prevent them from melting smoothly, potentially leading to a grainy texture in your mousse. The cocoa butter in proper cooking chocolate is essential for setting the mousse to the correct consistency.
- Unsalted Butter: Used at room temperature, butter adds a luxurious richness and smooth mouthfeel to the chocolate base. It also aids in setting the mousse and helps cool the melted chocolate before the egg yolks are incorporated, preventing them from scrambling. If you only have salted butter, you can use it, but consider slightly reducing any added salt in the recipe to maintain balance.
- Fresh Orange (Juice & Zest): To infuse the mousse with as much bright, zesty citrus flavour as possible, we utilize both fresh orange juice and finely grated orange zest. The zest contains concentrated oils that deliver an aromatic punch, while the juice adds a tangy sweetness that cuts through the richness of the chocolate. Always use fresh oranges for the best flavour; bottled juice simply won’t yield the same vibrant results.
- Large Eggs: This recipe calls for large eggs, separated into yolks and whites, and brought to room temperature. Room temperature eggs whip more easily and integrate better into mixtures. Since this is a classic French mousse, the eggs are not cooked through, making it absolutely essential to use pasteurized eggs for safety. Egg yolks contribute richness and emulsification, while whipped egg whites are the key to the mousse’s signature airy texture.
- Caster Sugar / Superfine Granulated Sugar: Sugar plays a critical role in stabilizing the whipped egg whites, creating a glossy, firm meringue that holds its volume. Caster sugar, with its fine granules, dissolves quickly and evenly, ensuring a smooth meringue without a gritty texture. It also balances the bitterness of the dark chocolate and the tanginess of the orange.
Optional Additions & Garnishes for an Extra Touch
- Whipped Cream Topping: For an extra layer of indulgence and visual appeal, I often finish these mousse cups with a dollop of freshly whipped cream. This is made simply by whisking cold heavy or thickened cream (with at least 30% fat content) with a touch of icing sugar (also known as powdered sugar). The cool, creamy topping provides a lovely contrast to the chocolate orange mousse.
- Garnish: Elevate your dessert presentation with a sprinkle of delicate chocolate shavings and a scattering of fresh orange zest or thin curls of candied orange peel. These not only add beauty but also reinforce the core flavours.
- Liqueur Boost: For adults, a subtle hint of orange liqueur can deepen the flavour profile. Consider adding a drop of Grand Marnier, Cointreau, or Triple Sec to the chocolate-orange base for an extra layer of sophisticated citrus notes.
Crafting Your Mousse: Step-by-Step Guide to Orange Chocolate Mousse
Follow these detailed steps carefully to achieve a perfectly light and flavourful chocolate orange mousse. Precision and gentle handling are key to its characteristic airy texture.
- To begin, finely chop your dark chocolate into very small, uniform pieces. This crucial step ensures that the chocolate melts quickly and evenly, significantly reducing the risk of it burning or seizing. If you are using couverture chocolate in the form of callets or pistoles, you can bypass this chopping step as they are already designed for optimal melting.
- Next, set up a classic double-boiler, also known as a “bain-marie,” for melting the chocolate. Select a heat-proof bowl that is slightly larger than a medium-sized saucepan. Fill the saucepan with a small amount of water, ensuring that when the bowl rests on top, its bottom does not touch the water. This indirect heat method is gentle and ideal for melting chocolate.
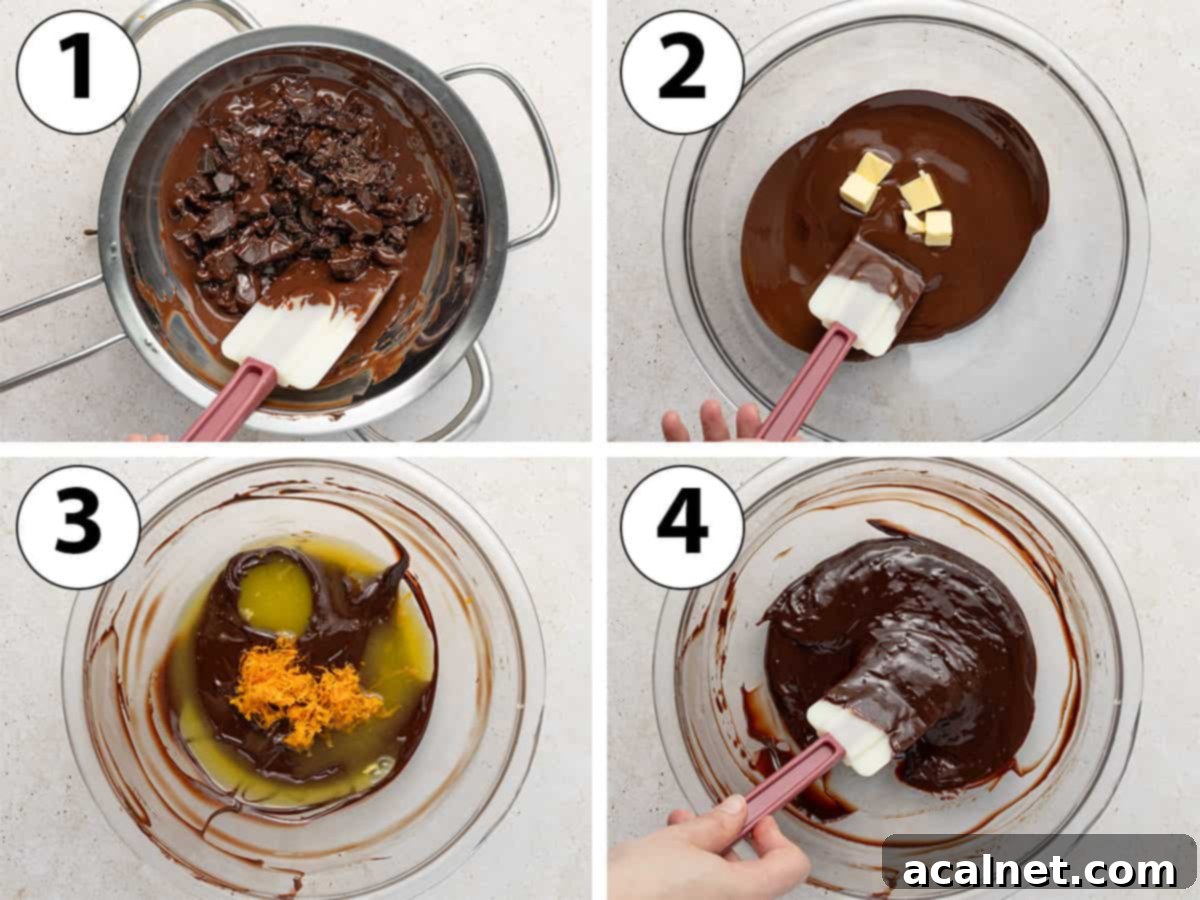
- Photo 1: Place the bowl containing the chopped chocolate over the saucepan. Turn the heat to medium and bring the water to a gentle simmer. Allow the chocolate to melt slowly, stirring occasionally with a heat-proof rubber spatula until it becomes completely smooth and glossy. Alternatively, you can melt the chocolate in a microwave in 30-second intervals, stirring thoroughly after each interval, until fully melted. Be very careful not to overheat it.
- Photo 2: Once melted, carefully remove the bowl from the stove. If desired, you can transfer the melted chocolate to a larger, clean mixing bowl. Gradually add the cubed, room-temperature butter, a few pieces at a time, stirring continuously until each addition has fully melted and incorporated into the chocolate. This process not only adds richness but also helps to gently reduce the temperature of the chocolate, preventing the egg yolks from cooking when added later.
- Photo 3: Incorporate the fresh orange juice and aromatic orange zest into the chocolate and butter mixture.
- Photo 4: Gently mix everything together until all ingredients are completely combined. You should now have a beautifully smooth, shiny, and fragrant chocolate-orange base.
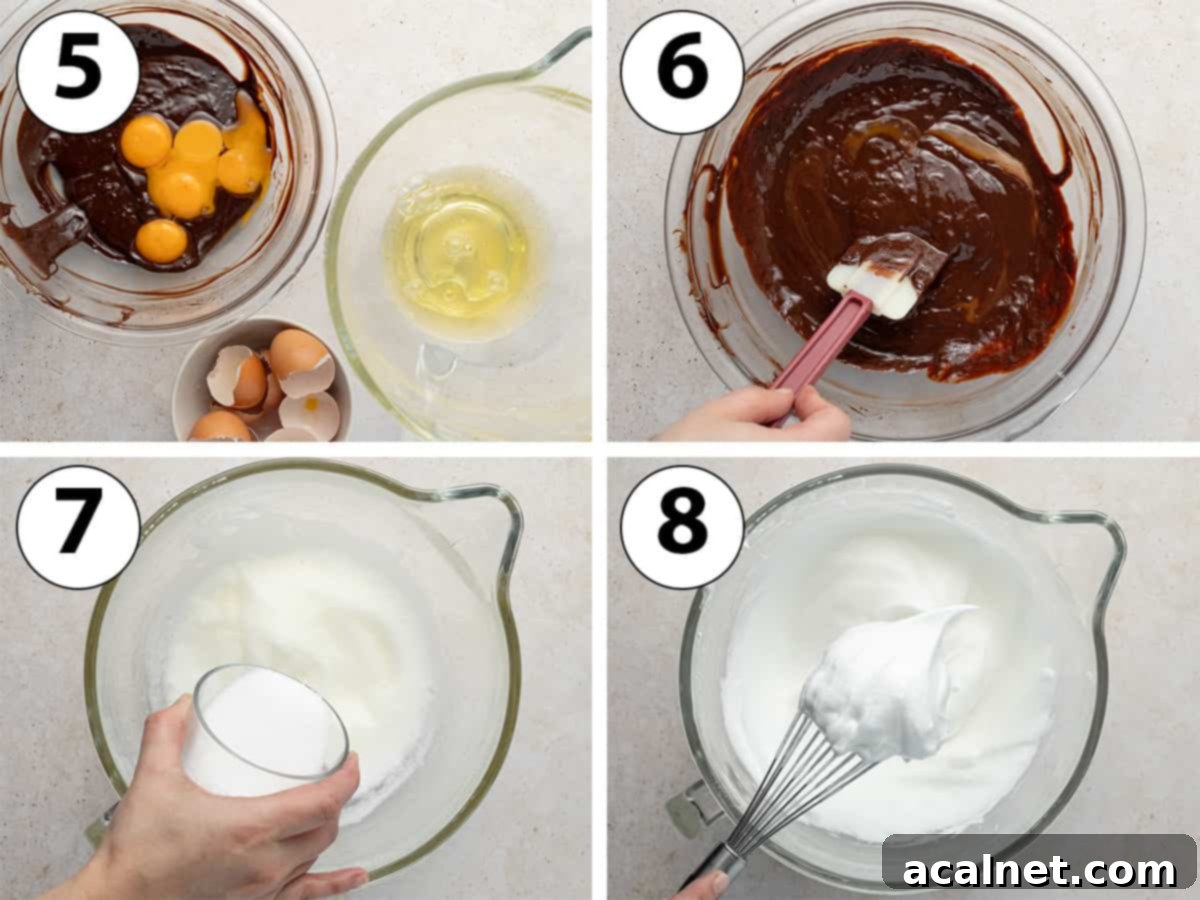
- Photo 5: Carefully separate the large egg yolks from the egg whites. Place the egg yolks directly into the chocolate mixture. The egg whites should be transferred to a large, impeccably clean bowl – either for use with an electric hand mixer or the bowl of a stand mixer fitted with a whisk attachment. Ensure there is no trace of grease or yolk in the egg white bowl, as this can prevent them from whipping properly.
- Photo 6: Stir the egg yolks into the chocolate mixture until they are fully combined and the mixture is uniform. Initially, the mixture might appear to separate or look slightly curdled, but continue stirring gently until it comes together into a beautiful, shiny, and smooth consistency. It is paramount that your eggs are at room temperature; adding very cold egg yolks to the chocolate can cause it to seize and become lumpy.
- Now, it’s time to prepare the meringue. Add a pinch of fine table salt to the egg whites in the large bowl. Begin whipping them on medium speed using your stand mixer or electric hand mixer.
- Photo 7: Continue whisking until the egg whites reach the “soft peaks” stage. At this point, they will have turned white, almost doubled in volume, and will have a consistency similar to shaving cream. When you lift the whisk, the peaks will stand briefly before gently curling over. This is the signal to start adding the caster sugar gradually, about one or two tablespoons at a time, while continuously whisking.
- Photo 8: Once all the sugar has been incorporated, increase the mixer speed to high. Keep whipping the egg whites until they form “stiff peaks.” The meringue should have tripled in volume, appear bright white and glossy, and hold its shape firmly when the whisk is lifted, with no drooping. This perfectly stable meringue is crucial for the mousse’s structure.
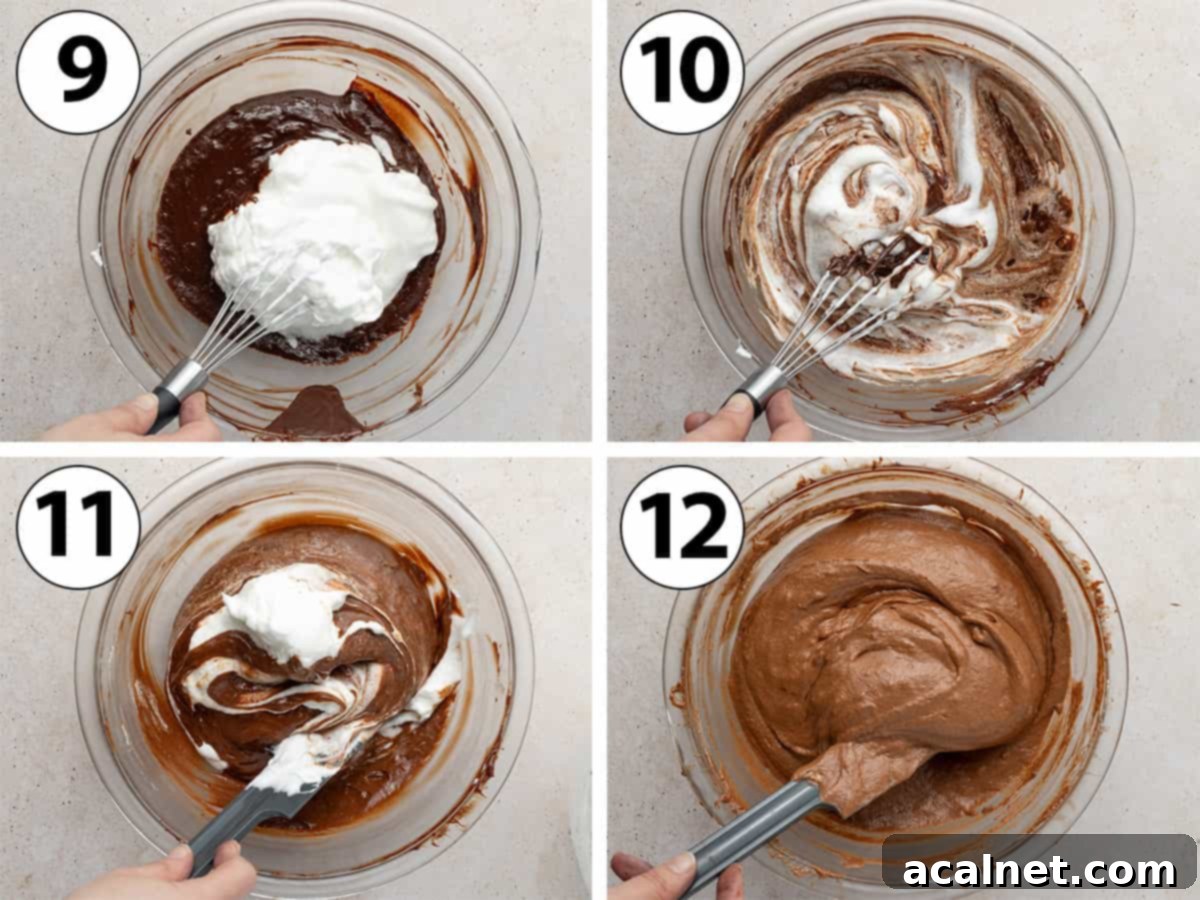
- Photo 9: Gently take about a quarter of the whipped egg whites (meringue) and add it to the chocolate mixture.
- Photo 10: Using a whisk, very gently fold this first portion of meringue into the chocolate base until you can no longer see any white streaks. This initial step is vital as it “lightens” the chocolate mixture, making it less dense and easier to incorporate the remaining, more delicate whipped egg whites without deflating them. This technique helps to maintain maximum airiness in your final mousse.
- Photo 11: Switch from a whisk to a rubber spatula. Now, carefully and gently fold in the remaining whipped egg whites in three or four separate additions. Use a “cut and fold” motion, drawing the spatula down through the middle of the mixture, across the bottom, and up the side of the bowl, then folding it over. Rotate the bowl as you go.
- Photo 12: Stop folding as soon as all the egg whites are just incorporated and there are no visible white streaks remaining. Over-mixing at this stage will deflate the precious air bubbles in the meringue, resulting in a dense rather than fluffy mousse. Handle with care!
- Carefully pour the delicate orange chocolate mousse into your chosen individual dessert cups or a larger serving bowl. Gently shake or tap the filled cups on the counter a couple of times to evenly distribute the mousse and remove any large air pockets. Then, place them in the refrigerator to chill and set for a minimum of 4 hours, though preferably overnight for the best texture and flavour development.
- If you opt to serve the mousse from a large bowl, simply cover it tightly with plastic wrap before refrigerating to prevent a skin from forming and to absorb any fridge odors.
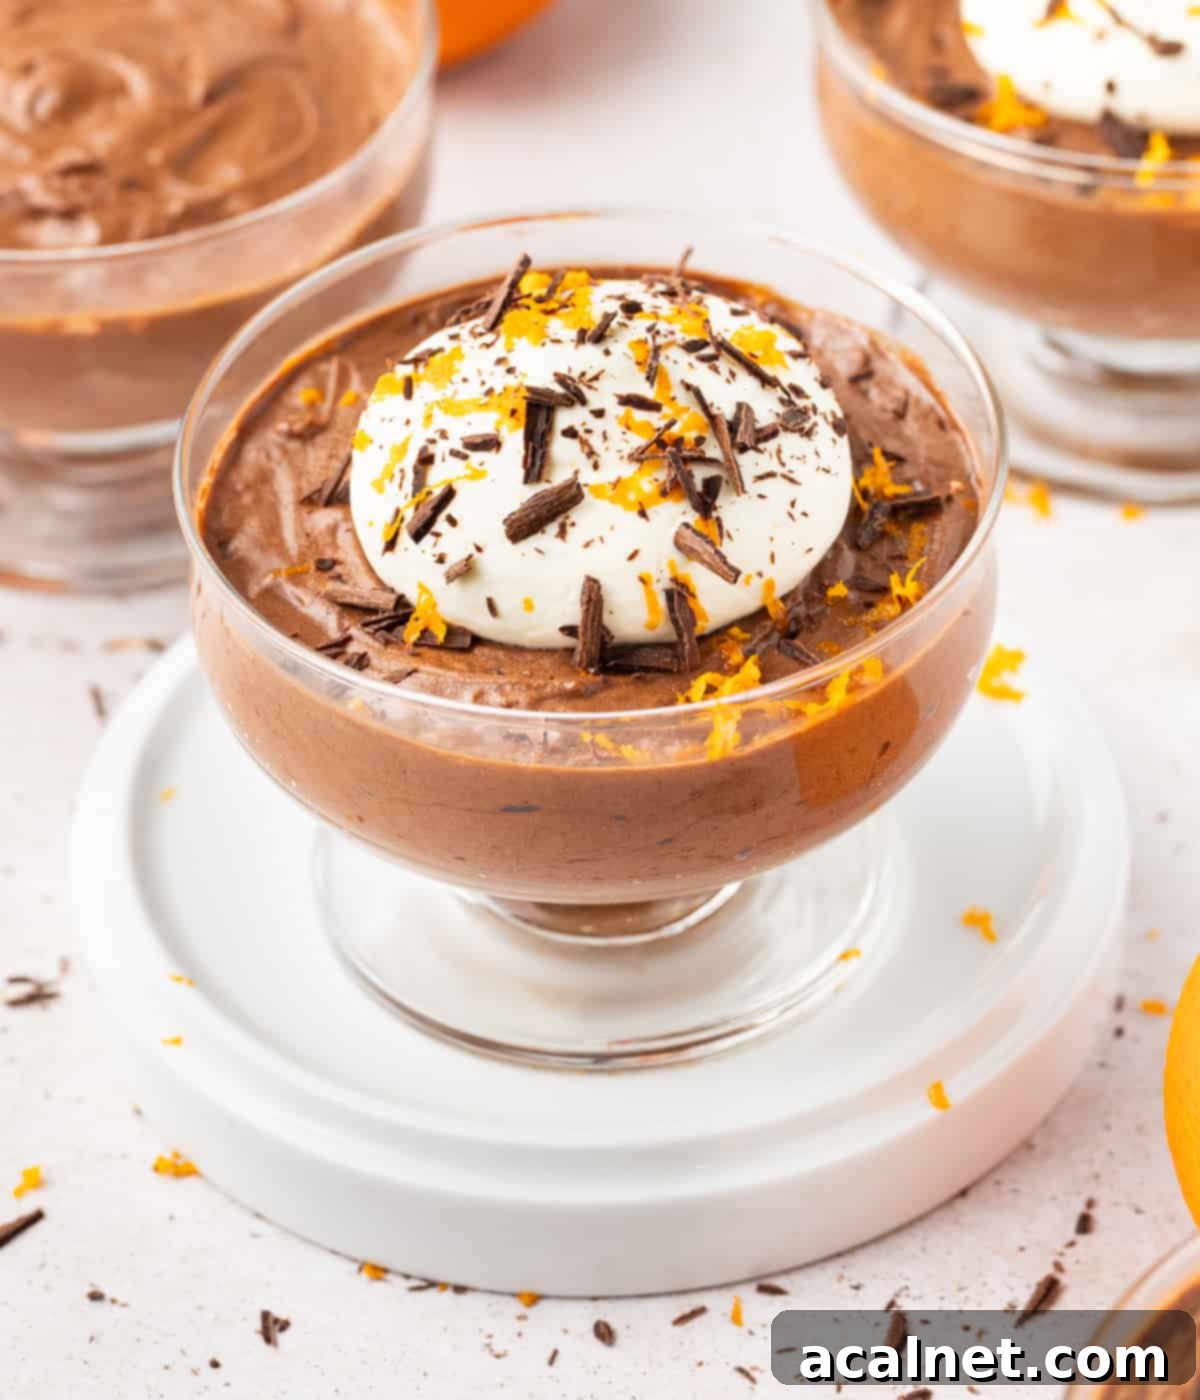
- Optional Topping Preparation: Just before serving, prepare your optional whipped cream topping. In a clean, chilled bowl (or stand mixer bowl with whisk attachment), combine very cold heavy/thickened cream with icing sugar. Whisk on medium speed until the cream begins to thicken, then gradually increase to high speed until firm, stiff peaks form. Scoop or pipe the whipped cream over the set chocolate orange mousse cups using a piping bag fitted with your desired nozzle (star or round works well). Finish with a final flourish of fresh chocolate shavings and bright orange zest or delicate orange peel for an elegant presentation and an extra burst of flavour.
Frequently Asked Questions About Chocolate Orange Mousse
When preparing a recipe that calls for raw or lightly cooked eggs, such as this chocolate mousse, safety is paramount. Raw eggs are considered safe to eat if they have been pasteurized. Pasteurization involves gently heating the eggs to a specific temperature for a short period, which effectively eliminates harmful bacteria like salmonella without cooking the egg itself. Always look for eggs explicitly labeled as “pasteurized” when making raw egg preparations.
The choice of chocolate significantly impacts the flavour, texture, and setting of your mousse. For the finest results, I strongly recommend using a high-quality cooking chocolate or couverture chocolate. These chocolates are specifically formulated with a higher cocoa butter content, allowing them to melt smoothly and contribute to the mousse’s perfect set. Avoid chocolate chips, chocolate melts, or standard eating chocolate bars, as they often contain less cocoa butter and more stabilizers, which can lead to an uneven melt and a slightly grainy or less stable mousse.
This recipe was specifically developed using 70% dark chocolate to achieve a deep, rich chocolate flavour that beautifully complements the orange. While you could use a slightly less intense dark chocolate (e.g., 60-65%), I do not recommend substituting with milk chocolate, white chocolate, or semi-sweet chocolate, as they have different fat and sugar contents that would alter the mousse’s texture and overall balance dramatically.
The defining light and airy texture of this mousse is primarily achieved by the careful and gentle folding of whipped egg whites (meringue) into the chocolate and orange base. When egg whites are whipped, tiny air bubbles are trapped within the protein structure, increasing their volume dramatically. These countless microscopic air pockets are then delicately incorporated into the heavier chocolate mixture. This creates the signature foamy, cloud-like consistency that mousse is celebrated for, making it feel incredibly light on the palate.
While both puddings and mousses are popular dessert categories, they differ significantly in their preparation methods and resulting textures. A mousse is distinguished by its light, fluffy, and often airy texture, which is created by folding in a whipped element—typically whipped egg whites or whipped cream. This aeration gives it a delicate, foamy mouthfeel.
In contrast, a pudding usually has a denser, creamier, and heavier texture. Puddings are typically made by cooking a mixture until it thickens, often relying on starches like cornstarch or flour, or eggs (as in a custard), to achieve their characteristic consistency. They lack the incorporated air bubbles that define a mousse.
This particular recipe relies on whipped egg whites for its classic French light and airy texture. While eggless chocolate mousse recipes exist (often using aquafaba or a combination of whipped cream and gelatin/agar-agar), they will yield a different texture than this traditional version. If you prefer an eggless option, I recommend seeking out a recipe specifically designed to be egg-free, like my Eggless Mango Mousse, and adapting the flavour profile.
Achieving perfect stiff-peak egg whites is crucial. Here are some tips: 1) Ensure your mixing bowl and whisk attachment are impeccably clean and completely free of any grease or oil (even a tiny speck can prevent whipping). 2) Use room temperature egg whites, as they whip to a larger volume than cold ones. 3) Add a pinch of salt or a tiny amount of cream of tartar to help stabilize the foam. 4) Gradually add sugar once soft peaks form, rather than all at once, to help build a strong, glossy meringue structure.
Expert Tips & Troubleshooting for Perfect Mousse
Even experienced bakers can encounter hiccups. Here are some valuable tips and solutions to ensure your Chocolate Orange Mousse turns out perfectly every time:
- My mousse seems runny right after mixing. Is this normal? Absolutely! It’s completely normal for the mousse to appear somewhat runny immediately after you’ve finished folding in the egg whites. The mousse requires several hours of chilling in the refrigerator to properly set and achieve its firm yet delicate structure. Patience is key here; resist the urge to check it too soon!
- Why isn’t my mousse fluffy? It turned out quite dense. If your chocolate orange mousse is dense rather than wonderfully fluffy after adequate chilling, it’s typically a sign that the whipped egg whites were folded in too vigorously or for too long. The delicate air bubbles created during whipping are easily deflated with rough handling. Remember to use a gentle “cut and fold” motion with a rubber spatula, stopping as soon as the egg whites are just incorporated to preserve as much air as possible.
- Do I need to add gelatine to this recipe? No, this traditional French chocolate mousse recipe does not require any gelatine. The combination of several factors allows the mousse to set perfectly without a gelling agent: the stabilized whipped egg whites (thanks to the sugar), the butter, and the natural cocoa butter present in good quality dark chocolate all contribute to its structural integrity once chilled. Trust the process and the power of these simple ingredients!
- Ensuring Smooth Chocolate Melting: When melting chocolate over a double-boiler, ensure the water never boils violently or touches the bottom of the bowl. Steam, not direct heat, is what melts the chocolate. Stir frequently to prevent hot spots. If using a microwave, melt in short bursts (15-30 seconds), stirring thoroughly between each, to prevent burning and seizing.
- Room Temperature Eggs are a Must: Always use room temperature eggs for both whipping whites to maximum volume and for incorporating yolks into the chocolate. Cold yolks can shock the chocolate, causing it to seize and become lumpy.
- Gentle Folding Technique: The “lightening” step (folding a small amount of meringue into the chocolate first) is essential. It makes the chocolate base more pliable and closer in consistency to the meringue, making subsequent folds easier and minimizing deflation. Always use a light hand!
Storing Your Chocolate Orange Mousse & Freezing Advice
Proper storage is crucial for maintaining the quality and safety of your chocolate orange mousse. Since this dessert contains raw (albeit pasteurized) eggs, it is best enjoyed within 2 days of preparation. It absolutely needs to be kept refrigerated from the moment it is made until it’s ready to be served. Ensuring it remains consistently chilled will help maintain its delicate texture and freshness.
This dessert excels as a make-ahead option. You can prepare it the day before your event and leave it to chill in the refrigerator overnight. This allows ample time for the mousse to set beautifully and for the flavors to meld and deepen, making it even more delicious. Simply add your desired toppings, such as whipped cream, chocolate shavings, or orange zest, just before serving to keep them fresh and appealing.
It is generally not recommended to freeze a mousse. The delicate, airy structure of the mousse, created by the whipped egg whites, will typically break down during the freezing and thawing process. This will result in a dessert that loses its signature fluffy texture and can become watery, compromising the overall quality and enjoyment. Stick to refrigeration for the best results.
Discover More Delectable Mousse Recipes
If you’ve fallen in love with the luscious texture and sophisticated flavour of this Chocolate Orange Mousse, you’ll be thrilled to explore other mousse creations from our collection. Each recipe offers a unique take on this classic dessert, perfect for any occasion or craving. From fruity delights to rich coffee concoctions, there’s a mousse for everyone:
- Easy Strawberry Mousse: A vibrant and sweet treat, perfect for summer.
- Double Raspberry Mousse Cups: Bursting with tangy raspberry goodness.
- Lemon Mousse with Lemon Curd: Zesty, creamy, and wonderfully refreshing.
- Effortless Passion Fruit Mousse: Tropical flavours for a taste of paradise.
- Rich Coffee Mousse: A delightful indulgence for coffee lovers.
- Eggless Mango Mousse: A fruity, light option for those avoiding eggs.
- Classic Vanilla Mousse: Simple elegance that never disappoints.
- Bright Orange Mousse Cups: Pure citrus bliss in a cup.
- Silky Chocolate Panna Cotta: While not a mousse, this creamy Italian dessert offers similar sophistication.
Did you try this recipe?
We’d love to hear your thoughts! Leave a comment below to share your experience, and don’t forget to tag us on Instagram @a.baking.journey with a photo of your magnificent creation!
Recipe Card

Chocolate Orange Mousse
Print Recipe
Ingredients
Chocolate Orange Mousse
- 180 gr Dark Cooking Chocolate, 70% cocoa solids
- 60 gr Unsalted Butter, cubed, at room temperature
- 60 ml Orange Juice
- 2 teaspoon Orange Zest, about 2 large oranges
- 5 large Eggs, pasteurised, at room temperature
- 1/3 teaspoon Fine Table Salt
- 80 gr Caster Sugar
Whipped Cream Topping (optional)
- 120 ml Thickened / Heavy Cream, 30% fat content min.
- 20 gr Icing Sugar
- 1 teaspoon Orange Zest, to garnish
- Chocolate Shavings, to taste, to garnish
Instructions
Chocolate Orange Mousse
- Finely chop the chocolate and place in a large heatproof bowl. Melt until completely smooth, either over a double-boiler (see note 1) or in the microwave in 30 seconds increments.
- Add the cubed butter a few pieces at a time, gently stirring until completely melted. The temperature of the chocolate should have dropped.
- Mix in the orange juice and orange zest. Stir until completely combined.
- Separate the large egg yolks from the egg whites. Place the egg yolks in the chocolate mixture and the egg whites in a large clean bowl (if using a hand mixer) or bowl of a stand mixer fitted with the whisk attachment.
- Stir the egg yolks into the chocolate mixture until fully combined (see note 2) Set aside.
- Add the salt to the egg whites and start whipping on medium speed. Once you reach soft peaks (the eggs will have turn white, almost doubled in volume and reach the consistency of shaving cream), start adding the sugar about one or two tablespoons at a time while continuously whisking.
- When all the sugar has been incorporated, increase the speed to high. Keep on whipping the egg whites until you reach stiff peaks. The meringue should have tripled in volume, be white and glossy and hold its shape on the whisk.
- Add about a quarter of the whipped egg whites into the chocolate mixture. Using a whisk, very gently mix it in until you can’t see any white (see note 3).
- Switch to a spatula and continue to very gently fold in the rest whipped egg whites in three or four times. Stop folding as soon as all the egg whites have been incorporated and you cannot see any streaks of white anymore.
- Carefully pour the orange chocolate mousse into dessert cups. Gently shake the filled cups to evenly distribute the mousse, then place in the fridge to chill for at least 4 hours, preferably overnight.
Whipped Cream (optional)
- Before serving, optionally prepare the toppings.
Place the cold cream in a large bowl (or bowl of a stand mixer fitted with the whisk attachment) and sift in the icing sugar. Whisk on medium speed until the cream starts to thicken, then slowly increase to high speed until you reach stiff peaks.
- Place a large dollop of whipped cream (or pipe over the cream using a piping bag fitted with a star shaped or round nozzle) over the set chocolate orange mousse.
- Top with some fresh orange zest and shaved chocolate before serving.
Would you like to save this recipe?
We’ll email this post to you, so you can come back to it later!
Notes
- Double-Boiler Method Explained: To create a bain-marie, select a heat-proof bowl that fits snugly over a medium-sized saucepan without touching the water below. Fill the saucepan with about an inch or two of water. Place the finely chopped chocolate in the heat-proof bowl. Bring the water in the saucepan to a gentle simmer over medium heat. The steam from the simmering water will gently and indirectly melt the chocolate, ensuring it doesn’t burn or seize. Stir occasionally with a rubber spatula until the chocolate is completely smooth and luscious.
- Egg Yolk Incorporation: When you first add the room-temperature egg yolks to the chocolate mixture, it might appear to separate or look slightly broken. Don’t worry, this is normal! Continue to stir gently but consistently, and the mixture will emulsify and come together into a shiny, uniform, and smooth consistency. It’s crucial that your eggs are at room temperature to prevent the chocolate from seizing and becoming grainy upon contact with cold yolks.
- The “Lightening” Step: Adding a quarter of the whipped egg whites to the chocolate mixture first, and gently whisking it in until no white streaks remain, is a very important technique. This step serves to “lighten” the dense chocolate base, making its consistency closer to that of the delicate meringue. This equalizes the density between the two components, which, in turn, makes it significantly easier to fold in the remaining whipped egg whites without deflating them, thus preserving the crucial airiness of your mousse.
Nutrition (per serving)
