Easy & Adorable Easter Bunny Cake: A Fun Family Tradition (Made with Cake Mix!)
Get ready to hop into the most charming Easter tradition with our incredibly easy and utterly adorable Easter Bunny Cake! This delightful dessert starts with a simple store-bought cake mix, making it a stress-free project that even the littlest hands can help decorate. Imagine the smiles when your family gathers around this festive centerpiece, a whimsical bunny made with love and a touch of creativity. It’s not just a cake; it’s an experience, a memory-making activity that can effortlessly become an annual highlight of your Easter celebrations, just as it has in our home for years.
Perfect for capping off your Easter dinner, this sweet treat brings joy and a playful spirit to the table. Forget complicated baking; we’re all about maximizing fun and minimizing fuss, ensuring you have more time to cherish moments with loved ones. Dive into this guide to create a cute, coconut-covered bunny that’s as delicious as it is charming!
Note: Some of the links on this page are paid links, Amazon Associates. This means I make a small commission when you click and shop. Your cost is always the same, and I only link to and recommend products or ingredients that I personally use and trust.
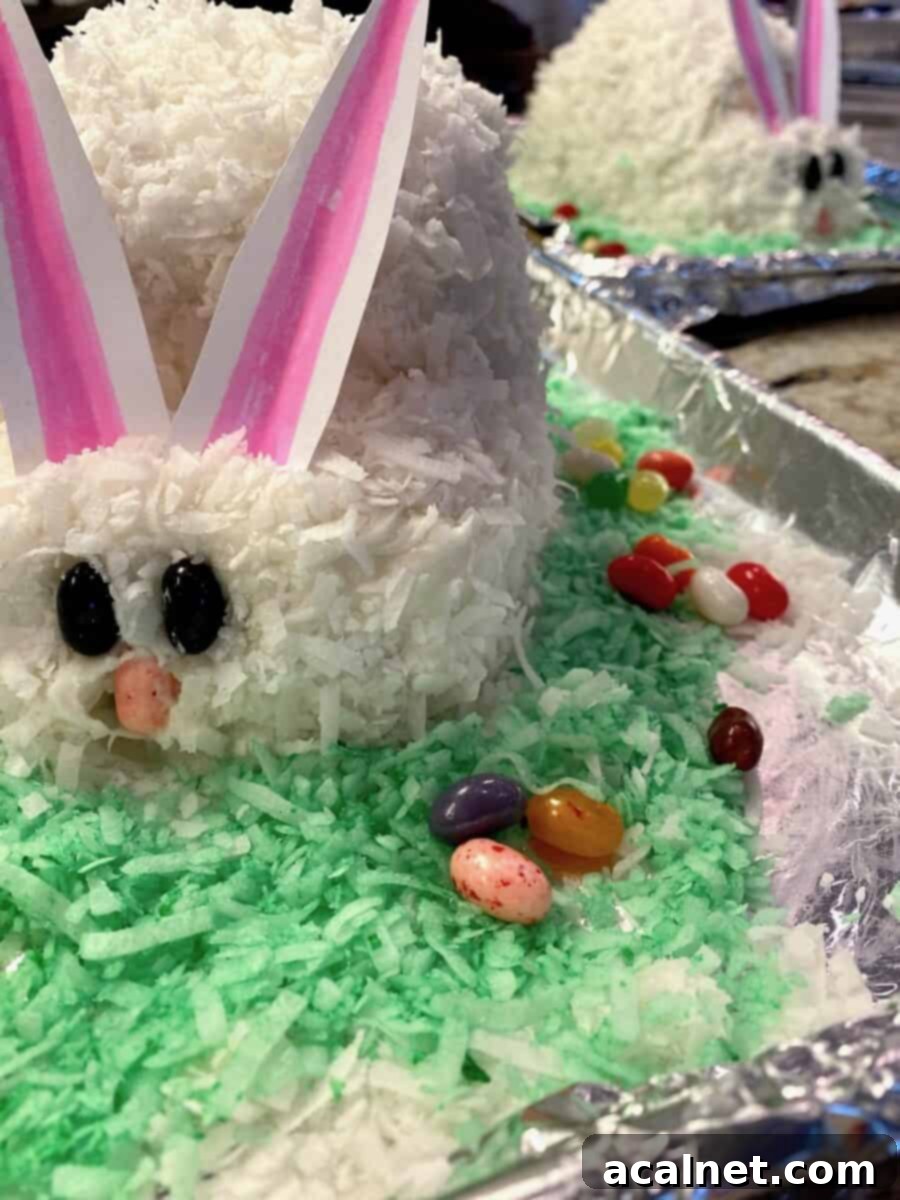
Table of Contents
- Ingredients to Have on Hand
- Baking Your Cake Base
- Selecting Your Favorite Cake Mix
- Crafting Whimsical Coconut Grass
- The Joy of Making Two Bunny Cakes
- Assembling Your Adorable Bunny Cake
- Storing Your Easter Bunny Cake
- FAQ and Top Tips for Bunny Cake Success
- The Sweet Inspiration Behind Our Bunny Cake
- More Delightful Easter Recipes
- Even More Sweet Treats to Explore
- Rate the Recipe
- Full Recipe Card
Ingredients to Have on Hand
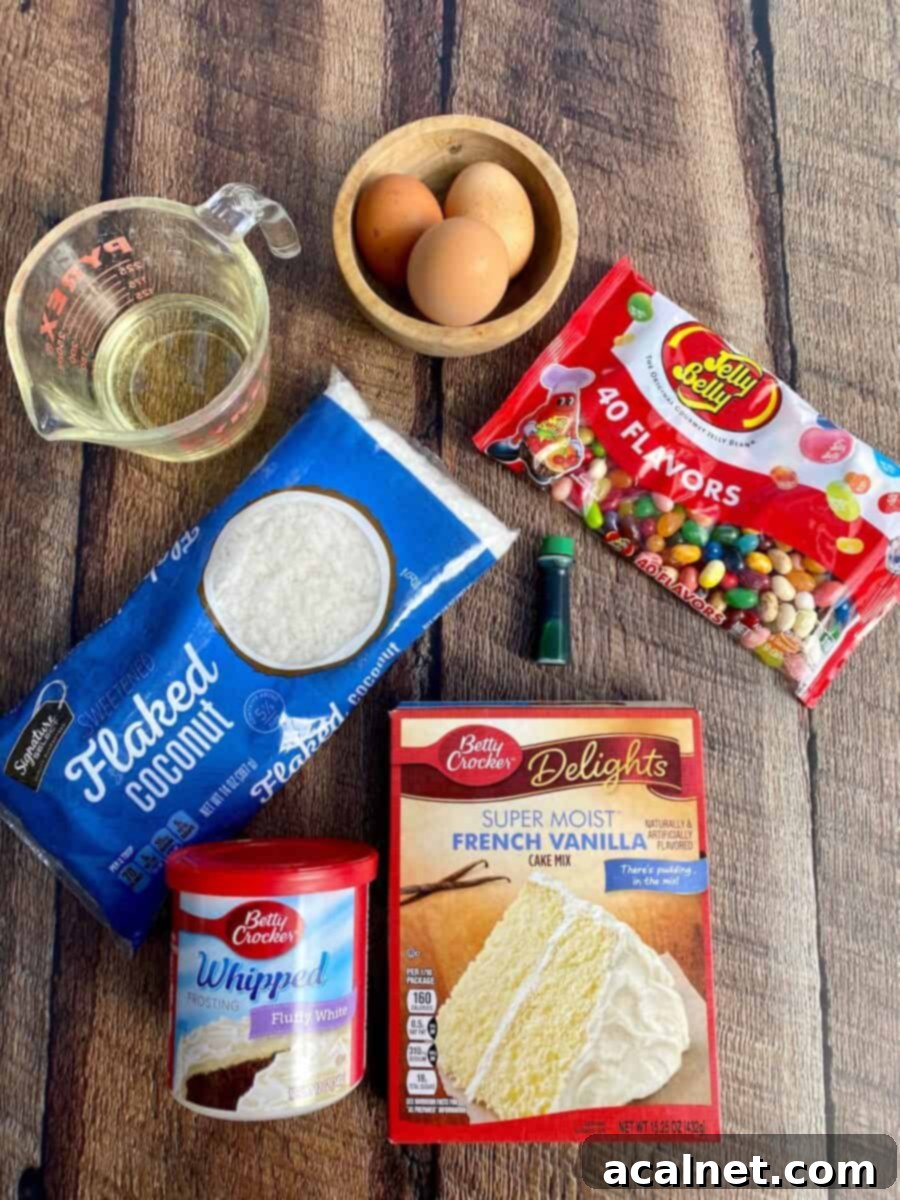
This Easter Bunny Cake recipe truly simplifies your holiday baking, proving that you don’t need a pantry full of specialty items to create something spectacular. The magic begins with just a few key components, most of which are likely already staples in your grocery cart. Gathering these simple ingredients is the first step towards creating an enchanting dessert that will captivate everyone, especially your little ones who will be eager to see the transformation!
We’re focusing on convenience without sacrificing charm. Here’s what you’ll need to have ready:
- Your Favorite Cake Mix: The beauty of this recipe is its flexibility. Choose any flavor that brings joy to your family!
- Store-bought Whipped, Fluffy White Frosting: A 12-ounce tub (or two, if you’re making two bunnies!) is perfect for achieving that soft, cloud-like bunny texture. Its light consistency makes it easy to spread and adheres beautifully to the coconut.
- Sweetened Coconut Flakes: Essential for giving our bunny its iconic fluffy fur and creating that charming grassy bed. Make sure it’s sweetened for an extra touch of deliciousness.
- Green Food Coloring: Just a few drops will magically transform ordinary coconut into a vibrant “Easter grass” for your bunny to nestle in.
- Assorted Jelly Beans: These colorful candies are ideal for decorating the bunny’s face, adding playful eyes and a cute nose. Their variety of colors allows for creative expression!
With these few items, you’re well on your way to a delightful Easter masterpiece. The simplicity of the ingredients ensures that even beginner bakers can achieve impressive results, making the entire process enjoyable from start to finish.
Baking Your Cake Base
The foundation of our charming Easter Bunny Cake is a perfectly baked cake from your chosen mix. This step is wonderfully straightforward, designed to be foolproof so you can focus on the fun decorating later. You’ll need two round 8 or 9-inch cake pans. Baking according to the directions on the back of your cake mix box is all it takes!
Don’t fret if your cakes puff up a little more than expected in the center; this is actually a bonus! A slightly domed cake will give your bunny a wonderfully “rolly polly” tummy, adding to its cute and cuddly appearance. It’s all part of the charm of this homemade, rustic-style cake.
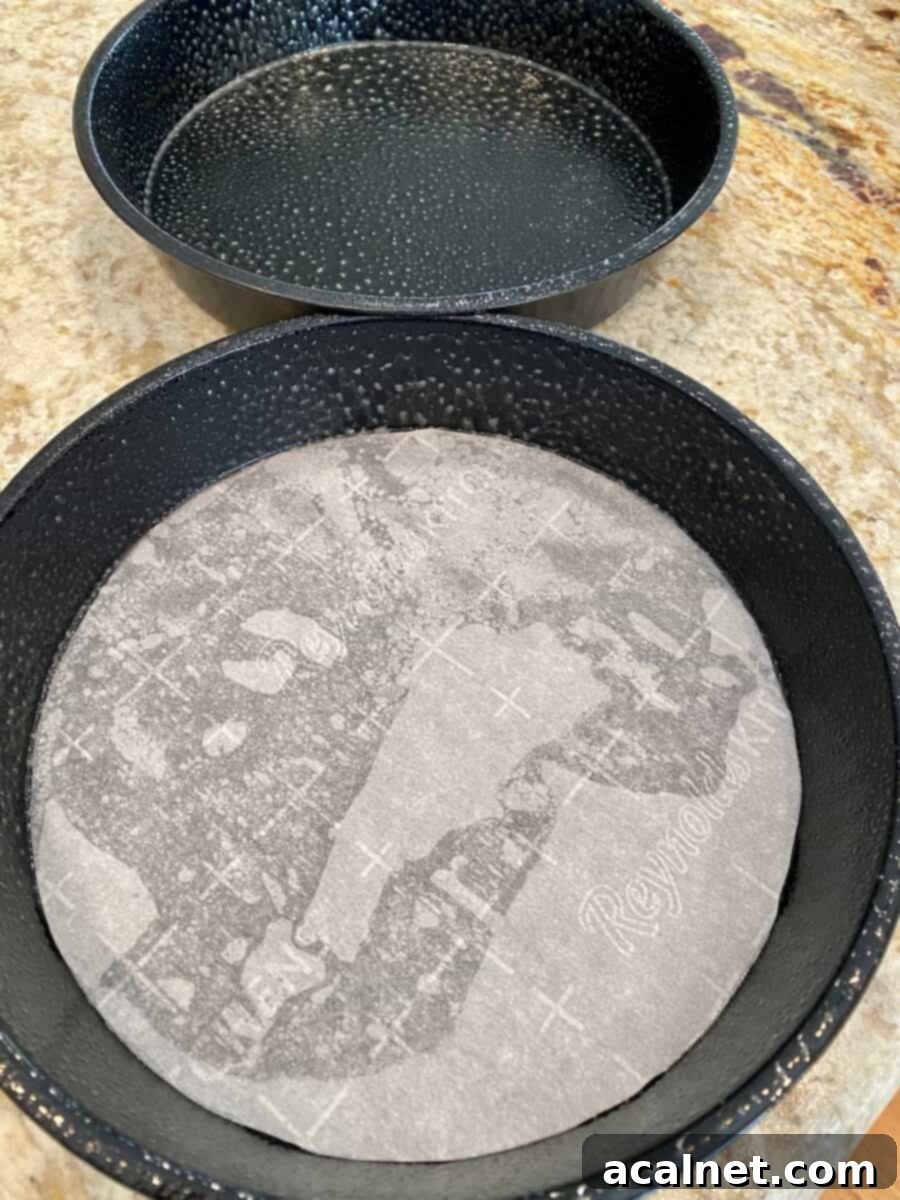
To ensure your cakes turn out of the pans effortlessly, I highly recommend a simple trick: first, spray each cake pan thoroughly with a non-stick spray like Pam, or grease it generously with shortening. Then, cut circles of parchment paper to fit the bottom of each pan and press them into place. This double layer of protection guarantees a smooth release, preventing any frustrating sticking and preserving the integrity of your cake rounds. Once baked, allow the cakes to cool in their pans for about 10 minutes before carefully inverting them onto a wire rack to cool completely. Thoroughly cooled cakes are much easier to handle and frost.
Selecting Your Favorite Cake Mix
One of the delightful aspects of this recipe is the freedom to choose your favorite cake mix! The options are truly limitless, allowing you and your little helpers to pick a flavor that everyone will adore. Whether you’re a fan of rich carrot cake, classic white cake, elegant French vanilla, or even a vibrant strawberry, any flavor will work beautifully as the base for your bunny.
In our family, we typically opt for a white or French vanilla cake mix. There’s a practical reason behind this choice: the lighter color of these cakes makes it significantly easier to achieve a perfectly white, fluffy bunny. When covered with white frosting and coconut, a light-colored cake ensures that no dark portions peek through, giving our bunny a consistently pristine appearance. However, if you love the flavor of chocolate or spice cake, go for it! Just be aware that you might need a slightly thicker layer of frosting and coconut to completely conceal the darker cake underneath. Ultimately, the best choice is the one that brings the most joy and flavor to your Easter table!
Crafting Whimsical Coconut Grass
Beyond the adorable bunny itself, perhaps the most whimsical and charming element of this Easter dessert is the vibrant bed of “coconut grass” that our fluffy friend rests upon. This simple touch adds an extra layer of visual appeal and truly brings the Easter scene to life. Transforming sweetened coconut into lush green grass is incredibly easy, a quick and fun activity that kids love to participate in!
Here’s how to create your festive green coconut grass:
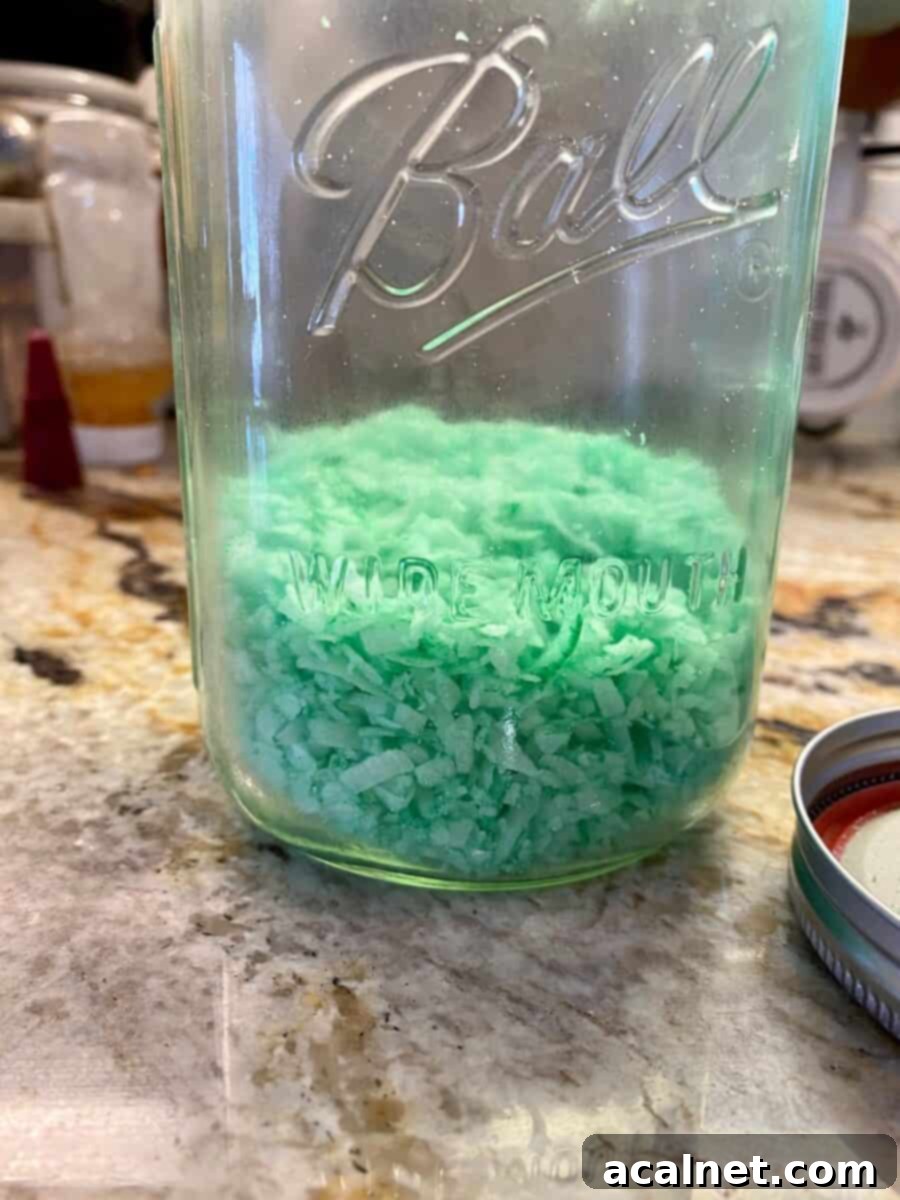
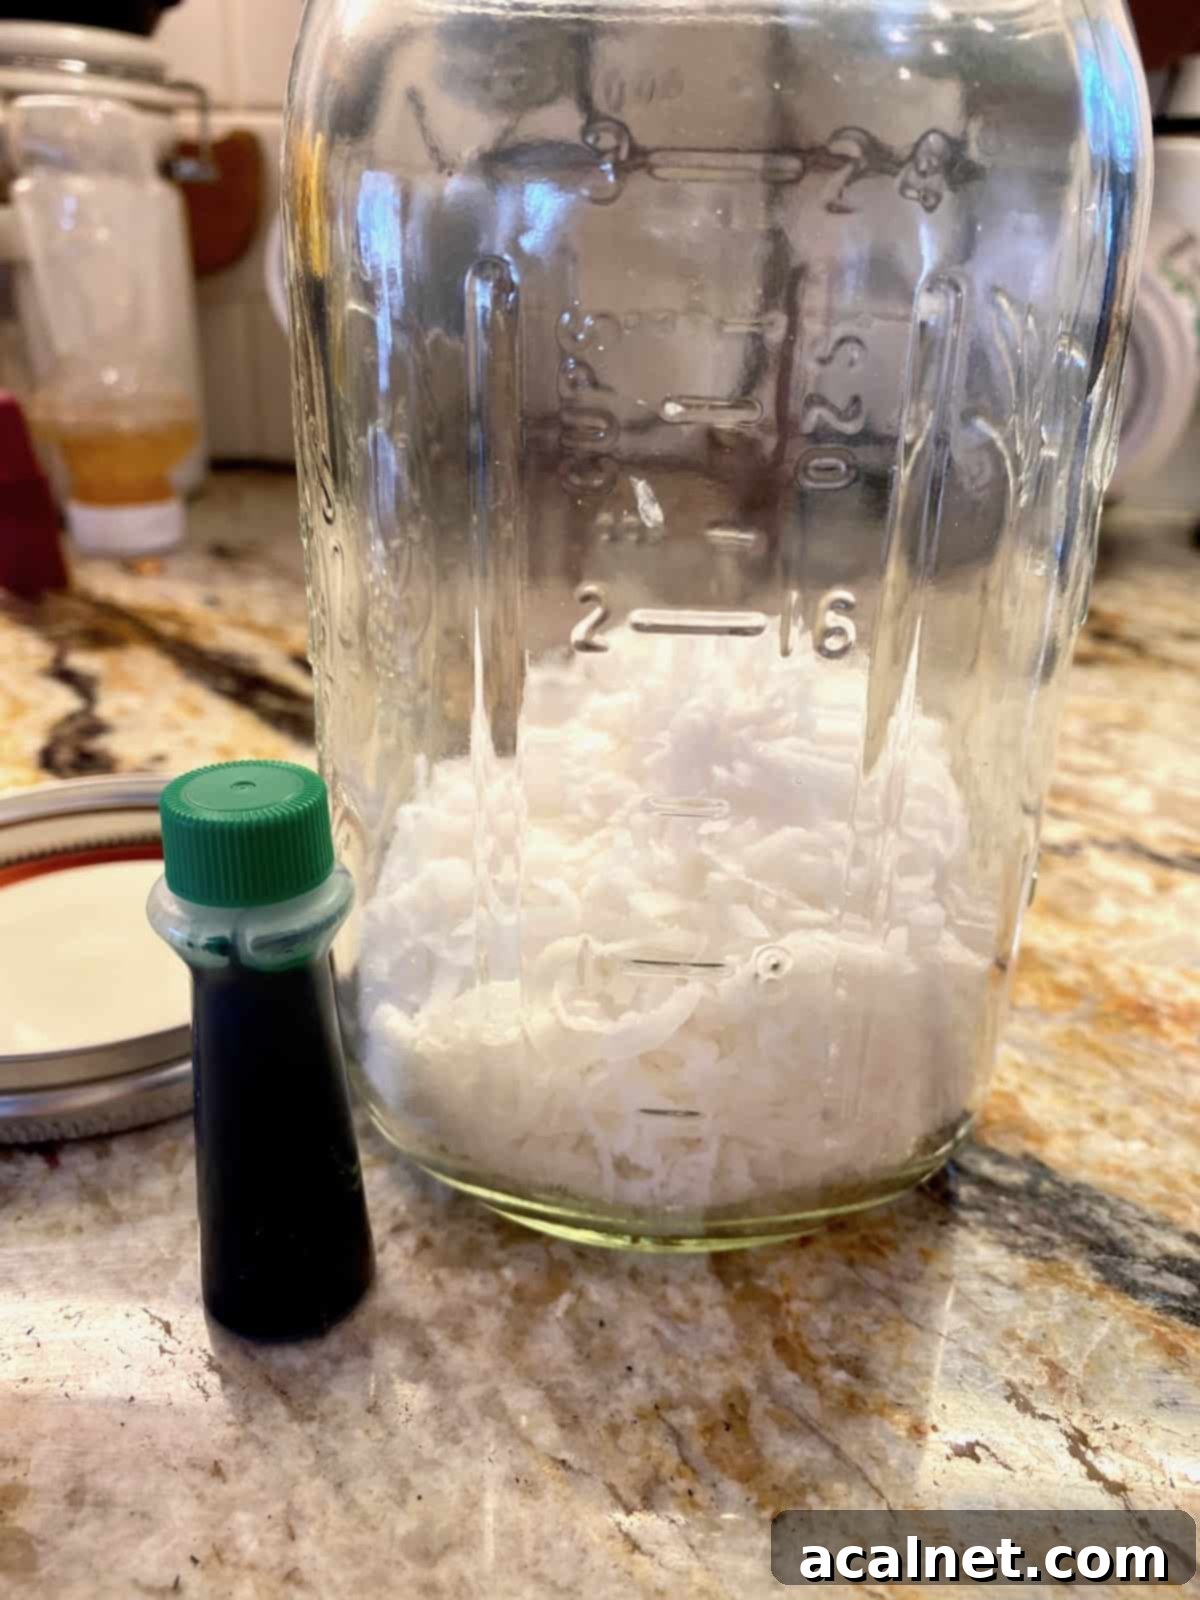
- Prepare Your Container: Place one cup of sweetened coconut flakes into a jar or any other sturdy container with a tight-fitting lid. A zip-top bag can also work well for this step.
- Add Food Coloring: Add 3 or 4 drops of green food coloring to the coconut. Start with a few drops, you can always add more if you want a deeper shade of green.
- Shake It Up: Securely seal the container with its lid. Now, let the fun begin! Shake vigorously for about 30 seconds, or until the green coloring is evenly distributed throughout the coconut. You’ll be amazed at how quickly it transforms into a vibrant, grassy hue.
- Arrange the Grass: Once tinted, remove the green coconut from the container and generously sprinkle it around the base of your assembled bunny cake. This is best done on a large serving platter or baking sheet covered with foil, making cleanup a breeze and creating a lovely presentation. The contrast of the white bunny against the green grass is simply magical!
The Joy of Making Two Bunny Cakes
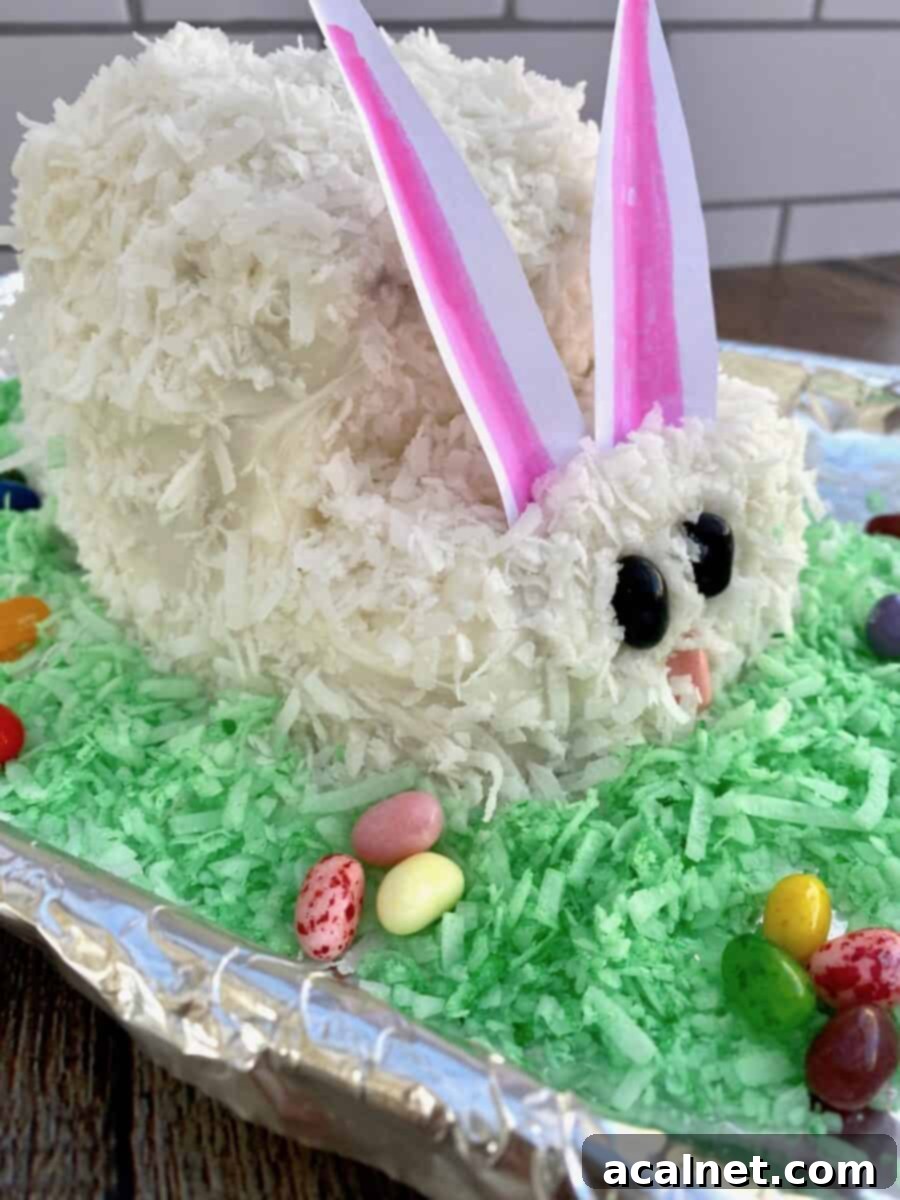
One of the most fantastic features of this Easter Bunny Cake recipe is that it yields two complete, adorable bunny cakes from just two round cake layers. This means double the fun and double the delight! Having two cakes offers wonderful versatility for your Easter festivities.
If you’re hosting a large gathering for Easter dessert, two cakes ensure there’s plenty to go around, satisfying every sweet tooth. Alternatively, you could enjoy one bunny cake at home and gift the other to friends, family, or neighbors. Imagine the joy of presenting a homemade Easter bunny cake as a thoughtful holiday present! It’s a sweet gesture that’s sure to be appreciated.
Whether you’re doubling down on sweet bunnies for a big crowd or simply want an extra cake for later enjoyment, this recipe conveniently provides enough to spread the Easter cheer. You might even find yourself enjoying a delightful “double dose” of these charming treats throughout the holiday weekend!
Assembling Your Adorable Bunny Cake
Now for the truly fun part: bringing your Easter Bunny Cake to life! This assembly process is surprisingly simple and incredibly rewarding, especially when little helpers are involved. Each step contributes to creating that classic, endearing bunny shape.
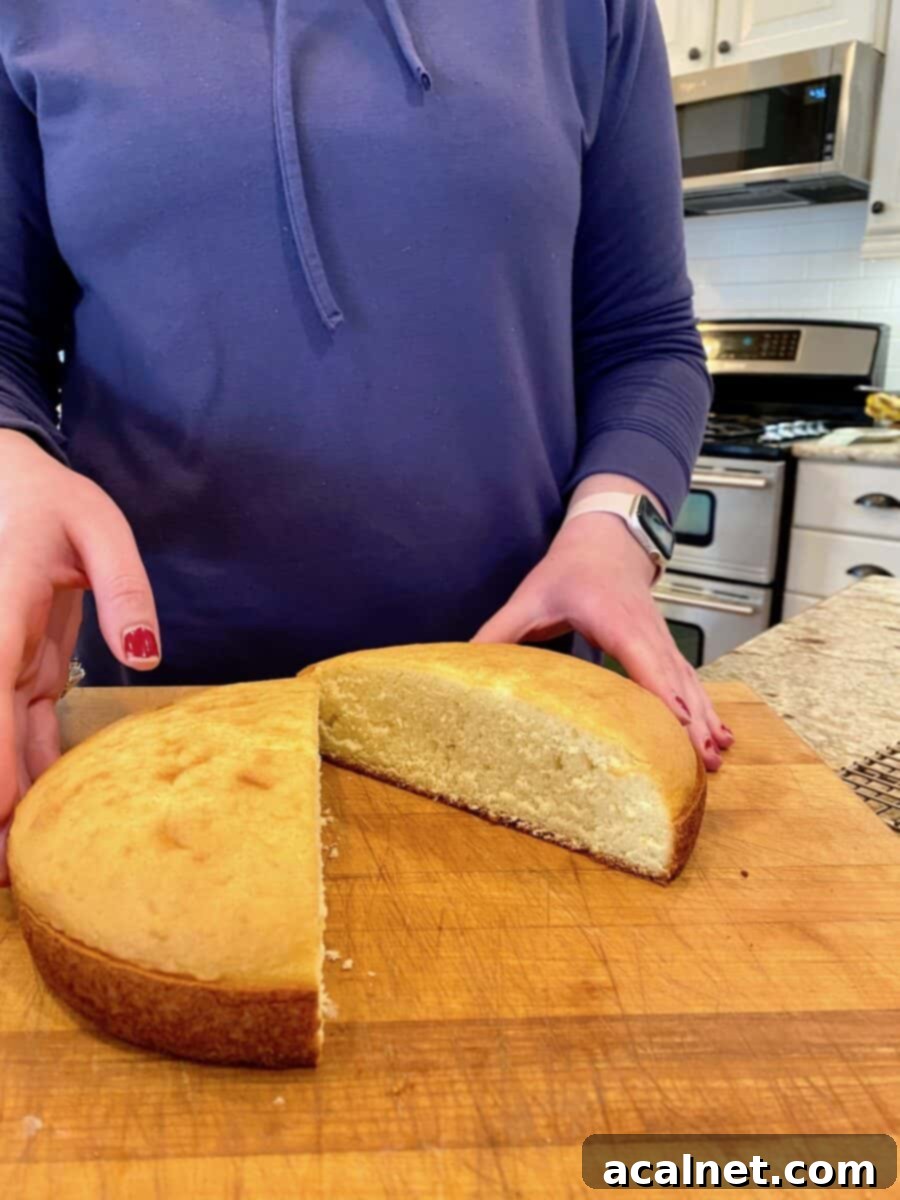
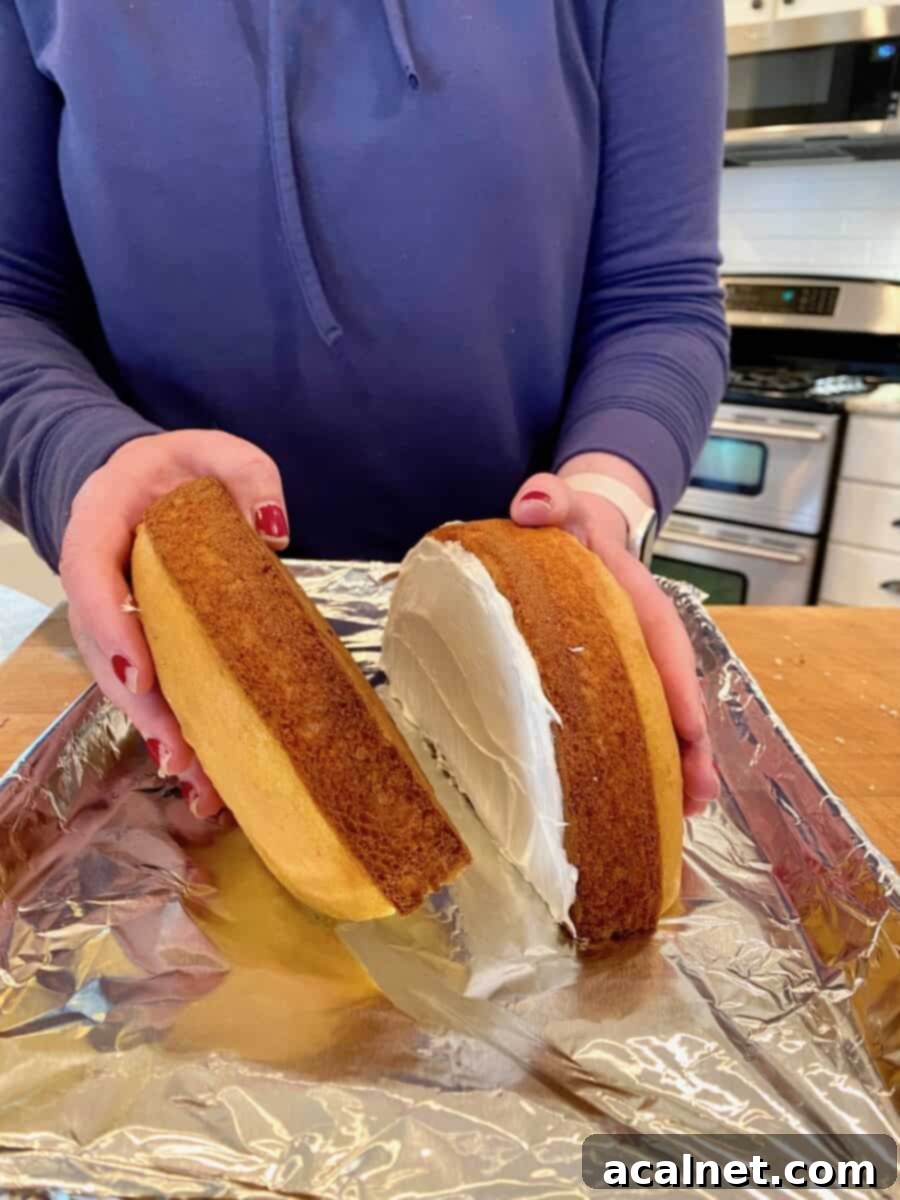
- Cut Your Cake: Take one of your completely cooled 8 or 9-inch round cakes. Using a sharp knife, carefully cut the cake exactly in half, creating two semi-circles. These will form the main body of your bunny.
- Join the Halves: Place a few generous tablespoons of your fluffy white frosting on the flat, cut side of one semi-circle. Gently press the flat side of the other semi-circle against it, much like making a sandwich. The rounded, outer edges of the original cake should now form the outer sides of your bunny’s body. The frosting acts as a delicious glue!
- Prepare for Decoration: Carefully transfer your now joined cake rounds (cut side down) onto a small cookie sheet or serving platter, ideally one covered with foil for easy cleanup and a festive presentation.
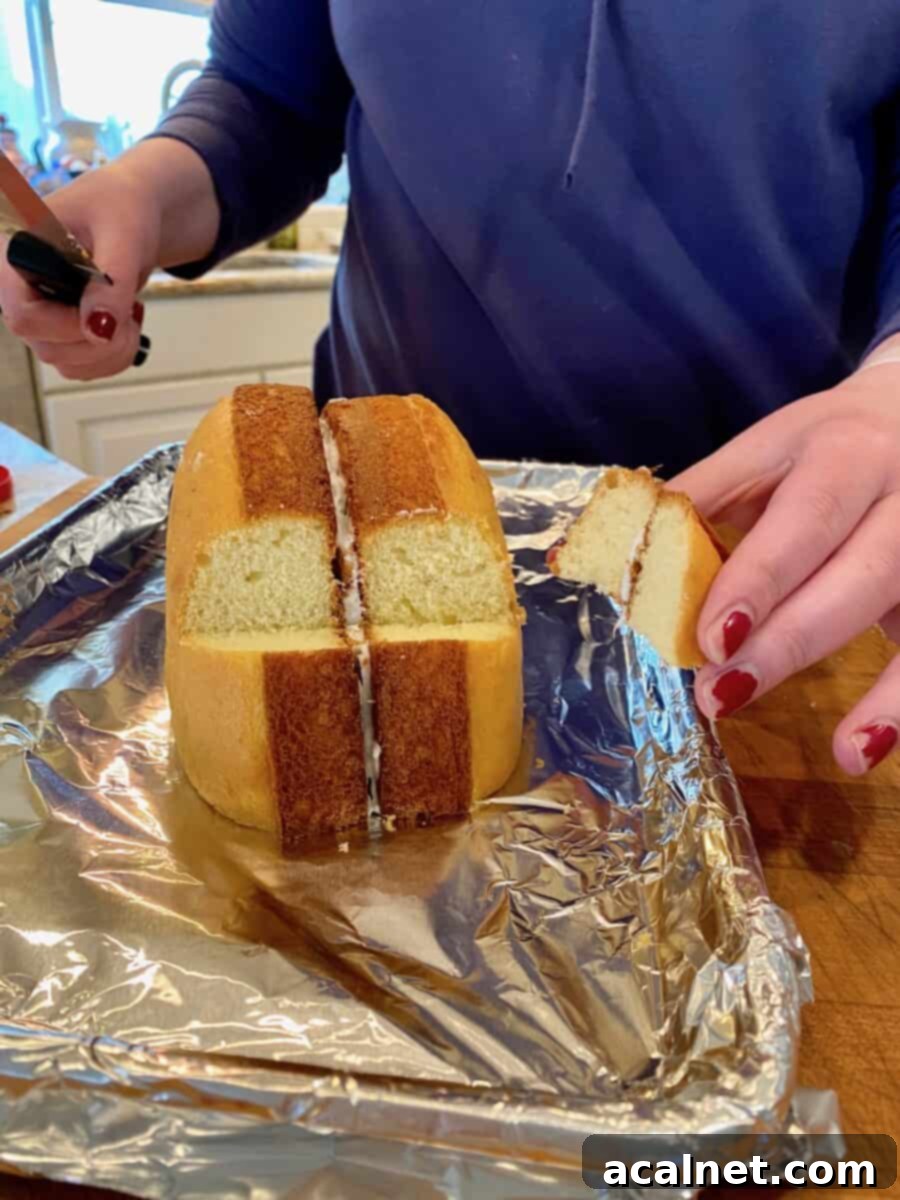
- Create the Bunny’s Head: To form the head, you’ll need to make a strategic cut. Measure about 4 inches or so from the bottom edge of one of the joined cake halves. From this point, carefully cut out a triangular wedge from the cake. This triangular piece will be repurposed.
- Add a Tail & Treat: Take one half of the triangular piece you just cut. Place it at the very bottom base of the bunny, just behind its “body” – this creates an adorable little bunny tail! The other small piece of cake? That’s the perfect baker’s treat for your kitchen helpers (or yourself!). As an alternative, a large marshmallow makes a fantastic, fluffy tail.
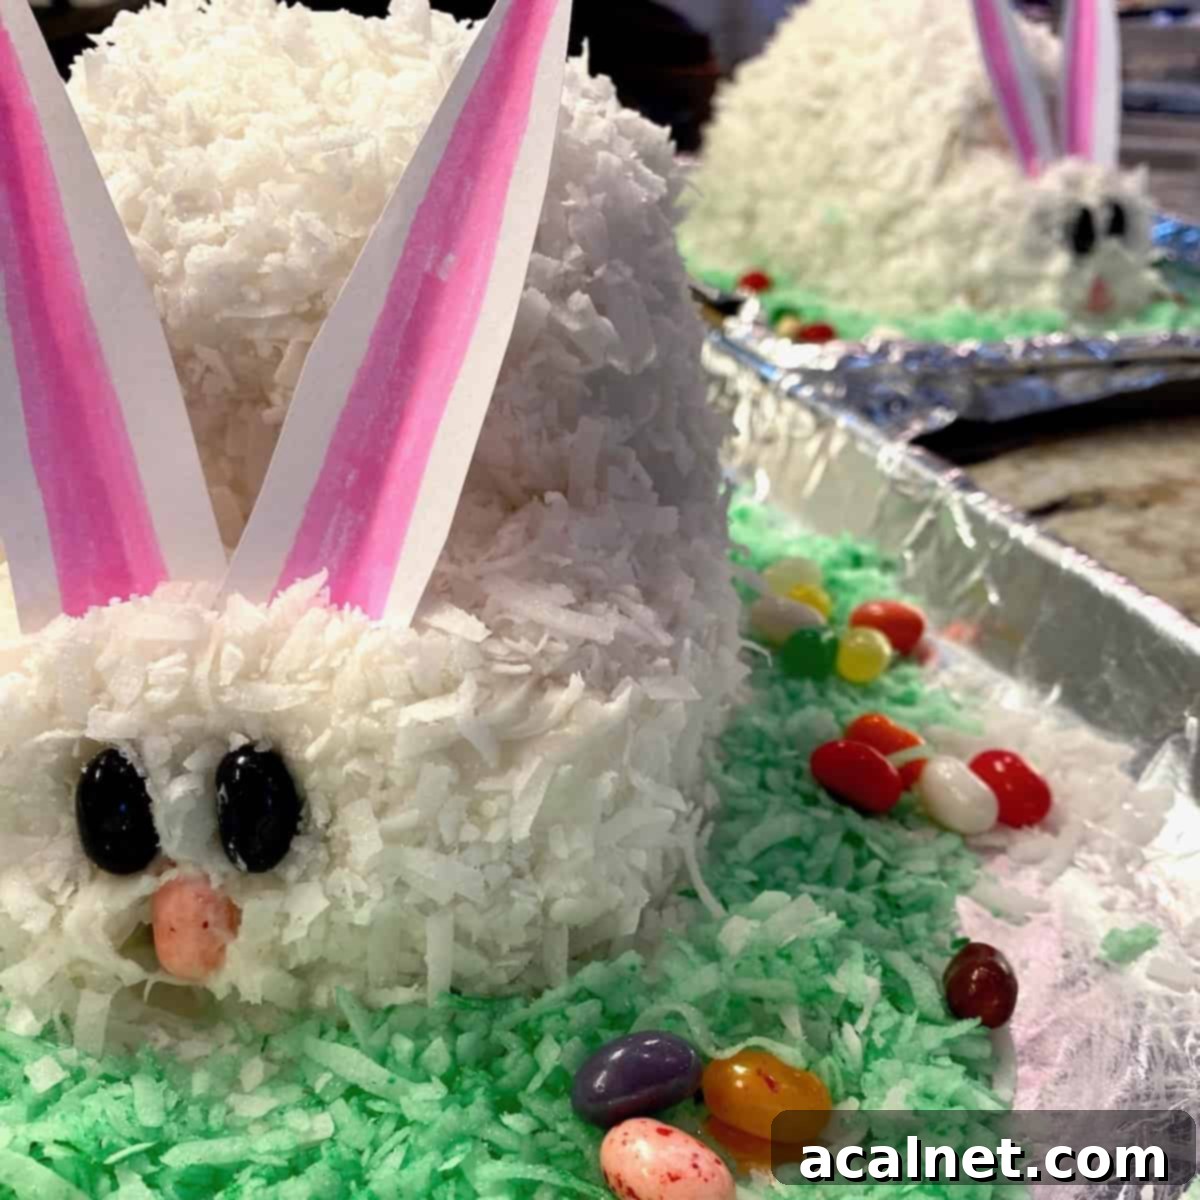
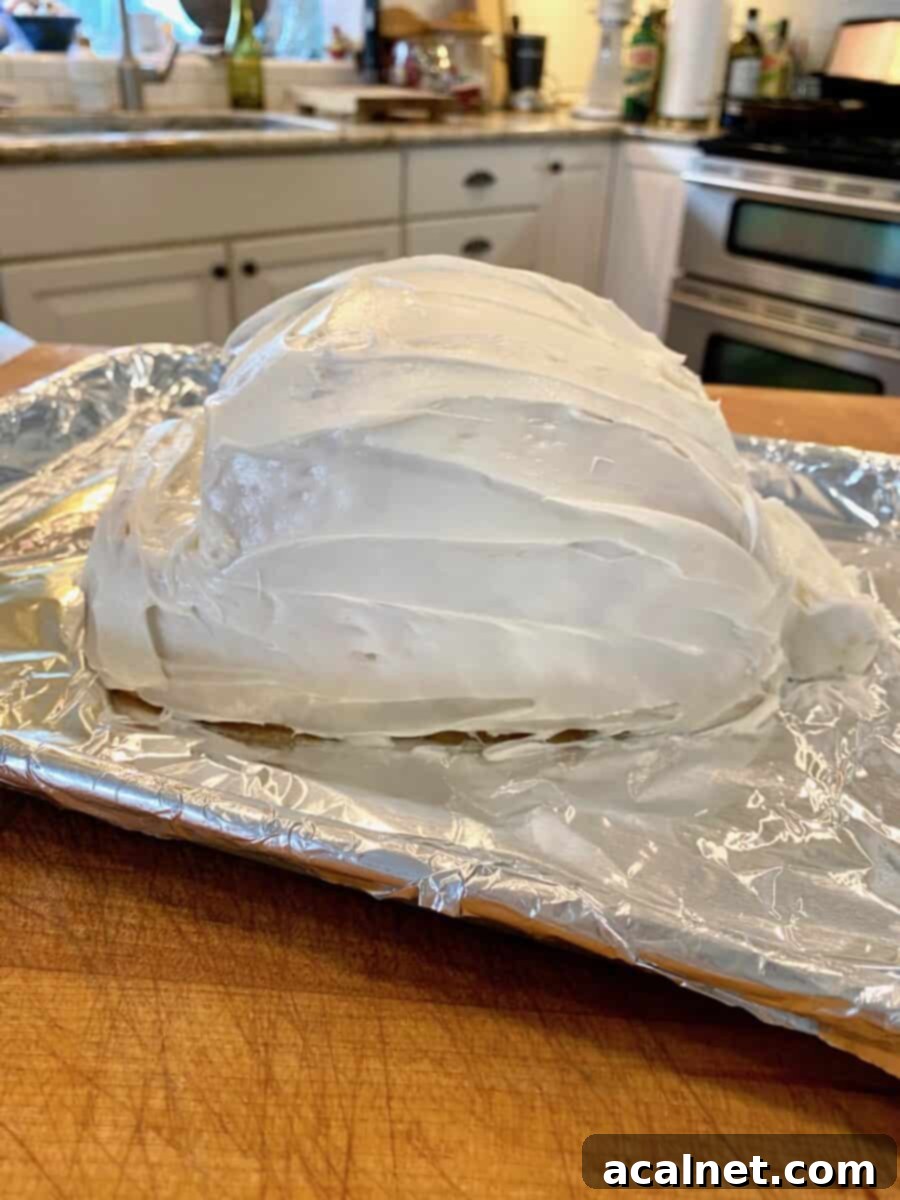
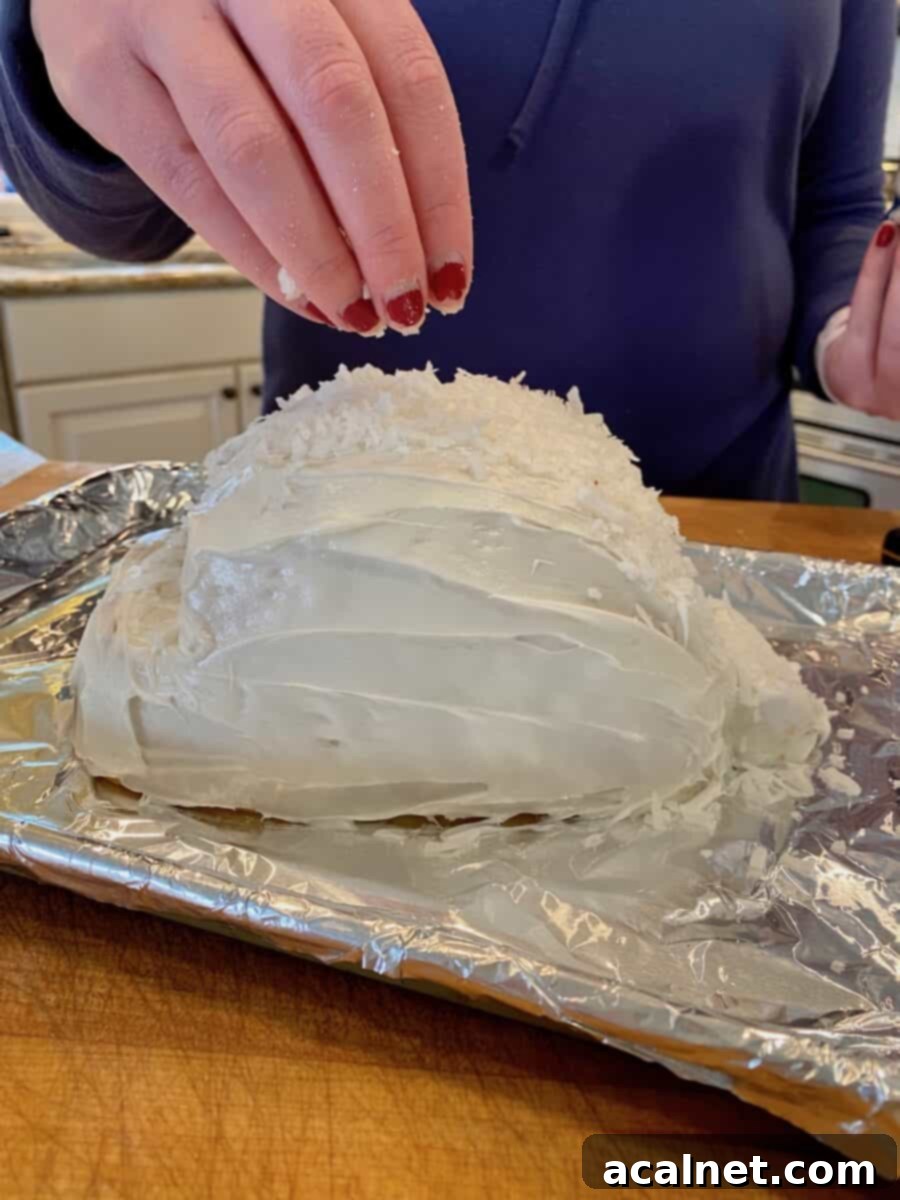
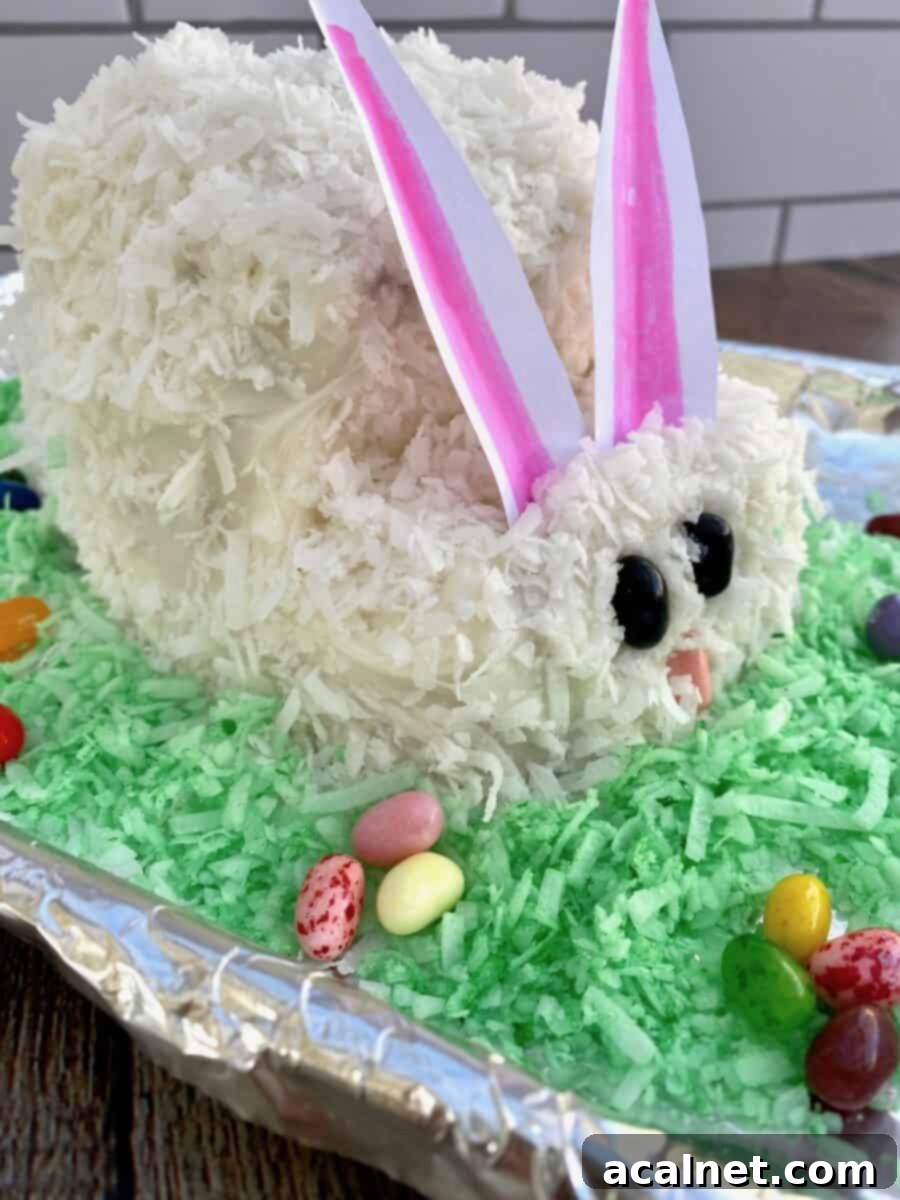
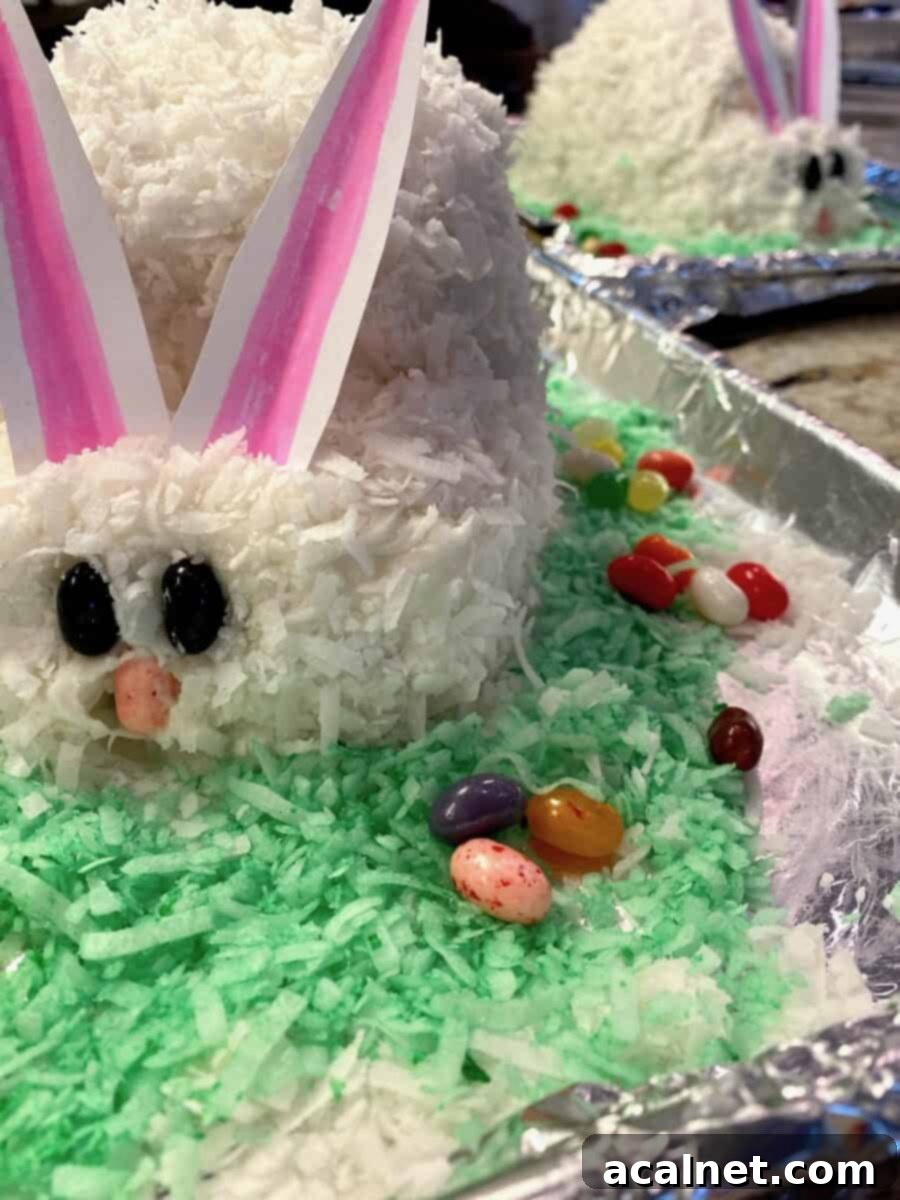
- Frost & “Fur” Your Bunny: Spoon a generous amount of the fluffy white frosting onto the entire cake, covering it completely and smoothly. Don’t be shy! Immediately after frosting, lavishly sprinkle the sweetened plain coconut flakes all over the frosted cake. Gently pat the coconut onto the sides and top to ensure it adheres well, creating that wonderfully soft, fluffy “fur” for your bunny. Each bunny cake typically uses about 1 cup of plain shredded coconut for its fur, in addition to the green coconut.
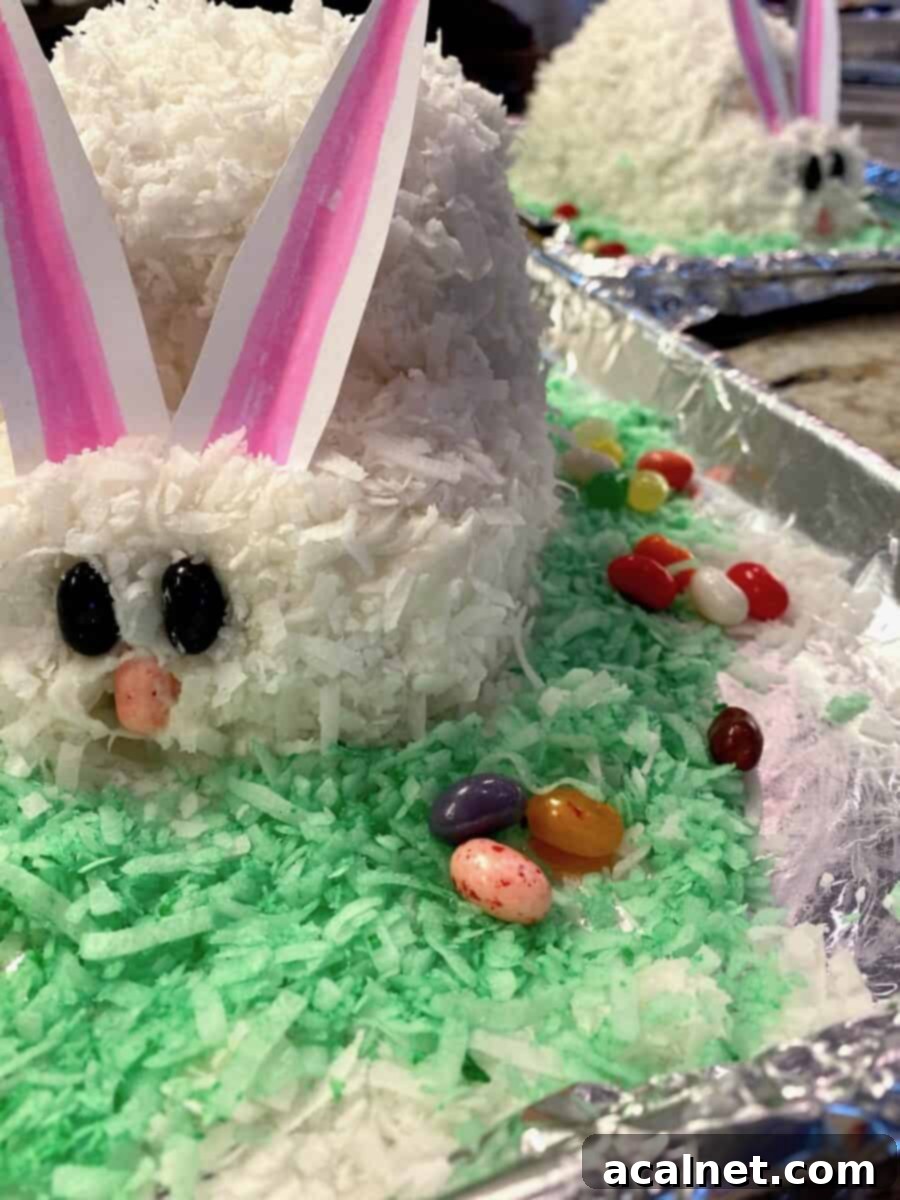
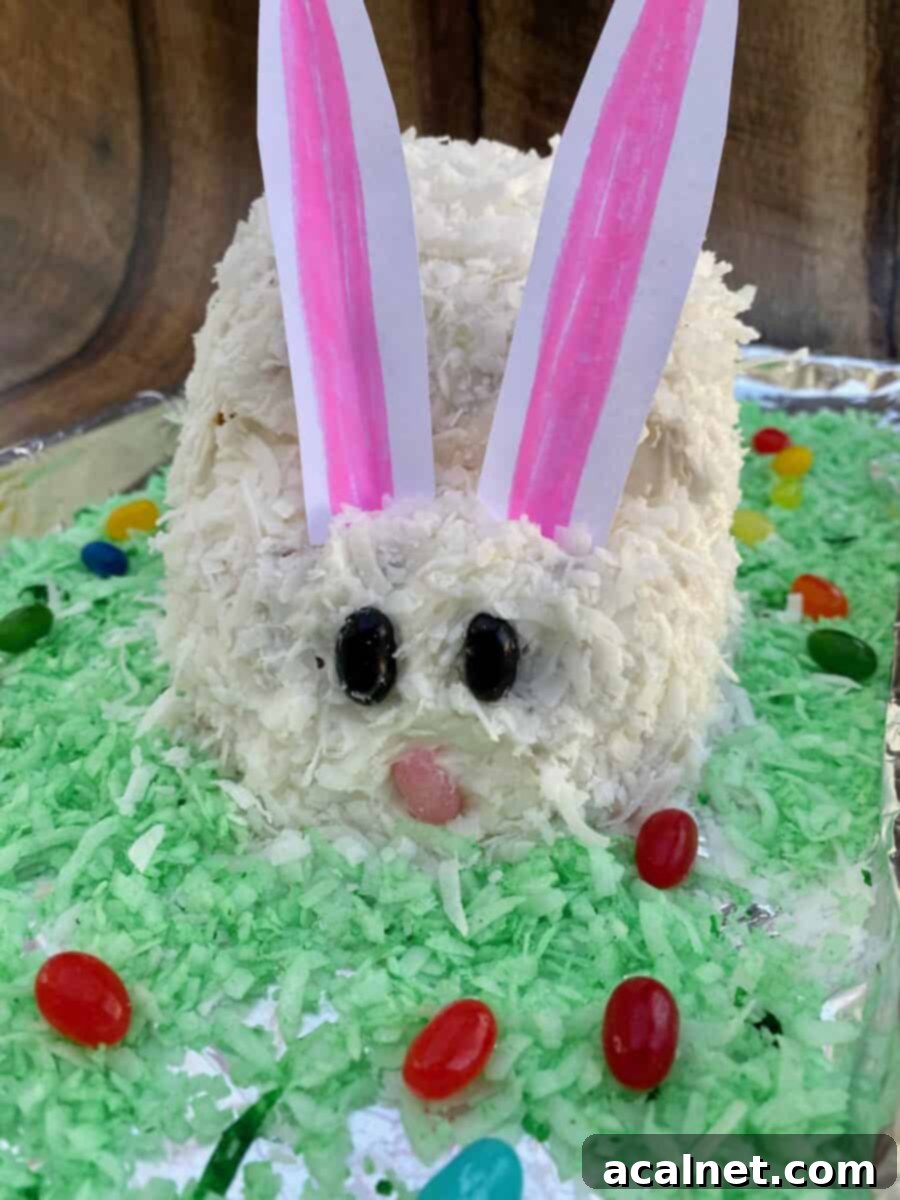
- Decorate the Scene: Now, arrange the vibrant green coconut “grass” around the base of your bunny. Finally, use your assorted jelly beans to create the bunny’s adorable face: two jelly beans for bright, cheerful eyes and one for a sweet little nose.
- Add the Ears: For the finishing touch, cut out narrow ovals with pointed tops from sturdy white paper or thin cardboard. Using a pink highlighter or crayon, draw a thick pink line down the center of each ear. Gently fold the bottom of each ear slightly to create a tab, then insert two ears into the wedge area where the head meets the body. Now, stand back and admire your magnificent creation!
Storing Your Easter Bunny Cake
To keep your Easter Bunny Cake fresh and delicious, proper storage is key. This charming dessert is truly at its best when served either on the day you make it or the day after. The flavors of the cake and frosting meld beautifully, and the coconut maintains its ideal texture within this timeframe.
If you plan to serve it within a day, you can store the cake on your kitchen counter. Gently cover it loosely with waxed paper or plastic wrap. Be very careful not to press down on the paper bunny ears, as they can easily flatten or bend! If your kitchen is particularly warm, or if you prefer a firmer frosting, storing the cake in the refrigerator before serving is also a great option. Just make sure to bring it to room temperature for about 30 minutes before cutting to ensure the cake is soft and the flavors are fully expressed.
For longer storage, while the assembled and frosted cake is best enjoyed fresh, you could bake the cake rounds in advance and freeze them. Simply wrap the cooled, unfrosted cake layers tightly in plastic wrap and then in foil. They can be frozen for up to a month. When ready to use, thaw them in the refrigerator overnight before proceeding with the assembly and decoration steps.
FAQ and Top Tips for Bunny Cake Success
If coconut isn’t a favorite or if you have allergies, there are a couple of excellent alternatives to still achieve that festive look and texture. For the green “grass” layer, you could use green Easter basket grass (the cellophane or paper kind). While not edible, it offers the same whimsical appearance and can be easily removed before serving. As for the coconut that forms the bunny’s “fur,” you have a few options: you could simply double up on the white frosting and create beautiful swirled patterns to give your bunny texture. Another idea is to use finely crushed vanilla wafers or white sprinkles for a different kind of white, fluffy coating. You could even use white candy melts, finely chopped white chocolate, or mini marshmallows for a different look and texture.
While the assembled and decorated bunny cakes are truly best enjoyed fresh – either the day you make them or the following day – you can certainly do some prep work in advance. The cake rounds can be baked a few days ahead of time. Once cooled, wrap them tightly in plastic wrap and then in aluminum foil, and store them in the freezer for up to a month. Just remember to defrost them thoroughly in the refrigerator overnight before you plan to assemble and decorate. This allows you to spread out the work and reduces stress on Easter day, ensuring your cake is fresh when served.
Jelly beans are fantastic for eyes and a nose due to their vibrant colors and classic appeal, but any small, round candy will work wonderfully! Feel free to get creative with what you have on hand or what your family prefers. Popular alternatives include M&M’s (especially the pastel Easter varieties), Skittles for a burst of color, gumdrops, or even small chocolate candies. For a more natural look, you could use small chocolate chips (pointed side down for eyes) or a small round piece of licorice for the nose. The goal is to create a charming face, so pick whatever sweet treats inspire you!
Absolutely! The beauty of starting with a store-bought cake mix is how easily adaptable it can be. Many brands now offer excellent gluten-free cake mixes that perform just like their traditional counterparts. For a vegan option, look for a vegan-friendly cake mix (many are accidentally vegan, but always check ingredients) and replace any eggs with flax eggs or applesauce, and use a plant-based milk and oil as directed. Ensure your frosting is also vegan (many store-bought fluffy white frostings are dairy-free), and use vegan jelly beans. With these simple substitutions, everyone can enjoy this delightful Easter treat!
The Sweet Inspiration Behind Our Bunny Cake
For our family, these festive Easter Bunny Cakes are far more than just a dessert; they are a cherished tradition woven into the fabric of our spring celebrations. This heartwarming custom began many years ago, introduced by our children’s beloved childhood babysitter, Margaret. She possessed a wonderful knack for turning ordinary moments into magical memories, and these bunny cakes were one of her most memorable creations.
My kids have the fondest memories of going shopping with Margaret to pick out all the ingredients, their eyes wide with excitement. They loved helping her in the kitchen, carefully assembling and decorating each bunny. Margaret always served these adorable cakes on small cookie sheets, thoughtfully wrapped in aluminum foil, and that’s precisely how we continue the tradition today, honoring her original touch. It’s a wonderful reminder of the simple joys and lasting impact of kind gestures.
I extend a heartfelt thank you to my daughter for her fantastic help in making these cakes for this very recipe, ensuring we perfectly captured Margaret’s inspiring technique and the spirit of this special tradition. While we may never know where Margaret discovered the original recipe for these charming cakes, our family is eternally grateful for her generosity and the beautiful tradition she started. Of all the Easter Bunny Cake recipes you might encounter online, this one stands out for its incredible ease and forgiving nature, making it accessible and enjoyable for everyone. It truly embodies the spirit of homemade goodness without the fuss.
More Delightful Easter Recipes
While the Easter Bunny Cake is a spectacular way to conclude your holiday feast, a complete Easter celebration calls for a variety of delicious dishes. Here are a few more recipes that beautifully complement your holiday ham and spring menu, ensuring your Easter table is brimming with flavor and tradition:
- Orange-Spiced Sweet Potato Casserole: This isn’t just for Thanksgiving! This exquisite casserole masterfully combines the natural sweetness of mashed sweet potatoes with bright orange zest, rich butter, a hint of brown sugar, and warm notes of nutmeg and cinnamon. It’s an absolutely divine pairing for your holiday ham, offering a unique and comforting side dish.
- Croissant Bread Pudding: Kick off your Easter morning celebration with this luxurious and indulgent recipe! Utilizing store-bought croissants, you can effortlessly create a sumptuous vanilla custard pudding that is both incredibly rich and wonderfully decadent. It’s a perfect brunch or dessert option that feels fancy but is surprisingly simple to make.
- Blue Cheese and Rosemary Scalloped Potatoes: For those seeking a sophisticated twist on a classic, these scalloped potatoes are a terrific departure from traditional cheddar-based recipes. The sharp, savory notes of blue cheese, beautifully balanced with aromatic rosemary, elevate humble potatoes into an elegant and unforgettable side dish that will impress your guests.
Even More Sweet Treats to Explore
- Chocolate Zucchini Cake
- Tiramisu Cake for Dessert
- Old Fashioned Sour Cream Cookies
- 15 Best Apple & Pumpkin Desserts
Rate the Recipe
Recipe
Bunny Cake Recipe
Print
Rate
Pin Recipe
Equipment
- 2, 8 or 9 inch cake pans
Ingredients
- 1 box french vanilla cake mix – make as directed including water, vegetable oil and eggs
- 2, 12 ounce tubs – fluffy white frosting, divided – one 12 ounce container of frosting per bunny cake
- 4 cups shredded sweetened coconut – divided, 2 cups per bunny cake
- 1 cup jelly beans – assorted colors, divided equally among two cakes
- 3 – 4 drops green food coloring – per cake
Instructions
Bake the Cake
- Spray two 8 or 9 inch round cake pans with Pam and line the bottoms with parchment paper, cut to fit the bottom of each pan.
Preheat the oven and prepare the cake according to the package directions and bake per the instructions on the back of the box.
Cool for 10 minutes, then remove the cake from the pans, carefully peeling off the parchment paper from the bottom after you flip each cake out. Place the cakes flat side down on a cooling rack. You will want the cakes to be thoroughly cooled before the next step.
Make Green Coconut
- Place one cup of coconut in a jar or other container with a lid and add 3-4 drops of green food coloring.
- Top with the lid and shake for about 30 seconds or until the coconut becomes green. Set aside. Note: You’ll repeat this process for each cake.
Assemble Bunny Cake
- Use a sharp knife and cut the 8 or 9 inch cake in half.
- Place a few tablespoons of frosting on the flat side of each round and place the sides together, like a sandwich. Leave the rounded side of the cake on the outer side of the bunny.
- Place the cake rounds, cut side down, on a small cookie sheet covered in foil.
- About 4″ or so from the bottom of one halved cake round, cut a triangle out of the cake.
- Place half of the triangle at the base of the bunny – this will be its bunny tail, and let any kitchen helpers enjoy the other small piece of cake. As an option you could use a large marshmallow for the tail too.
- Spoon frosting on the cake and cover completely. Immediately sprinkle the sweetened coconut on top of the frosted cake and gently pat on the sides.
Note: Each bunny cake will use about 2 cups of shredded coconut. One cup tinted green for the “grass” and 1 cup plain which will be a patted onto the frosting.
- Place the green coconut around the bunny then place jelly beans for eyes and a nose.
Make Bunny Ears
- Use study white paper or cardboard and cut four narrow ovals with pointed tops.
- Using a pink highlighter or pink crayon, and draw a thick line of pink in the center of each bunny ear. Fold the “ears” in half and place two on top of each bunny head.
Notes
Please note, the nutrition details are estimated using a food database, so they’re just a rough estimate not an exact science.
Did you try this recipe? Leave a comment below or @crinkledcookbook on Instagram, snap a photo and tag it #crinkledcookbook
