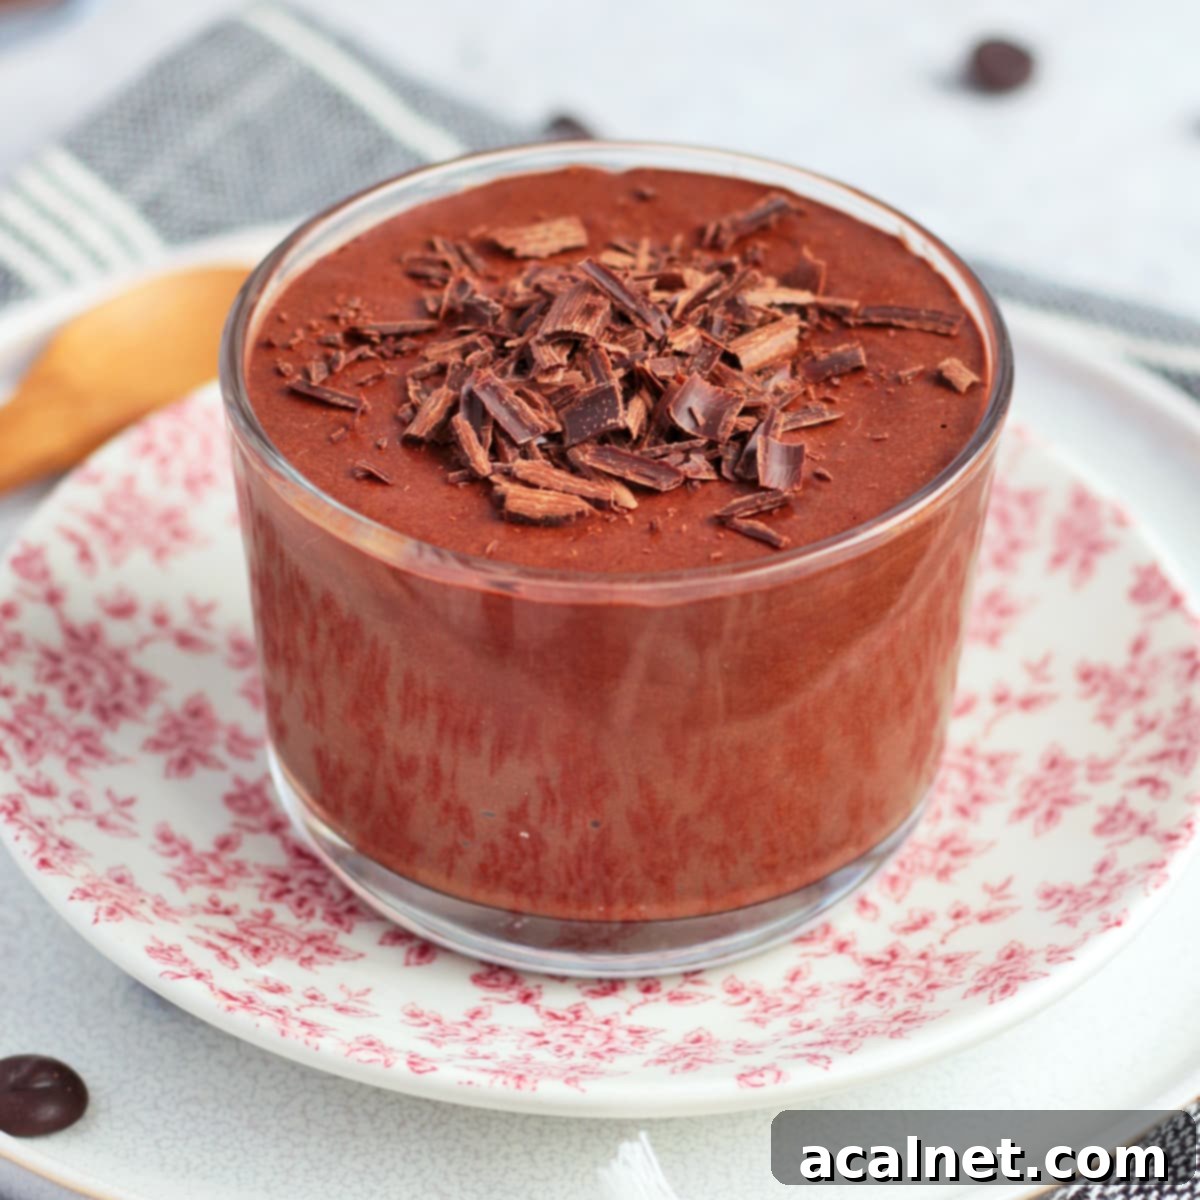
Decadent 3-Ingredient Vegan Chocolate Mousse: The Ultimate Aquafaba Recipe (Egg-Free & Dairy-Free)
Indulge in a rich, creamy, and irresistibly decadent chocolate mousse that’s entirely egg-free and dairy-free. This amazing Vegan Aquafaba Chocolate Mousse is a true chocolate lover’s dream, crafted with just three simple ingredients. Whether you’re a seasoned vegan or simply exploring plant-based desserts, this recipe promises an absolutely delicious and surprisingly easy treat.
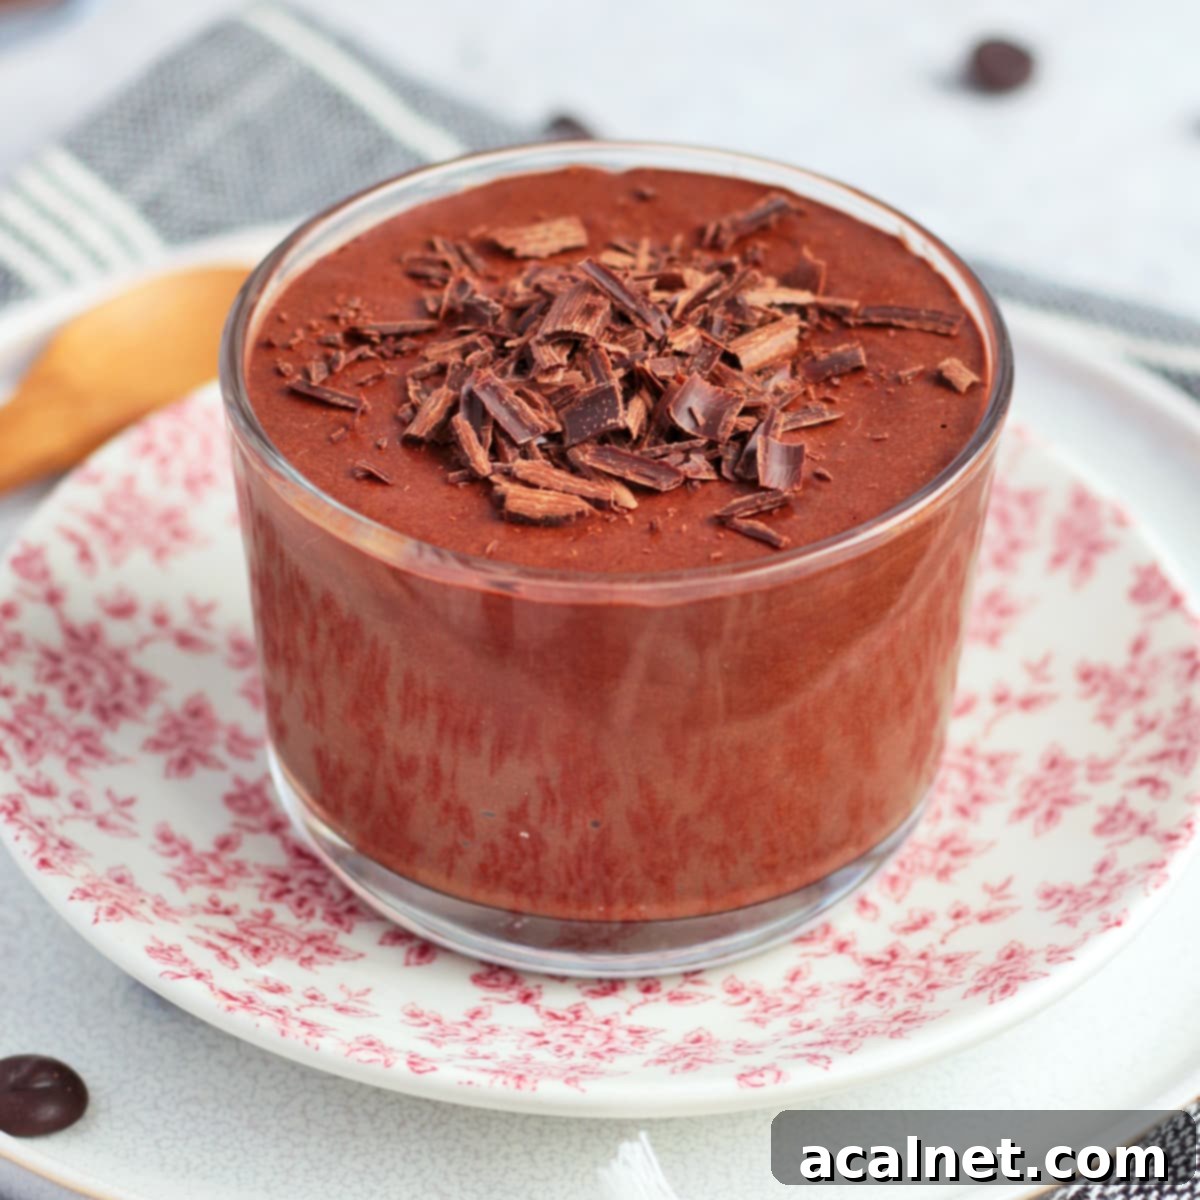
Why You’ll Adore This Vegan Aquafaba Chocolate Mousse
Prepare to be amazed! This recipe proves that you can create an incredibly rich and airy chocolate mousse without a single egg, a drop of dairy cream, or any gelatine. In fact, many find this plant-based version even easier to whip up than its traditional egg white counterpart. The secret to its simplicity and success lies in just three core ingredients, making it an accessible and impressive dessert for any occasion.
Over the years, I’ve explored numerous alternatives to egg-based mousses, often out of necessity when I’ve run out of eggs or when catering to friends and family with dietary restrictions. While I’ve cherished my Vegan Avocado Chocolate Mousse, the quest for a more “traditional” mousse texture led me to a truly remarkable discovery.
Enter the game-changing ingredient: Aquafaba. This “liquid gold” is an absolute marvel in the world of vegan baking. It flawlessly substitutes whipped egg whites, delivering that signature light and fluffy texture, yet it’s virtually tasteless when blended with rich chocolate. Aquafaba isn’t just for mousse; it’s also perfect for making light and crispy eggless meringues!
What Exactly is Aquafaba? Your Vegan Egg White Solution
Aquafaba is the starchy liquid typically found in a can of chickpeas (or other legumes) or left over from cooking dried chickpeas. Derived from the Latin words “aqua” (water) and “faba” (bean), it’s a revolutionary ingredient in vegan cuisine, celebrated for its unique ability to mimic the properties of egg whites. This makes it the ultimate ingredient substitution for desserts that rely on whipped egg whites, such as meringues, macarons, and, of course, a luxurious chocolate mousse.
The easiest and most common way to source aquafaba is by simply using the liquid drained from a Can of Chickpeas. This readily available liquid is already perfect for whipping. For those who prefer a more DIY approach, you can also make your own aquafaba by cooking dried chickpeas in water and then reducing the cooking liquid until it reaches a similar consistency to canned aquafaba.
For a detailed guide on making your own aquafaba, you can learn more here.
Explore More Aquafaba Desserts:
- Aquafaba Meringue Cookies: Light, crisp, and wonderfully sweet.
- Vegan Chocolate Mousse Tart: A rich and creamy filling in a delicate crust.
- Vegan Mini Pavlovas from The Cook’s Pyjamas: Elegant individual desserts perfect for entertaining.
- Vegan Mayonnaise: A surprisingly simple and delicious condiment using aquafaba.
- Whiskey Sours and other cocktails: Aquafaba can create that perfect foamy top!
The Magic of Just 3 (or 4) Simple Ingredients
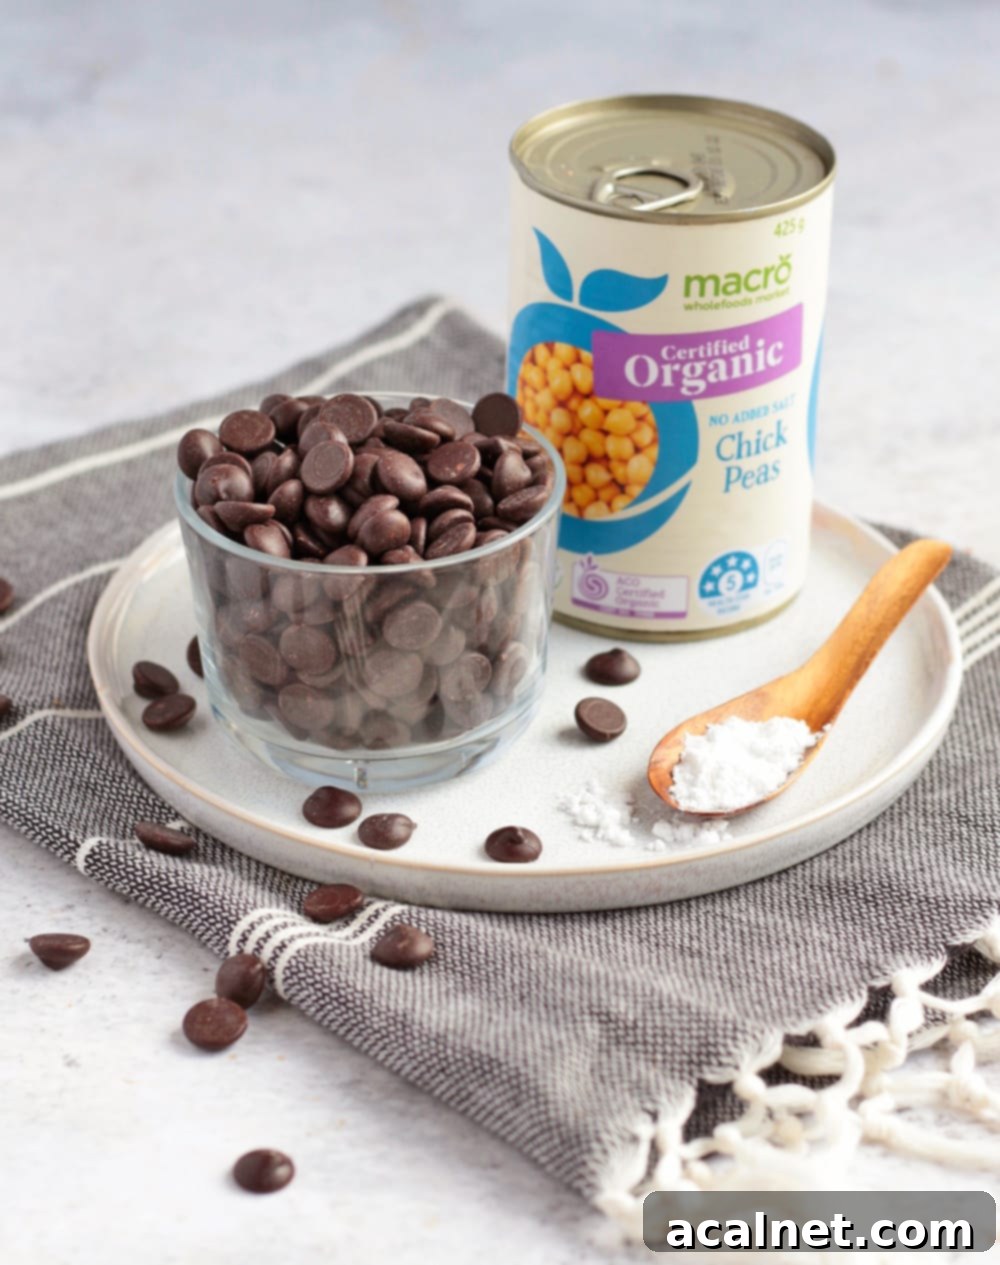
When I promised this mousse was easy, I truly meant it. You’ll only need three primary ingredients to achieve this sublime dessert, with an optional fourth to fine-tune the texture. (Scroll down to the recipe card for exact quantities and measurements.)
- A Can of Chickpeas: Specifically, we’re after the liquid inside – the aquafaba. Choose organic chickpeas if possible, and simply drain them, reserving the liquid. The chickpeas themselves can be used for another delicious recipe!
- High-Quality Dark Cooking Chocolate: For an authentic, rich chocolate flavor, this is key. Ensure it’s dairy-free/vegan if needed. I typically opt for a 70% Cacao Chocolate for an intense, slightly bitter profile. Avoid eating chocolate bars or standard chocolate chips, as they often contain stabilizers that prevent proper melting and can result in a grainy mousse. Always choose a proper cooking or baking chocolate.
- Cream of Tartar: This is a secret weapon for perfectly whipped aquafaba. It acts as a stabilizer, helping the aquafaba whip up faster and hold its stiff peaks longer. While technically optional, it’s highly recommended for best results.
- Optional: A small amount of Plant-Based Milk: Adding a touch of milk when melting the chocolate can lead to an even lighter, fluffier mousse consistency. Use any plant-based milk you prefer, such as almond, soy, or oat milk.
Smart Ingredient Substitutions
- Chickpea Aquafaba: While canned chickpea liquid is most convenient, it can absolutely be substituted with homemade aquafaba. To make your own, simply cook dried chickpeas and reduce the cooking water. I haven’t personally experimented with other legume liquids (like black bean liquid), but theoretically, they might work. For consistent results, stick with chickpea aquafaba.
- Chocolate Type: There’s no direct substitute for chocolate, but you have flexibility with the type! As mentioned, I use 70% cacao for a deep, intense, and less sweet mousse. If you prefer a sweeter dessert, you have a couple of options: you can either add a little powdered sugar (also known as icing sugar) to the aquafaba as it whips, or choose a dark chocolate with a lower cacao percentage (e.g., 45-55%). For a very sweet version, you could even use a dairy-free “milk” chocolate, just ensure it’s specifically vegan.
- Cream of Tartar: While recommended for stability and speed, cream of tartar isn’t strictly essential. If you don’t have it, a small pinch of salt, a teaspoon of lemon juice, or apple cider vinegar can also help stabilize the aquafaba foam, though whipping might take a bit longer.
Delicious Optional Additions and Flavorings
Beyond the core ingredients, there are many ways to elevate your vegan chocolate mousse and make it truly your own:
- A hint of Plant-Based Milk: As noted, a little milk with your melting chocolate can create a subtly lighter, airier mousse.
- Flavor Extracts:
- Vanilla Extract: A classic enhancer for any chocolate dessert.
- Mint Extract: For a refreshing mint chocolate chip vibe.
- Orange Extract: To create a sophisticated chocolate orange mousse.
- Almond Extract: Adds a delicate nutty undertone.
- Spices & Powders:
- Sea Salt: A pinch of flaky sea salt can beautifully balance and intensify the chocolate flavor.
- Coffee or Espresso Powder: Deepens the chocolate taste without making it taste like coffee.
- Chilli Powder or Cayenne Pepper: For a spicy kick!
- Cinnamon or Cardamom: Adds warmth and aromatic complexity.
- Toppings for Serving:
- Chocolate Shavings or Cocoa Powder: Classic and elegant.
- Fresh Berries (raspberries, strawberries): Add a burst of freshness and color.
- Vegan Whipped Cream: For an extra layer of creamy indulgence.
- Chopped Nuts (pistachios, almonds, hazelnuts): For crunch and contrasting flavor.
- Coconut Flakes or toasted coconut: For a tropical twist.
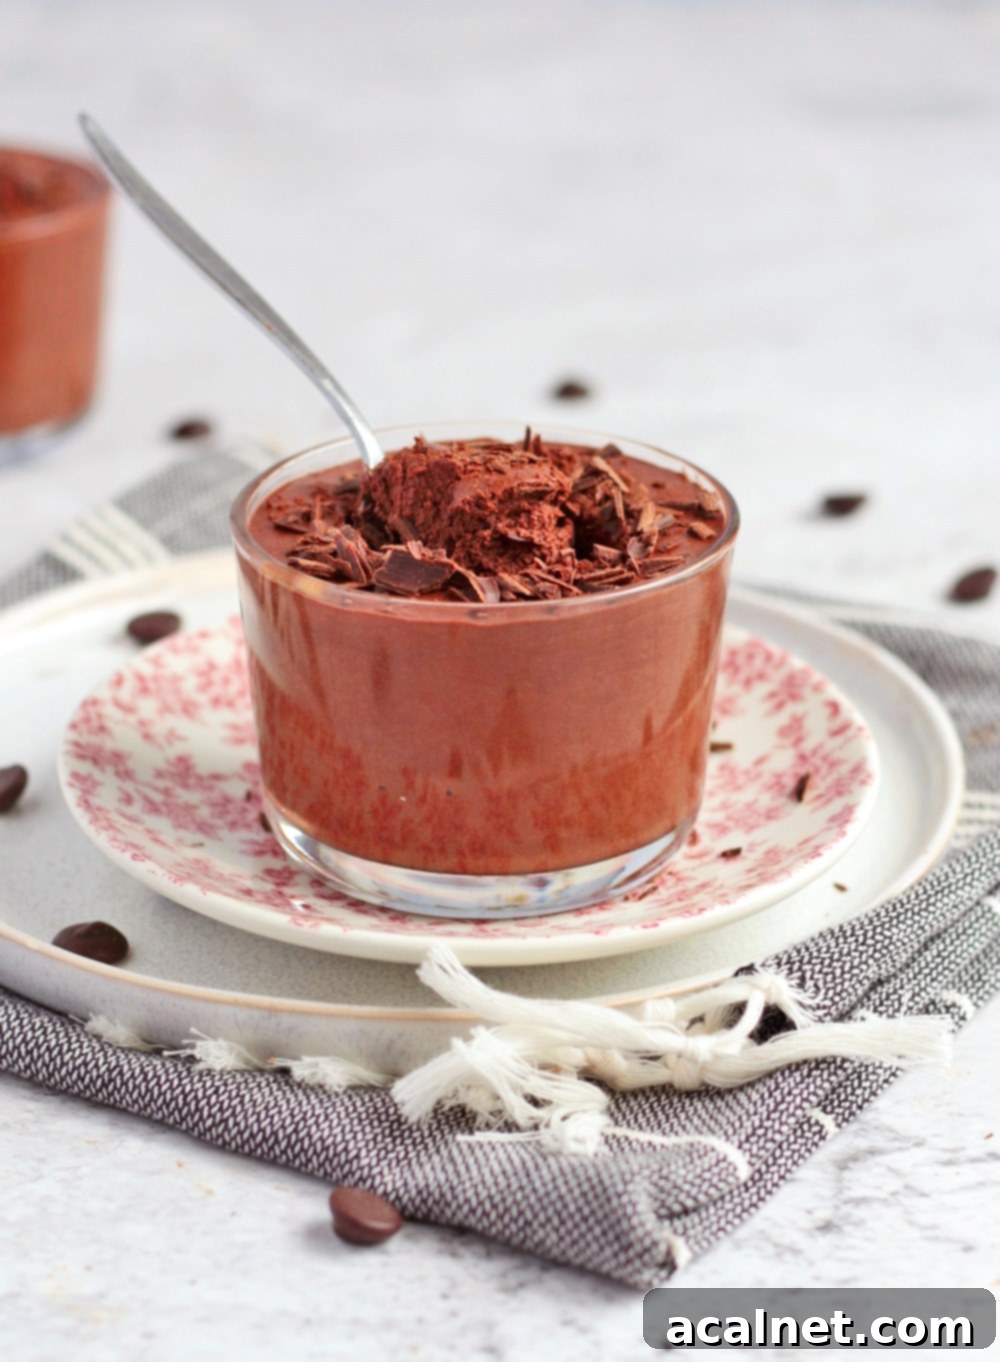
How to Make Decadent Chocolate Mousse Without Eggs (Step-by-Step)
Creating this rich and airy vegan chocolate mousse is surprisingly straightforward, broken down into three essential steps: melting the chocolate, whipping the aquafaba, and gently combining the two. It’s truly that easy!
Follow these steps to craft your perfect Eggless Chocolate Mousse:
- Melt the Chocolate: Carefully place your dark cooking chocolate (finely chopped if using a bar, or use chips/callets for convenience) in a heat-proof bowl. Set this bowl over a saucepan with a small amount of simmering water to create a double boiler (bain-marie). Ensure the bottom of the bowl does not touch the water. Stir occasionally until the chocolate is fully melted and smooth.
- Cool the Chocolate: Once melted, remove the bowl from the heat and set the chocolate aside to cool down completely to at least room temperature. This step is crucial! If the chocolate is too warm when combined with the aquafaba, it will seize and harden, making it impossible to fold properly.
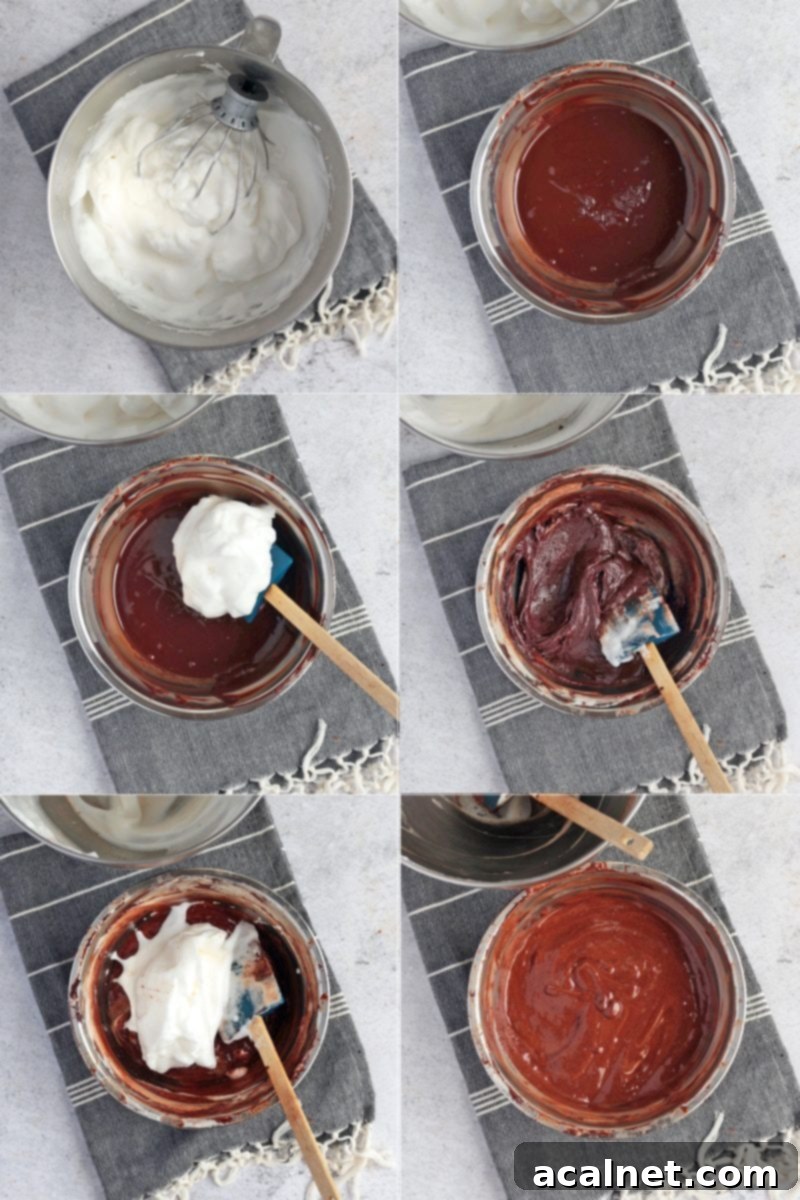
- Whip the Aquafaba: While the chocolate cools, drain your can of chickpeas, reserving only the liquid aquafaba. Pour the aquafaba into the clean, dry bowl of your stand mixer (or a large mixing bowl if using a hand mixer). Add the cream of tartar. Begin whipping on medium speed, gradually increasing to high speed. Continue whipping until the aquafaba forms stiff, glossy peaks. It should resemble firm meringue. The time this takes can vary, but typically ranges from 5 to 10 minutes.
- Temper the Chocolate with Aquafaba: Take about a quarter of your whipped aquafaba and gently fold it into the cooled, melted chocolate. At first, the mixture may seem a bit stiff or hard to combine, but keep folding gently until it loosens and becomes a smoother, more manageable consistency. This step helps to temper the chocolate and lighten it before adding the rest of the aquafaba.
- Gently Fold in Remaining Aquafaba: Add the remaining whipped aquafaba to the chocolate mixture in two or three additions. With each addition, carefully fold it in using a spatula, employing a gentle lifting motion to incorporate the ingredients without deflating the air from the aquafaba. Stop folding as soon as the mixture looks combined. It’s normal for the mousse to lose some volume at this stage and appear a bit runny – don’t worry, it will set beautifully in the fridge.
- Chill to Perfection: Pour the mousse into individual serving cups or a large elegant serving bowl, depending on your preference. Cover tightly with plastic wrap to prevent it from absorbing any fridge odors. Place the mousse in the refrigerator to chill and set for at least 1 to 2 hours, or preferably longer, until firm.
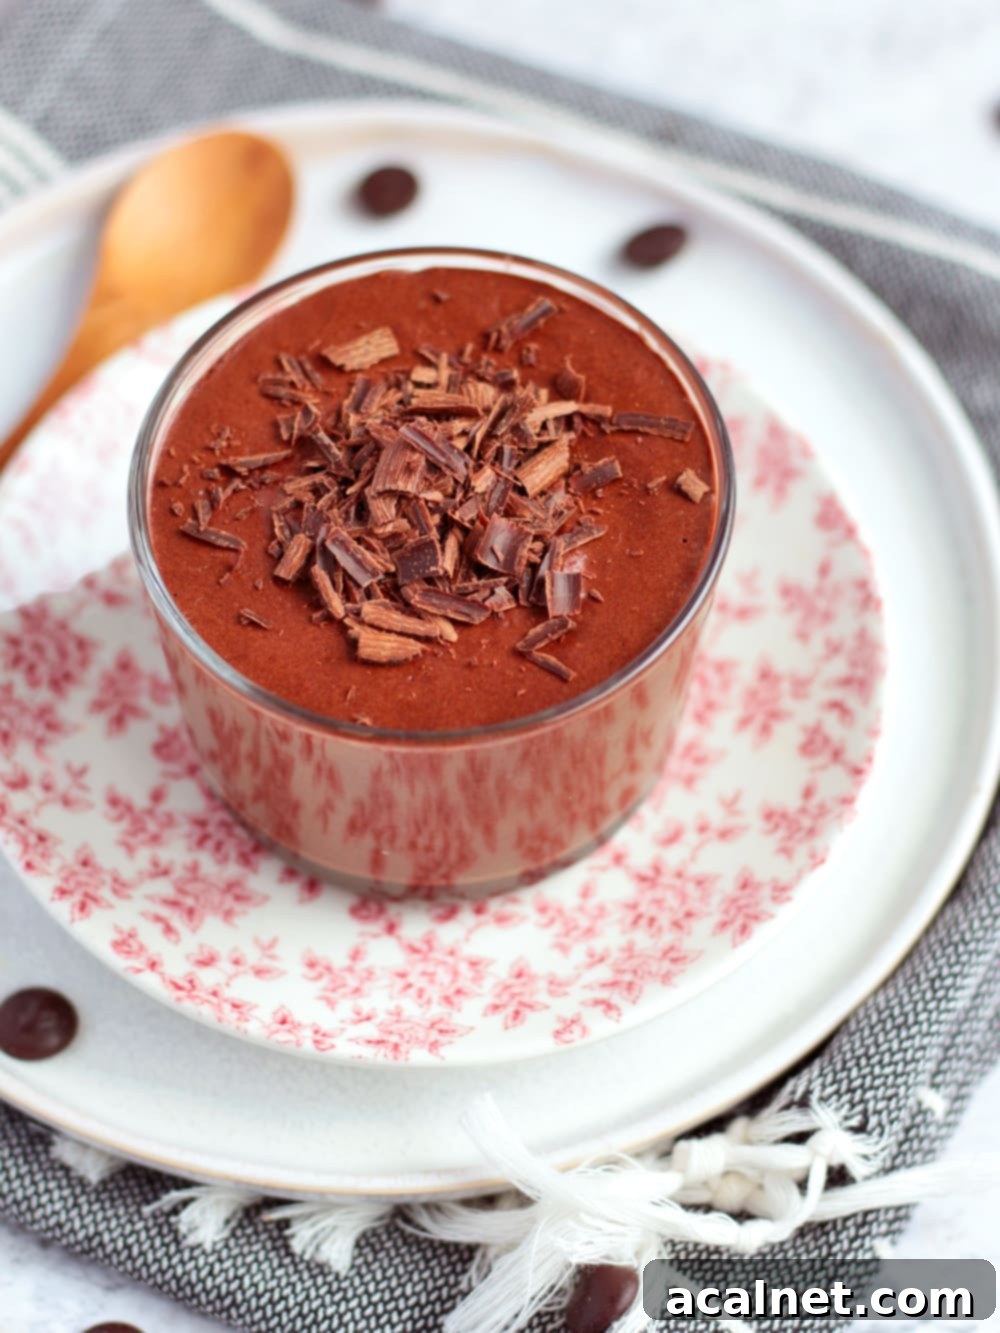
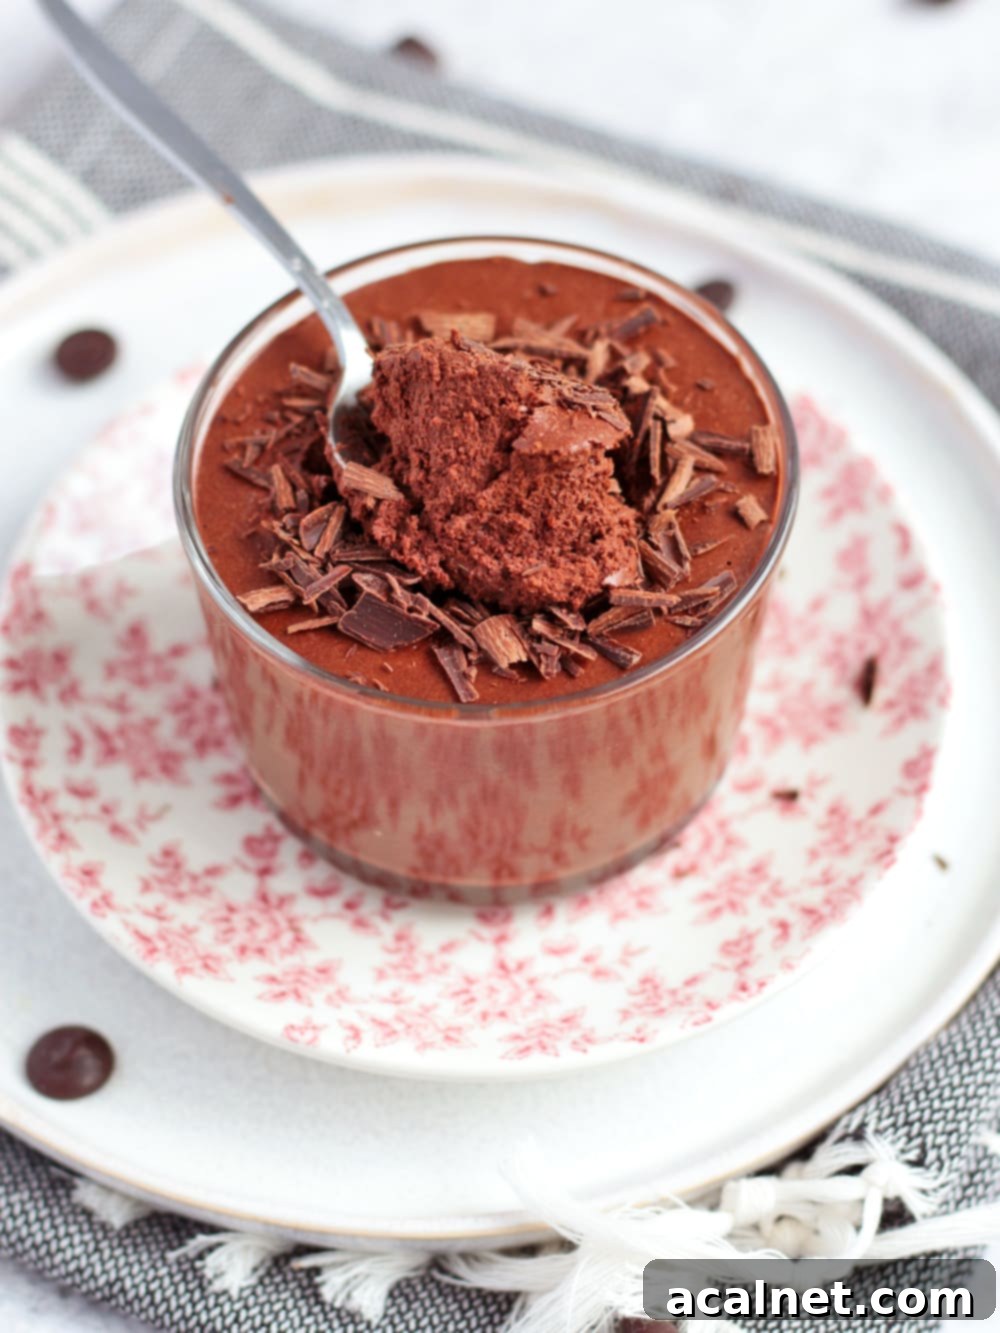
- Optional Finishing Touch: Before serving, elevate your dessert with desired toppings such as delicate chocolate shavings, a sprinkle of cocoa powder, fresh berries, a dollop of vegan whipped cream, or crunchy chopped nuts.
(*) Note on whipping time: The duration required to achieve stiff peaks with aquafaba can vary significantly based on factors like the brand of chickpeas, your mixer’s power, and whether you use cream of tartar. For me, it takes around 5 minutes, but others might find it takes up to double that time. The key is persistence – keep whipping until you reach the desired consistency. Rest assured, you cannot over-beat aquafaba!
If you’re on the hunt for more incredible Eggless Recipes, don’t miss my curated list of 25 Amazing Eggless Cakes & Desserts!
Expert Tips for the Perfect Vegan Aquafaba Chocolate Mousse
Achieving a flawless, restaurant-quality vegan chocolate mousse is easy when you keep a few key tips in mind. These insights will help you navigate common pitfalls and perfect your dessert:
- Prepare Your Chocolate Carefully: If you’re using a block of cooking chocolate, always chop it thinly before melting. This not only accelerates the melting process but also ensures a more even melt, significantly reducing the risk of scorching or seizing the chocolate. Alternatively, opt for high-quality chocolate chips or callets for ultimate convenience.
- Cool Chocolate is Crucial: Never add warm melted chocolate to your whipped aquafaba. It must cool down to at least room temperature. If the chocolate is too hot, it will instantly deflate the delicate aquafaba foam and cause the chocolate to seize or harden, making it nearly impossible to achieve a smooth, airy mousse.
- Adjust Mousse Density: This recipe naturally yields a mousse that’s on the denser, more intensely chocolaty side – a truly satisfying richness. If you prefer a lighter, airier texture, simply incorporate a tablespoon or two of plant-based milk into your chocolate as it melts. This addition creates a slightly less viscous chocolate mixture, allowing for better incorporation with the aquafaba and a fluffier final product.
- Sweetness is Personal: Our base recipe, using 70% cacao chocolate and no added sugar, results in a deeply intense, sophisticated chocolate flavor. If your palate prefers a sweeter dessert, you have excellent options:
- Add Powdered Sugar to Aquafaba: While whipping the aquafaba, once it reaches medium peaks, gradually sift in a little powdered (icing) sugar, a tablespoon at a time, until it reaches your desired sweetness. This integrates the sugar smoothly without deflating the foam.
- Choose Sweeter Chocolate: Opt for a dark chocolate with a lower cacao percentage (e.g., 45-55%) for a naturally sweeter profile. For an even sweeter, milder chocolate experience, select a good quality dairy-free “milk” chocolate.
- Folding Technique Matters: The order and method of combining are important. While some recipes suggest pouring melted chocolate over whipped aquafaba, I find it much easier and more effective to add the whipped aquafaba to the chocolate. Start by folding in just a quarter of the aquafaba first. This initial addition helps to lighten the dense chocolate and creates a more consistent base, making it significantly easier to gently fold in the remaining aquafaba without losing too much air and volume.
- Don’t Overmix: When folding the aquafaba into the chocolate, resist the urge to overmix. Stop as soon as the mixture appears homogenous. Over-folding can deflate the precious air bubbles from the aquafaba, resulting in a less airy and denser mousse. A slightly runny consistency before chilling is perfectly normal and desired, as it allows the mousse to settle into a creamy, smooth texture in the fridge.
Recipe FAQs: Your Vegan Chocolate Mousse Questions Answered
The way you melt chocolate is paramount to the mousse’s texture. Chocolate is delicate and can easily burn or seize, leading to a grainy result. The best method is a “Bain-Marie” or “Double Boiler.” To do this, fill a small saucepan with a couple of inches of water and bring it to a gentle simmer over low heat. Place your chopped cooking chocolate (or chips/callets) in a heat-proof bowl that fits snugly over the saucepan, ensuring the bottom of the bowl does not touch the simmering water. The steam from the water will gently and slowly melt the chocolate. Stir occasionally until it’s completely smooth and lump-free, then remove from heat.
This aquafaba chocolate mousse should always be stored in the refrigerator. To maintain its freshness and prevent it from absorbing any unwanted odors from your fridge, make sure to cover the individual cups or the main serving bowl tightly with plastic wrap or an airtight lid. This also helps prevent the top layer from drying out.
Since this mousse contains no eggs or dairy cream, it’s quite stable. I recommend enjoying it within 1 to 2 days for the best taste and texture, as the top can start to dry out after that. However, it will safely last for up to 3-4 days in the fridge when properly covered. Yes, it’s an excellent make-ahead dessert! You can prepare it up to 24 hours in advance and keep it chilled in the refrigerator until you’re ready to serve. This makes it perfect for dinner parties or when you want a delicious treat ready to go.
Several factors can affect aquafaba’s whipping ability. Ensure your mixing bowl and whisk attachments are immaculately clean and grease-free, as even a tiny speck of oil can prevent proper aeration. Using cold aquafaba straight from the fridge usually works best. While cream of tartar helps significantly, sometimes it just needs more time. Keep whipping, gradually increasing speed. If after 10-15 minutes it’s still not firm, it might be an issue with the specific can of chickpeas; some brands have more potent aquafaba than others. Try reducing the aquafaba slightly over low heat to concentrate it before chilling and whipping again.
For a genuinely vegan mousse, you would need to use a high-quality dairy-free white or milk chocolate. The principle remains the same: ensure it’s a “cooking” or “baking” chocolate for optimal melting and setting properties. Keep in mind that white and milk chocolates are typically much sweeter than dark chocolate, so you may not need to add any extra sugar to the aquafaba.
Discover More Delicious Vegan Desserts:
- Easy Vegan Lemon Tart: Bright, zesty, and refreshing.
- Vegan Sticky Date Puddings: Warm, comforting, and utterly delightful.
- Vegan Carrot Cake Muffins: Moist, spiced, and perfect for breakfast or a snack.
- Coconut Panna Cotta with Strawberry Compote: A creamy, elegant, and fruity dessert.
- Gluten-Free and Vegan Banana Bread: A wholesome and satisfying bake.
- Chocolate Peanut Butter Balls: No-bake, fudgy, and addictive.
- 3 Ingredients Peanut Butter Banana Oatmeal Cookies: Simple, healthy, and quick.
- Almond Flour Peanut Butter Cookies: Chewy, nutty, and naturally gluten-free.
Made this recipe?
We’d love to hear from you! Leave a comment below and share your delicious creation on Instagram, tagging us @a.baking.journey!
Recipe Card
Vegan Chocolate Mousse with Aquafaba
Print Recipe
Ingredients
- 200 gr (7 oz) Dark Cooking Chocolate, Dairy-Free/Vegan, high-quality recommended
- 45 ml (3 tbsp) Plant Based Milk, (Optional, for a lighter mousse)
- 180 ml (3/4 cup) Aquafaba, (liquid from one 400gr / 14 oz Can of Chickpeas)
- 1/4 tsp Cream of Tartar (*)
Instructions
- Place the finely chopped Dark Cooking Chocolate (or chocolate chips/callets) in a heat-proof bowl. Melt it slowly over a double boiler (1) until completely smooth.
- Optional: For a lighter mousse texture, add the Plant-Based Milk to the chocolate before melting.
- Once fully melted, remove from heat and set aside to cool completely to room temperature – this usually takes about 20 minutes. Do not skip this step!
- Drain the can of chickpeas, reserving only the liquid aquafaba. Pour the aquafaba into a clean, dry stand mixer bowl (or use a large mixing bowl with a hand mixer). Add the Cream of Tartar. Begin whipping on medium speed, gradually increasing to high speed, until you achieve stiff, glossy peaks (2).
- Add about 1/4 of the whipped Aquafaba to the cooled melted Chocolate. Gently fold it in with a spatula until it is mostly combined and the chocolate has loosened (3). This helps temper the chocolate.
- Add the remaining aquafaba in 2 or 3 increments, carefully folding each time until just combined. Be gentle to maintain as much air as possible (4). Stop folding as soon as no streaks of aquafaba remain.
- Pour the mousse into individual serving cups or a large bowl. Cover tightly with plastic wrap and refrigerate for at least 1 to 2 hours, or until fully set.
- Optional: Before serving, garnish with chocolate shavings, fresh berries, or a dollop of vegan whipped cream for an elegant finish.
Would you like to save this recipe?
We’ll email this post to you, so you can come back to it later!
Notes
Ingredient Notes:
- Chocolate: For the best texture and flavor, it’s essential to use proper Cooking Chocolate, whether in bar form or as callets. Avoid standard eating chocolate bars or most chocolate chips, as their stabilizers can prevent proper melting and result in a grainy, less desirable mousse texture.
- (*) Cream of Tartar: While optional, Cream of Tartar is highly recommended as it significantly helps stabilize the whipped aquafaba, making it whip much faster and hold its peaks better. If you don’t have it, a small pinch of salt or a teaspoon of lemon juice or apple cider vinegar can serve as alternatives to help with stabilization.
Instruction Notes:
- Double-Boiler (Bain-Marie) technique: To melt chocolate without burning, place a small amount of water in a saucepan and bring it to a low simmer. Put the finely chopped chocolate or callets in a heat-proof mixing bowl that sits securely over the saucepan, ensuring the bottom of the bowl does not touch the water. Allow the gentle steam to melt the chocolate slowly, stirring occasionally until smooth.
- Whipping Aquafaba Time: The time it takes for aquafaba to reach stiff peaks can vary. With Cream of Tartar, it often takes around 5 minutes. Without it, or depending on the chickpea brand and mixer, it could take up to twice as long. Continue whipping until firm, glossy peaks form – you cannot over-beat aquafaba!
- Combining Chocolate and Aquafaba: The initial folding of a small portion of aquafaba into the chocolate might feel a bit stiff, but persevere gently until it combines and loosens. If the chocolate hardens or splits quickly (seizes), it indicates the chocolate was likely too warm when combined.
- Mousse Consistency Post-Folding: It is entirely normal for the mousse to lose some volume after the aquafaba is folded in. It will also appear quite runny at this stage, which is desired. This runny consistency allows you to easily pour the mousse into serving cups, and it will firm up beautifully as it chills in the refrigerator.
Nutrition (per serving)
