Irresistible Oat Flour Chocolate Chip Cookies: Your New Go-To Gluten-Free & Wheat-Free Treat
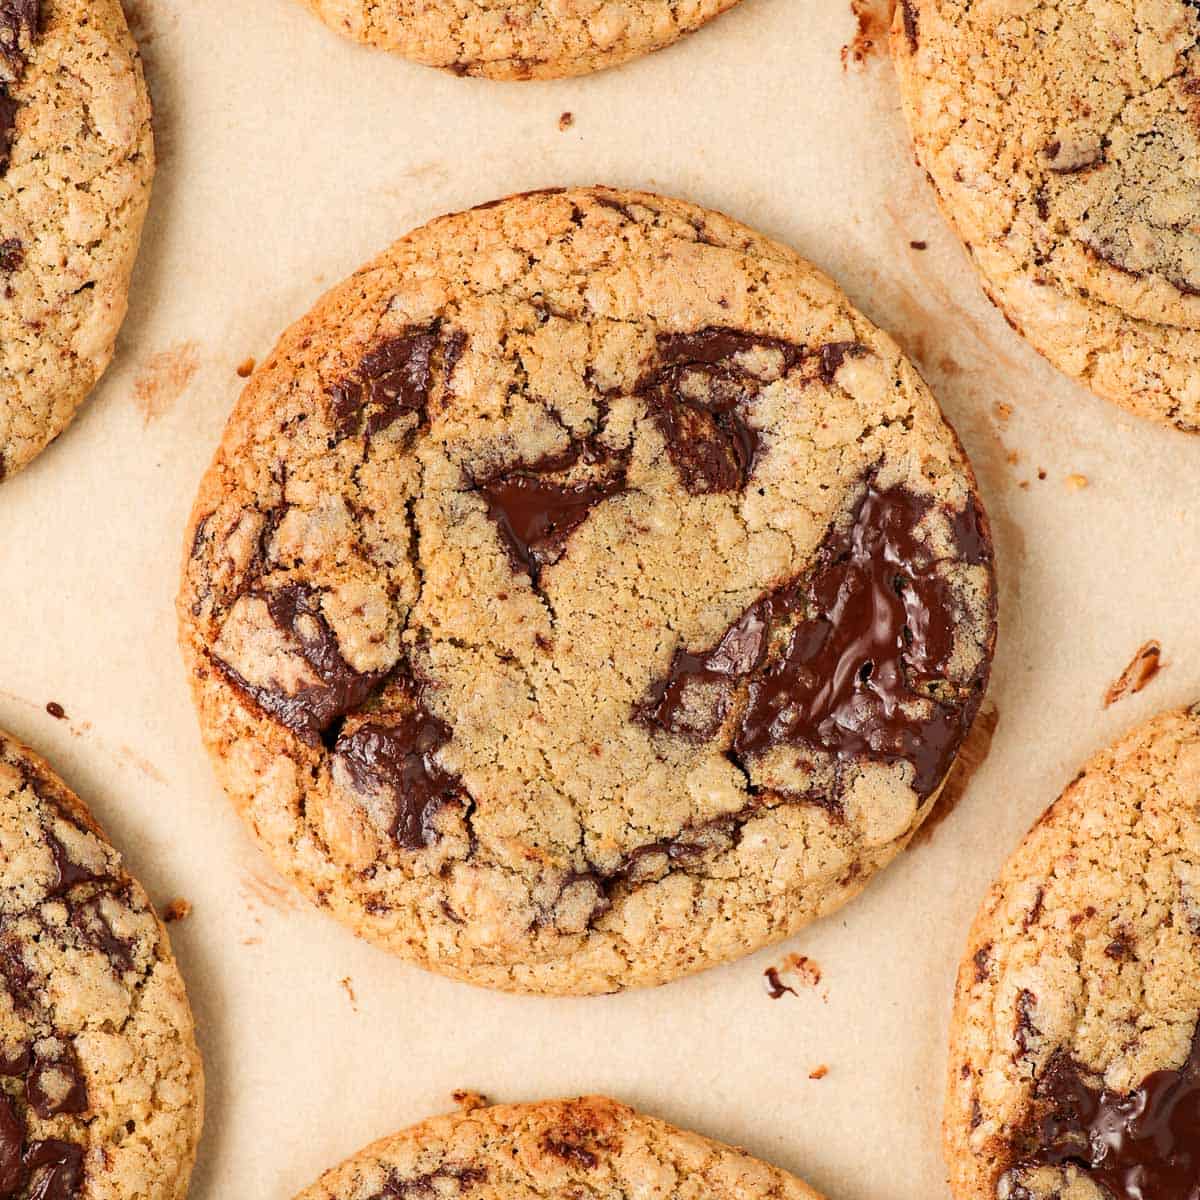
Get ready to fall in love with these Oat Flour Chocolate Chip Cookies! They are incredibly delicious, surprisingly quick, and remarkably easy to whip up, requiring minimal chilling time. What sets them apart? The unique addition of wholesome oat flour imparts a delightful earthy depth and a wonderfully chewy texture to the classic chocolate chip cookie, while also making them completely flourless and wheat-free. If you’re seeking a simple, yet utterly satisfying cookie recipe that caters to various dietary preferences without compromising on flavor, your search ends here. These cookies promise a golden-brown exterior, perfectly soft and gooey centers, and generous pockets of melted chocolate – a true baking journey for your tastebuds!
[feast_advanced_jump_to]
Why You’ll Adore These Oat Flour Chocolate Chip Cookies
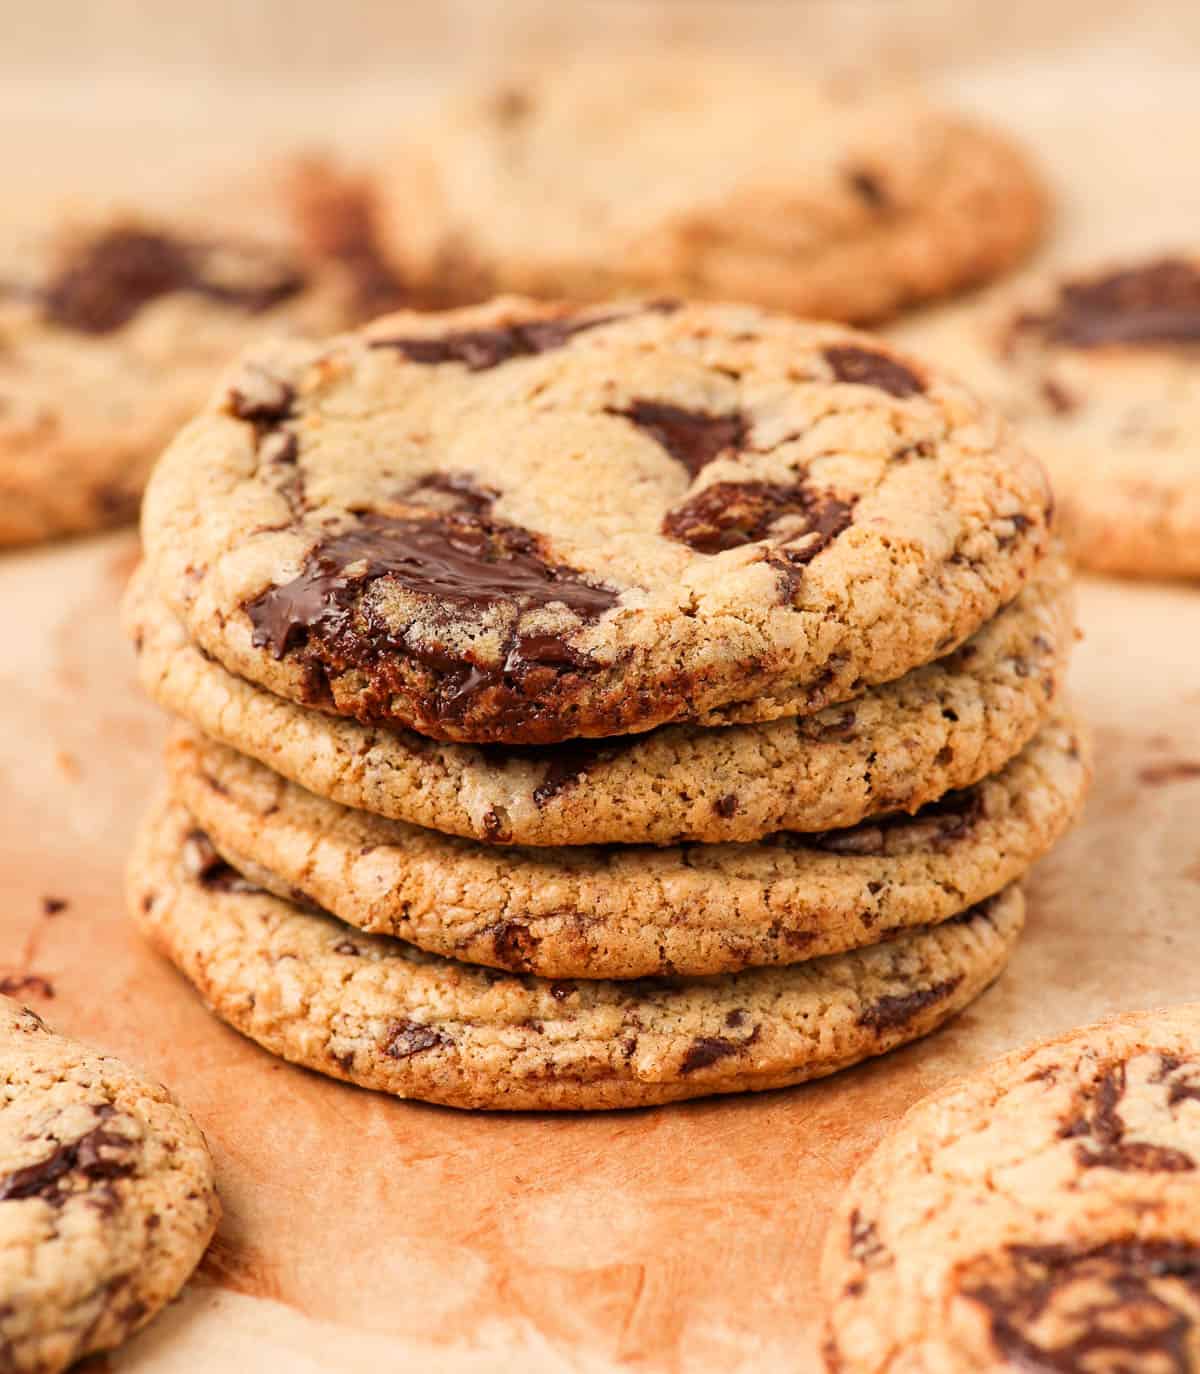
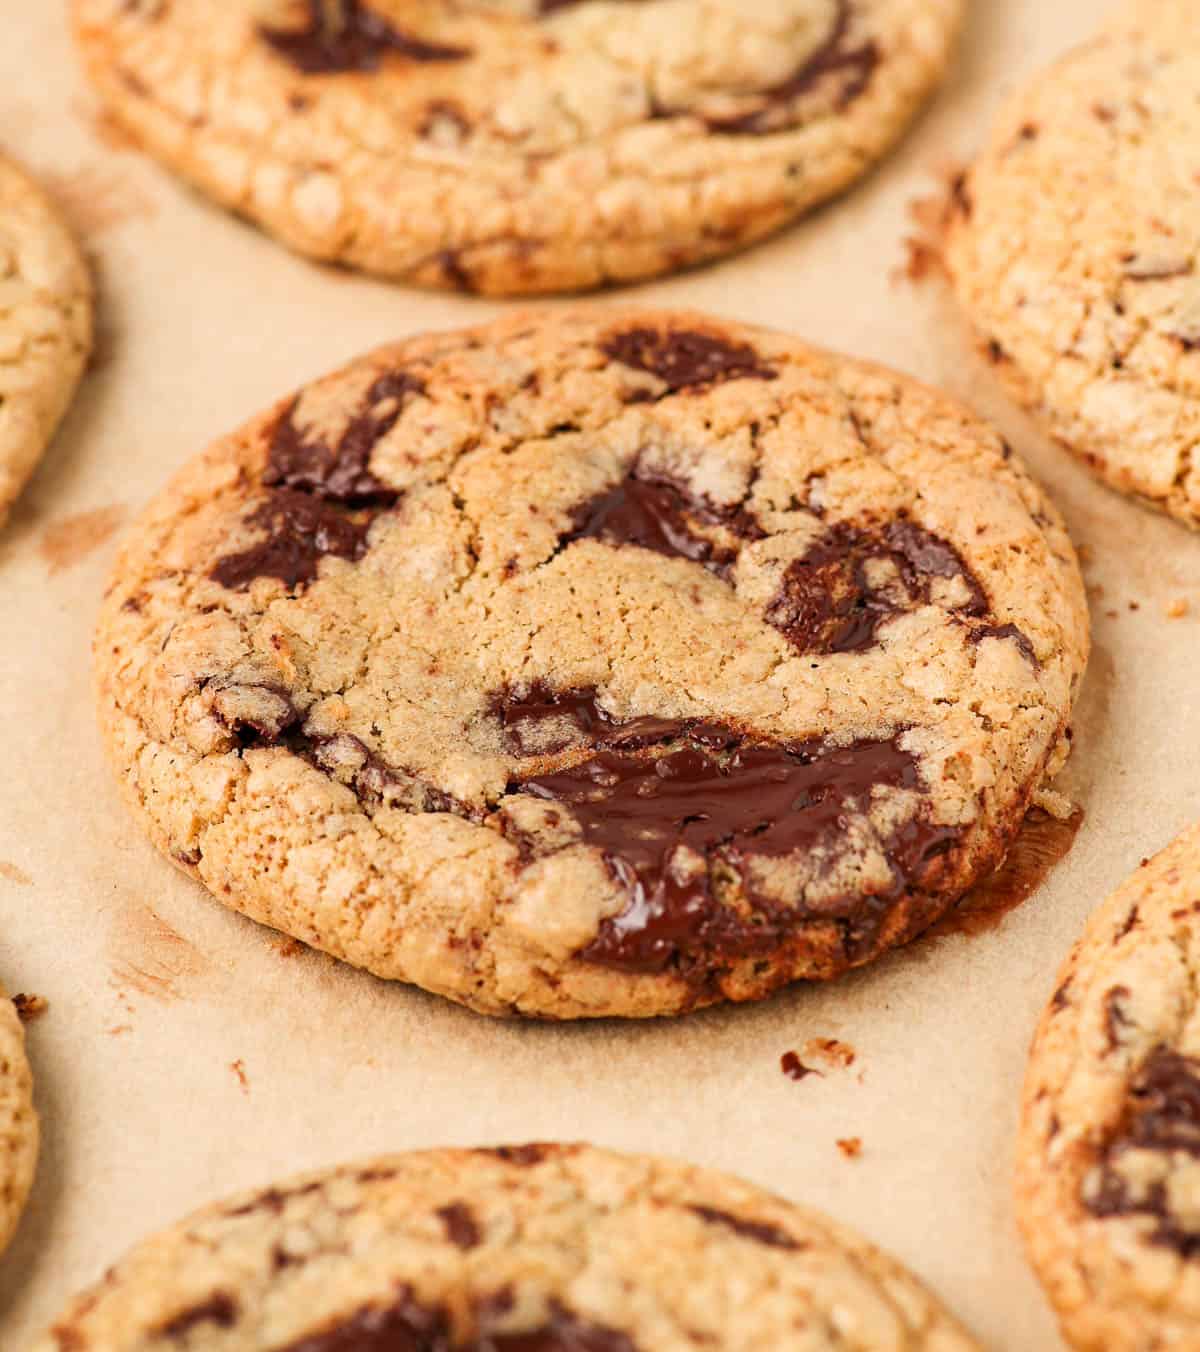
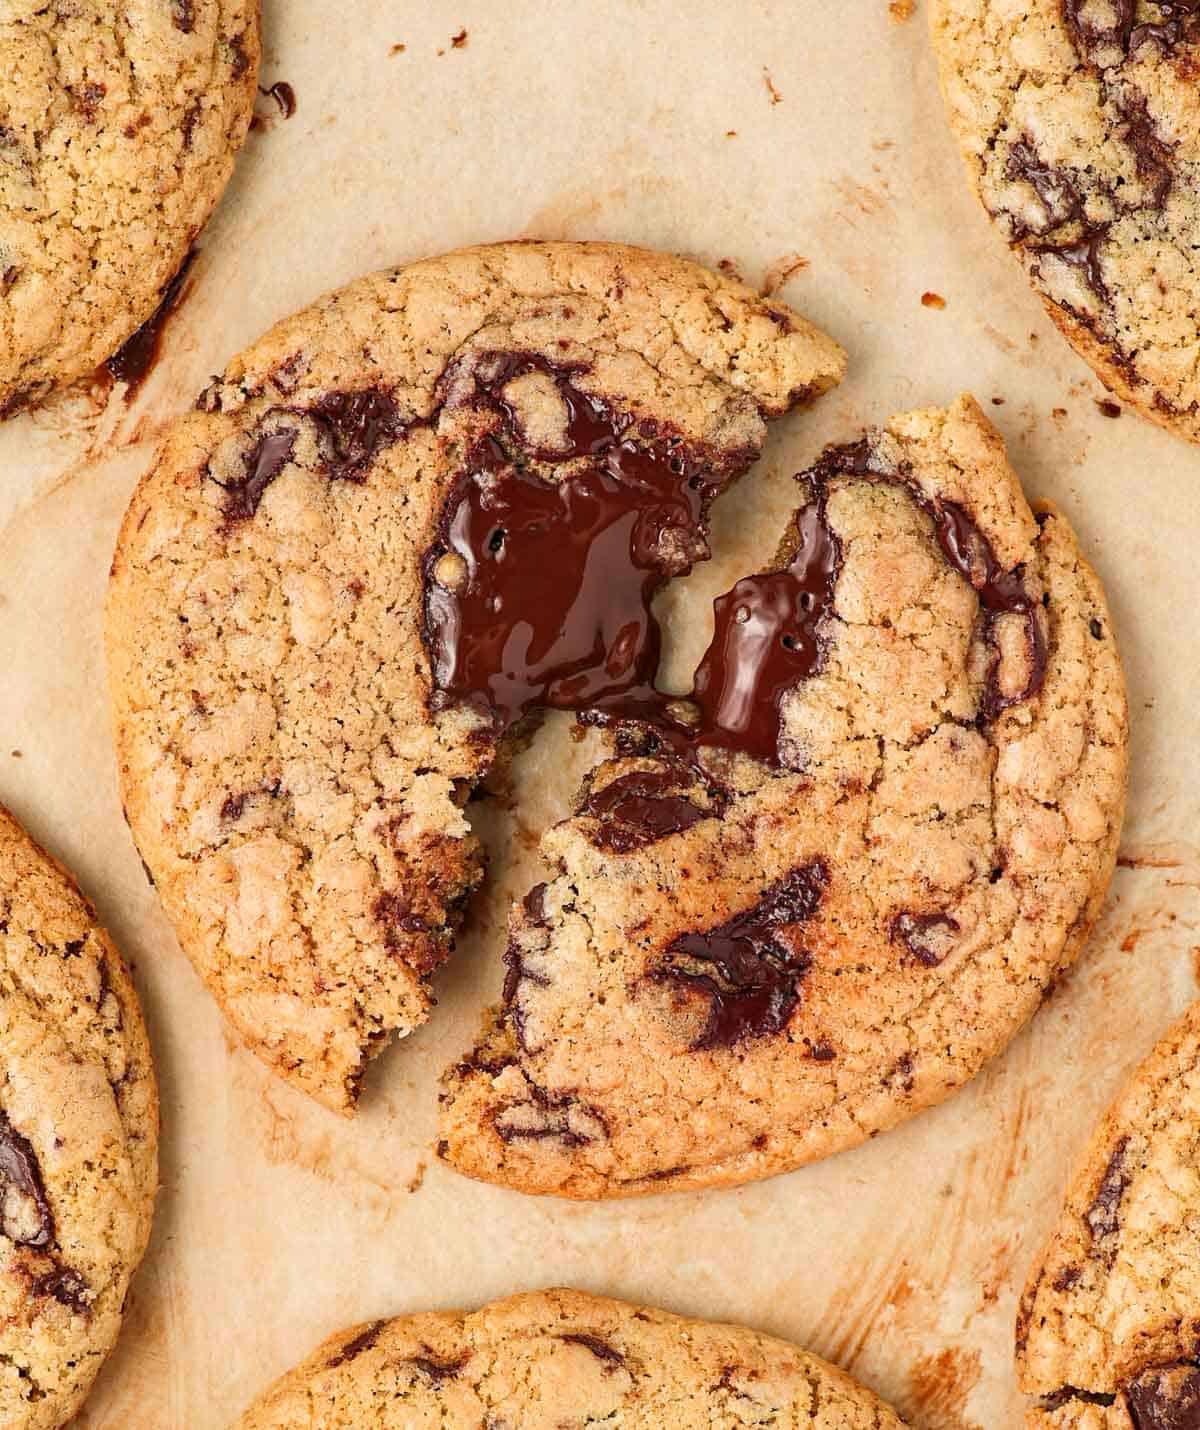
If you’re a chocolate chip cookie enthusiast but often find traditional recipes overly sweet, prepare to have your mind changed! This unique oat flour cookie recipe is crafted with significantly less sugar than most, yet it delivers an incredibly decadent and satisfying experience. Each bite offers a delightful contrast: slightly crunchy edges give way to a luxuriously gooey middle, brimming with rich, dark chocolate chunks. The deep, nutty flavor contributed by the oat flour is simply incomparable, elevating these cookies far beyond standard versions. They truly offer a gourmet touch to a beloved classic.
Beyond their exquisite taste, we particularly love this recipe for several key reasons:
- Effortlessly Quick & Simple: Forget about complicated steps or extensive cleanup. These cookies are made in just one bowl with no electric mixer required, making them perfect for bakers of all skill levels, even on a busy weeknight.
- Minimal Chilling Time: Unlike many cookie doughs that demand hours in the fridge, this dough only needs a brief 20 to 30-minute rest. This short chill time is just enough to allow the oat flour to properly hydrate and for the butter to firm up slightly, ensuring perfectly shaped cookies without the long wait.
- Gluten-Free & Wheat-Free Goodness: Made exclusively with oat flour, these cookies are naturally wheat-free and can easily be made gluten-free friendly by using certified gluten-free oat flour. Plus, with no almond flour in sight, they are also a fantastic nut-free option, perfect for those with nut allergies or sensitivities. Enjoy delicious cookies without compromise!
Essential Ingredients for Perfect Oat Flour Chocolate Chip Cookies
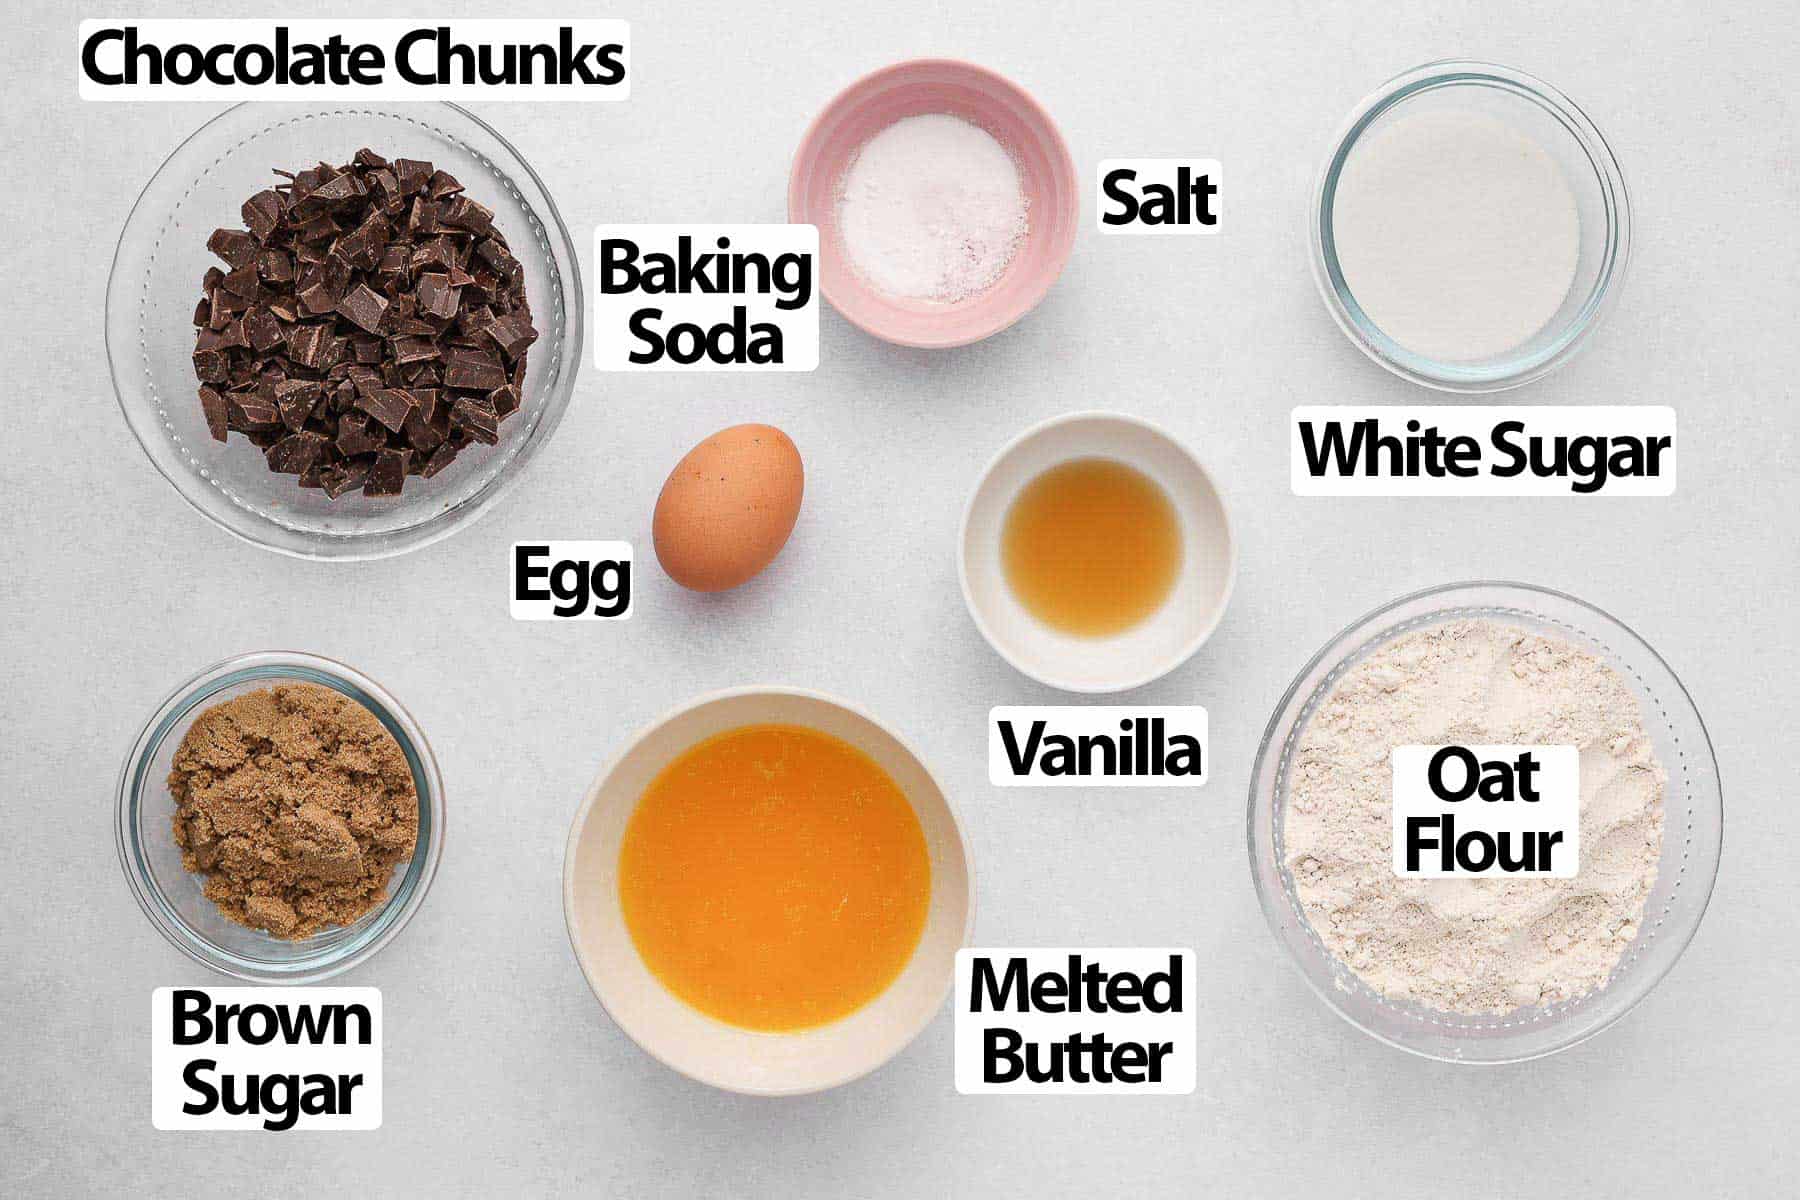
To create these delightful Oat Chocolate Chip Cookies, gather the following ingredients (refer to the full recipe card below for exact quantities):
- Unsalted Butter: We use melted butter for ease, which contributes to a thinner, chewier cookie with those lovely slightly crisp edges. If your preference leans towards a thicker, more ‘puffy’ cookie, opt for softened (room temperature) butter instead. Cream it with the sugar for a few minutes to incorporate more air, and you’ll achieve a chunkier result. While you could try a dairy-free spread or vegan butter, be aware that it might alter the rich, characteristic flavor derived from real butter.
- Sugar Blend: A balanced mix of both Brown Sugar and White Caster Sugar (or fine white sugar) is crucial here. Brown sugar adds moisture, depth of flavor with its subtle molasses notes, and contributes to the wonderfully chewy, gooey texture. White sugar, on the other hand, ensures those irresistible crispy edges and a delicate crumb. This combination truly offers the best of both worlds. For experimenting with texture, check the FAQs section for guidance on using all brown or all white sugar. I haven’t tested coconut sugar specifically for this recipe, but it often works as a substitute in other cookie recipes, though it might yield a slightly different texture and flavor profile.
- Egg: A single medium-sized egg, ideally at room temperature. This helps it incorporate more evenly into the batter, creating a smoother, more cohesive dough and a better overall cookie texture.
- Oat Flour: The star of our recipe! Oat flour brings a distinct earthy, nutty flavor and a tender crumb to these cookies. You can effortlessly make your own by blending rolled oats (see FAQs below for instructions), or simply use good quality store-bought oat flour. Crucially, if you require these cookies to be certified gluten-free, ensure your oat flour explicitly states “certified gluten-free” to avoid cross-contamination.
- Chocolate: For the ultimate indulgence, I recommend Dark Chocolate Chunks, finely chopped from a high-quality dark chocolate bar (around 70% cocoa solids works beautifully). These chunks melt into glorious pools of rich chocolate as they bake. Alternatively, standard Chocolate Chips can be used; they tend to hold their shape more, offering distinct chocolate morsels throughout the cookie. Feel free to adjust the type of chocolate to your preference – milk chocolate or even white chocolate chunks would also be delicious, though they will yield a sweeter cookie.
- Baking Soda & Flaky Sea Salt: Essential leavening and flavor enhancers. Baking soda helps the cookies spread and achieve a desirable texture, while a touch of flaky sea salt brilliantly balances the sweetness of the chocolate and sugar, enhancing all the flavors.
- Vanilla Extract: A splash of vanilla extract (or paste) adds a warm, aromatic depth that complements the chocolate and oats perfectly.
How to Bake Delightful Oat Flour Chocolate Chip Cookies
Crafting these delicious oat flour chocolate chip cookies is a straightforward and enjoyable process. Follow these simple steps for perfectly baked treats:
- Preparation is Key: Begin by gathering all your ingredients. Melt the butter gently in the microwave or on the stovetop and set it aside to cool slightly. It should still be liquid but not piping hot, as hot butter can “cook” the egg. If you’re using a chocolate bar instead of chips, give it a rough chop now and set it aside.
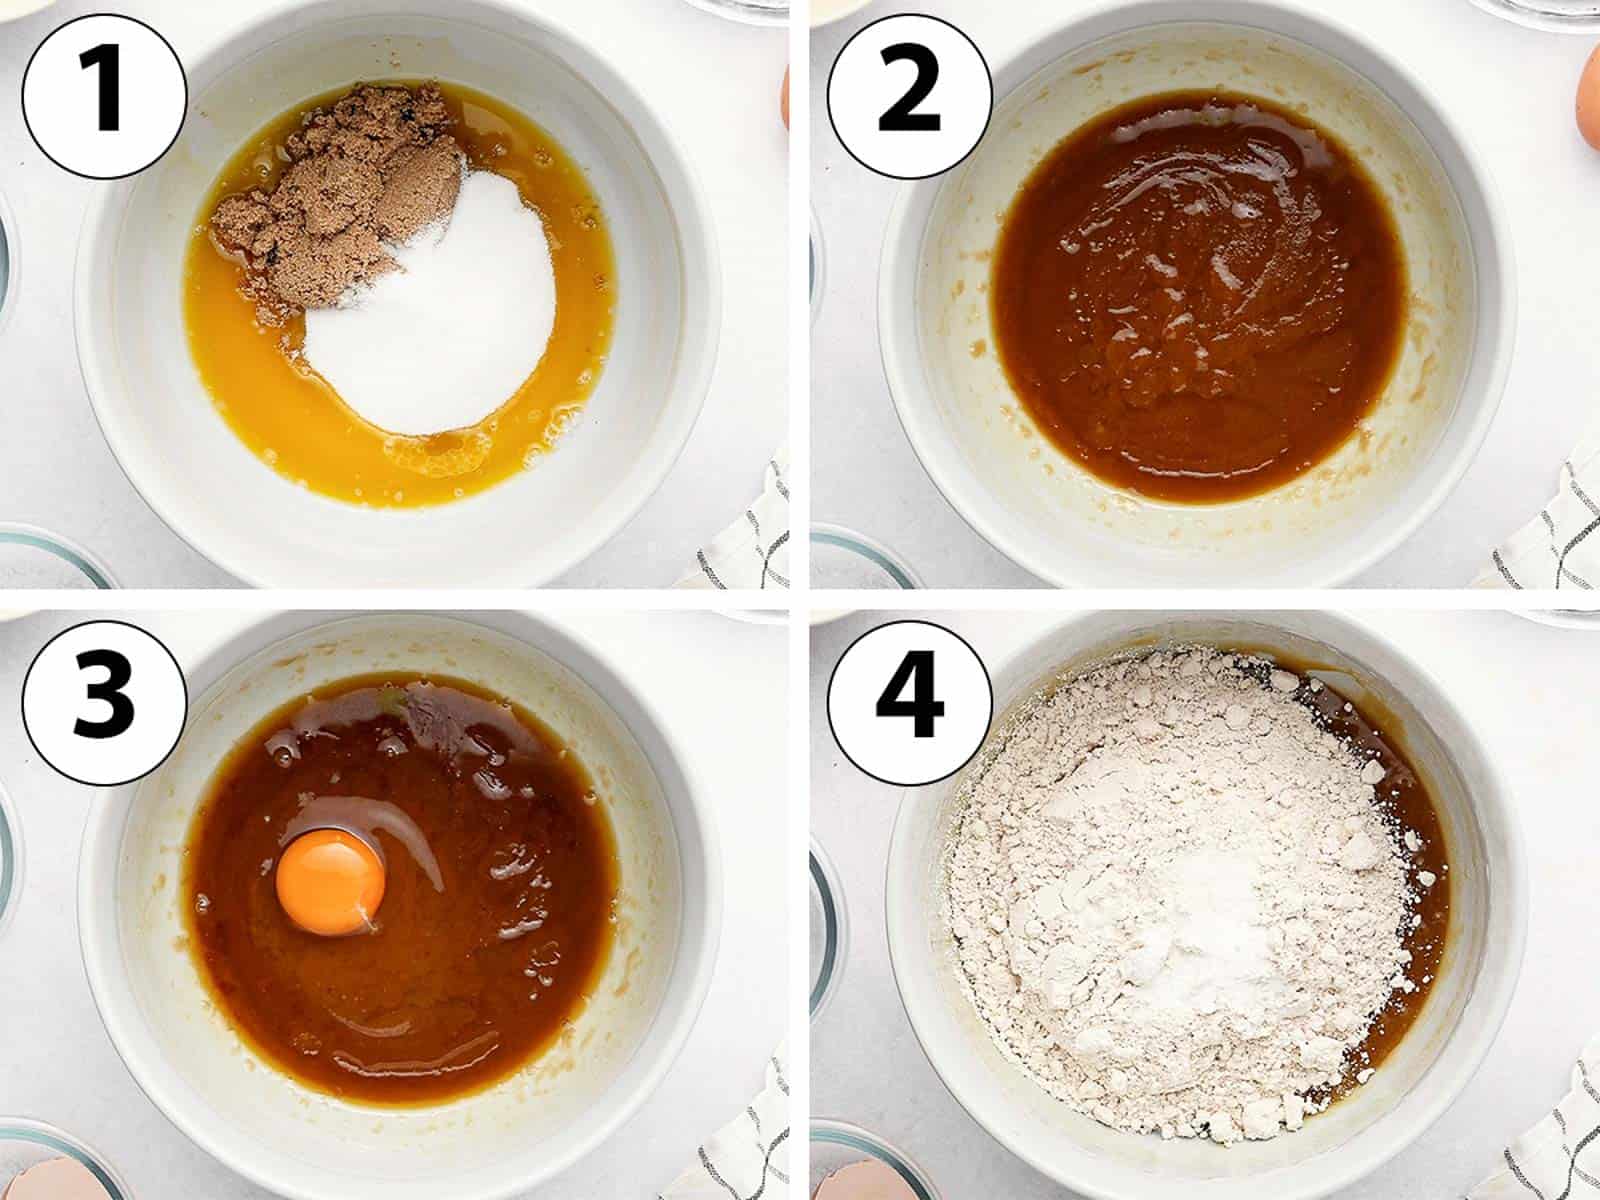
- Photo 1: Combine Wet Ingredients: In a large mixing bowl, pour in the cooled melted butter, along with both brown sugar and white caster sugar.
- Photo 2: Whisk Until Combined: Stir the butter and sugars together vigorously for about a minute. The mixture might appear slightly separated or “split,” which is completely normal at this stage due to the melted butter. Continue mixing until it’s well combined and slightly lighter in color.
- Photo 3: Add Egg & Vanilla: Incorporate the room temperature egg and vanilla extract. Whisk thoroughly until the mixture visibly thickens, becoming pale and glossy. This aeration is important for the cookie’s texture.
- Photo 4: Introduce Dry Ingredients: Carefully add the oat flour, baking soda, and flaky sea salt. For the best results and to prevent lumps, it’s highly recommended to sift these dry ingredients before adding them to the wet mixture.
- Gentle Mixing: Using your whisk or a sturdy spatula, gently fold the dry ingredients into the wet mixture. Mix only until just combined – over-mixing the dough can activate the gluten in the oats (though much less than wheat flour), potentially leading to tougher cookies. A few streaks of flour are acceptable; they will disappear during the chilling process.
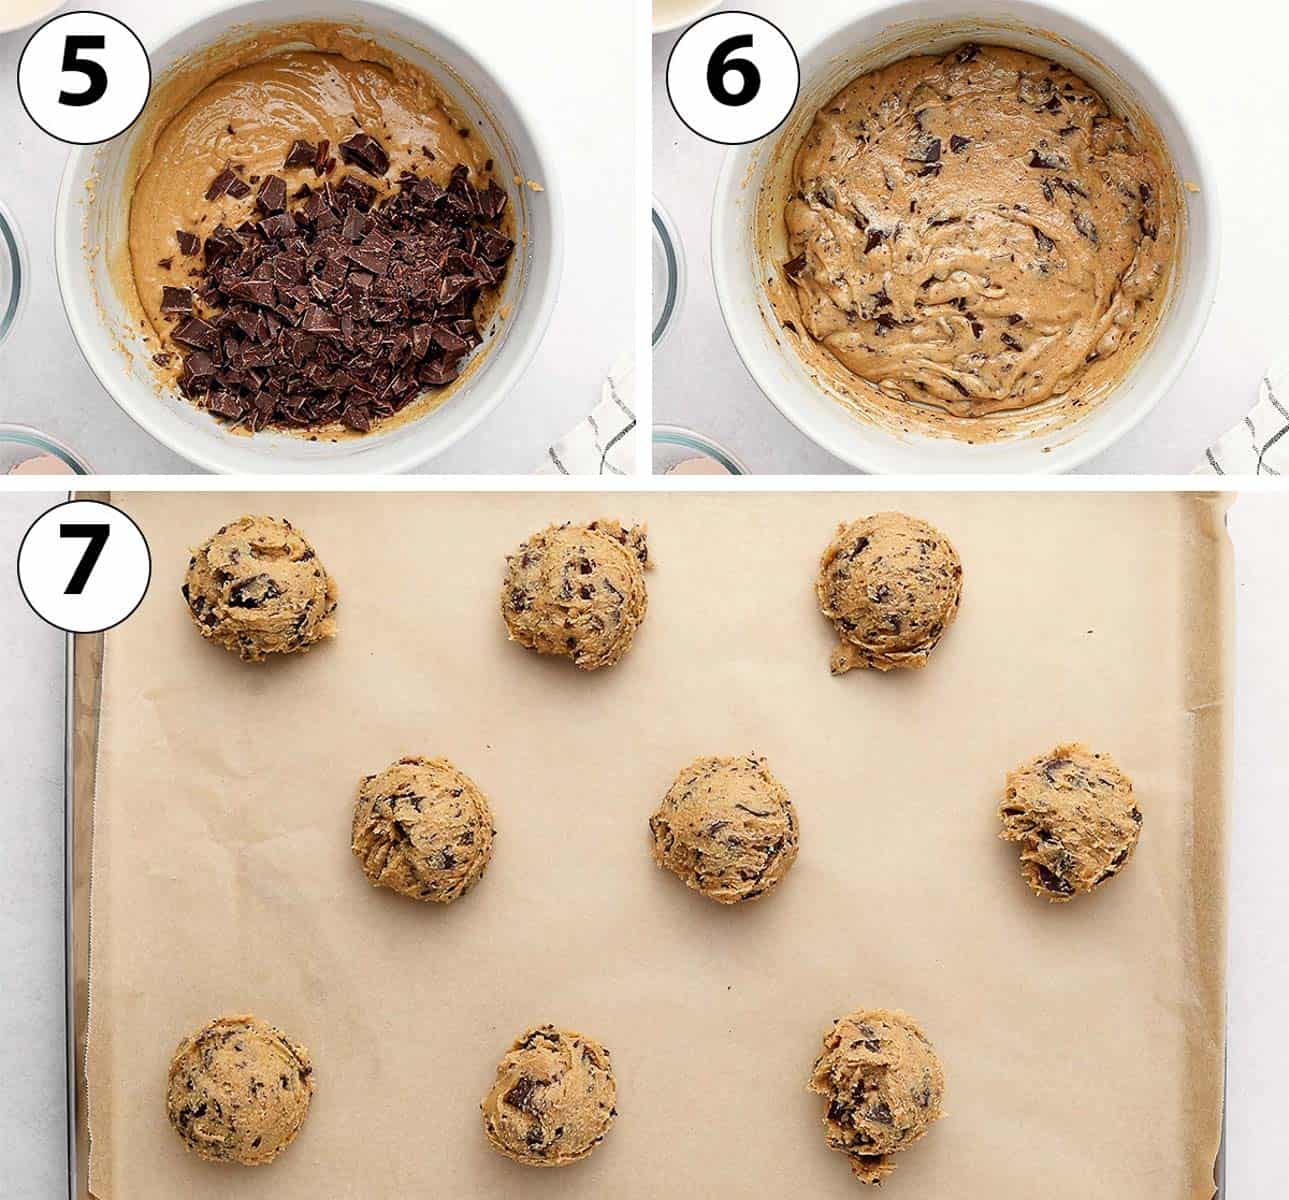
- Photo 5 & 6: Fold in Chocolate: Add your chosen chocolate chunks or chips to the dough. Using a spatula, gently fold them in until evenly distributed. Again, avoid over-mixing here to keep the dough tender.
- Initial Dough Consistency: At this point, the cookie dough will appear quite soft and slightly sticky. This is entirely normal for a dough made with melted butter and oat flour.
- Chilling Time: Cover the bowl and place it in the refrigerator for a quick 20 to 30 minutes. This brief chill is crucial; it allows the oat flour to absorb moisture, preventing excessive spreading, and gives the melted butter a chance to firm up. The result will be a more manageable dough that’s easier to scoop and cookies that hold their shape better during baking. This short chilling time yields cookies that spread to a deliciously flat and chewy consistency. If you prefer a thicker, chunkier cookie, extend the chilling time to at least an hour, and consider adding an extra minute or two to the baking time.
- Preheat Oven & Prepare Tray: While the dough chills, preheat your oven to 180°C / 350°F (160°C / 325°F fan-forced). Line a large baking sheet with parchment paper (baking paper) or a silicone baking mat. Depending on the size of your oven and tray, you might need to bake the cookies in two batches to prevent overcrowding. Alternatively, you can freeze a portion of the dough for future baking!
- Scoop and Space: Once chilled, use an ice cream scoop or a dedicated cookie scoop (a 1.5 tablespoon scoop works well) to portion out the dough onto your prepared baking sheet. Remember, these cookies will spread generously in the oven, so ensure you leave ample space (about 2-3 inches) between each scoop. For an extra touch of beauty and to guarantee those delightful pools of melted chocolate, press a few extra chocolate chunks onto the top of each scooped dough ball before baking.
- Bake to Perfection: Bake the cookies for approximately 10 to 12 minutes. You’re looking for golden-brown edges with centers that still look slightly soft and underdone. This is the secret to achieving that irresistible gooey middle.
- Cooling is Crucial: Once out of the oven, immediately transfer the entire parchment paper with the baked cookies onto a wire cooling rack. Allow the oat chocolate cookies to cool down completely on the rack before attempting to move them. They will be incredibly soft and fragile straight from the oven and prone to breaking if handled while still warm. As they cool, they will firm up and become perfectly chewy.
Recipe Frequently Asked Questions
My absolute personal preference for these oat flour chocolate chip cookies is high-quality Dark Chocolate Chunks, typically chopped from a bar with around 70% cocoa solids. These melt beautifully during baking, creating luxurious, irresistible pools of rich, dark chocolate throughout the cookie. If you prefer distinct chocolate pieces that hold their shape, classic chocolate chips are an excellent alternative. Feel free to experiment with different types of chocolate, such as milk chocolate for a sweeter profile or even white chocolate for a creamy contrast. The choice ultimately depends on your desired flavor intensity and texture.
Making your own oat flour is incredibly easy and cost-effective! Simply place rolled oats (not instant oats) into a high-speed food processor or a powerful blender. Blend on high until the oats are transformed into a fine, powdery flour. The exact blending time will vary depending on the strength of your machine, but it usually takes just a minute or two. For the smoothest possible flour, you can optionally pass the blended oats through a thin mesh sieve to remove any larger, un-blended bits. This homemade oat flour is perfect for baking and ensures you always have a fresh supply!
Yes, these cookies are inherently made without any traditional wheat flour, relying solely on oat flour. Oats themselves are naturally gluten-free. However, it’s crucial to be aware that oats can often be cross-contaminated with gluten-containing grains during farming, harvesting, or processing. Therefore, if you need these cookies to be strictly gluten-free due to celiac disease or severe gluten sensitivity, it is essential to use certified gluten-free oat flour. This guarantees that the oats have been processed in facilities free from gluten cross-contamination, ensuring a safe and delicious treat for everyone.
Absolutely! Adjusting the ratio of white and brown sugar is a fun way to customize the texture and flavor of your cookies. Using all brown sugar will result in a significantly gooier, softer cookie with a deeper caramel flavor and a noticeably chewier, thicker consistency. On the other hand, opting for all white sugar will yield a slightly crispier, thinner cookie with a more uniform texture and a less complex, sweeter taste. Feel free to experiment to find your perfect balance!
Chilling cookie dough is a secret weapon for better cookies! For these oat flour chocolate chip cookies, a brief chill of 20-30 minutes helps the oat flour fully absorb the moisture from the wet ingredients, preventing the cookies from spreading too much during baking. It also allows the melted butter to solidify slightly, which contributes to a more controlled spread and a chewier texture. For chunkier cookies, a longer chill (1+ hour) makes the dough firmer and prevents excessive spreading, resulting in thicker, puffier cookies.
Expert Tips for Your Best Oat Flour Chocolate Chip Cookies
Achieving cookie perfection is all about the details. Here are some invaluable tips to ensure your oat flour chocolate chip cookies turn out absolutely flawless every time:
- For Thicker, Chunkier Cookies: If you desire a more substantial cookie, you have a couple of options. Firstly, instead of melted butter, use softened butter (at room temperature) and cream it with the sugar for 3-5 minutes until light and fluffy. This incorporates more air, leading to a puffier cookie. Secondly, extend the chilling time for your dough to at least an hour in the fridge. This firmer dough will spread less. In both cases, you might need to add an extra 1 to 2 minutes to the baking time to ensure they’re cooked through.
- Mind the Spacing: These oat flour cookies love to spread out as they bake, so it’s crucial to leave plenty of space – at least 2-3 inches – around each scoop of dough on the baking sheet. Overcrowding can lead to uneven baking and cookies merging together. Using a small cookie scoop (a 1.5 tablespoon capacity is ideal) also helps manage their size.
- Achieve Melted Chocolate Perfection: To get those stunning, large pools of gooey, melted chocolate that are so visually appealing and delicious, strategically place a few extra chocolate chunks directly on top of each scooped cookie dough ball just before you put them into the oven. This ensures some chocolate melts on the surface, creating that irresistible look and texture.
- Customize Your Crunch: Craving more texture? Feel free to add a handful (about ¼ cup) of rolled oats directly into the dough along with the oat flour. For a nutty twist, incorporate some finely chopped nuts like walnuts or pecans. If you prefer a sweeter profile, swap out some of the dark chocolate for white chocolate chips or even milk chocolate chunks. The possibilities are endless!
- Don’t Overbake: The key to a truly gooey center is to pull the cookies from the oven when their edges are golden brown but the centers still look slightly soft, or even a little underbaked. They will continue to set and firm up as they cool on the baking sheet. Overbaking will result in drier, crispier cookies, losing that desired chewy-gooey contrast.
Storing & Freezing Your Oat Flour Cookies
Proper storage is essential to maintain the freshness and deliciousness of your homemade oat flour chocolate chip cookies:
Storing Baked Cookies: Once completely cooled, these oat flour chocolate chunk cookies can be kept at room temperature for up to three days. To ensure they remain soft and chewy, store them in an airtight container. If you notice them drying out slightly, adding a half-slice of bread to the container can help maintain their moisture.
Freezing Cookie Dough for Later: The unbaked cookie dough freezes exceptionally well, making it perfect for future cravings! After you’ve chilled the dough as per the recipe, scoop individual portions onto a flat tray lined with baking paper. Place this tray in the freezer until the cookie dough balls are completely solid (this prevents them from sticking together). Once frozen, transfer the solid dough balls into a freezer-safe container or a heavy-duty freezing bag. They can be stored for up to 2-3 months.
Baking from Frozen Dough: When you’re ready to bake, simply place the frozen cookie dough balls directly onto a prepared baking sheet. There’s no need to thaw them! Just add an extra 2 to 3 minutes to the recommended baking time. Keep in mind that cookies baked from frozen dough tend to spread slightly less than fresh dough, resulting in a delightfully chunkier cookie with a thicker center. This method is incredibly convenient for enjoying freshly baked cookies whenever the mood strikes!
Explore More Delicious Cookie Recipes
- Sablé Breton Cookies
- Lemon Poppy Seed Shortbread Cookies
- Chocolate Hazelnut Shortbread Cookies
- Peanut Butter Banana Oatmeal Cookies
- Almond Shortbread Cookies
- Almond Flour Peanut Butter Cookies
- Biscoff Butter Cookies
- Lemon Curd Cookies
- Strawberry Shortbread Cookies
- Chocolate Chip Almond Cookies
Made this recipe?
Let us know if you liked it by leaving a comment below, and tag us on Instagram @a.baking.journey with a photo of your creation!
Recipe Card

Oat Flour Chocolate Chip Cookies
Servings:
12
cookies
Author:
Sylvie
15 minutes
10 minutes
25 minutes
50 minutes
Print Recipe
Prevent your screen from going dark
Ingredients
- 120 gr (1/2 cup) Unsalted Butter, melted and slightly cooled
- 75 gr (1/3 cup) Brown Sugar
- 75 gr (1/3 cup) Caster Sugar, or fine white sugar
- 1 Egg, medium size, at room temperature
- 1 1/2 teaspoon Vanilla Extract
- 200 gr (2 cups + 3 tablespoons) Oat Flour, certified gluten-free if required
- 1/2 teaspoon Baking Soda
- 1/3 teaspoon Flaky Sea Salt
- 150 gr (5 oz) Dark Chocolate Chunks or Chocolate Chips
Instructions
- Melt the Butter and set aside to cool down for 5 minutes. If using chocolate chunks, roughly chop a chocolate bar and set aside.
- Place the melted Butter, Brown Sugar and White Sugar in a large mixing bowl and whisk for about a minute until combined.
- Whisk in the Egg and Vanilla Extract until glossy and smooth.
- Add the Oat Flour, Baking Soda and Salt, preferably sifted. Gently mix until just combined to avoid over-mixing.
- Add the Chocolate Chunks or Chocolate Chips and fold them into the batter.
- Place the bowl in the fridge for 20 to 30 minutes (see note 1).
- In the meantime, preheat your oven on 180’C / 350’F and prepare a large baking sheet with baking paper or a baking mat (see note 2).
- Scoop the chilled batter on the prepared tray with a small ice cream scoop (I used a 1,5 tablespoon scoop), leaving plenty of space between each scoop as the cookies will spread in the oven.
- Bake for 10 to 12 minutes. Place on a cooling rack to cool down completely before moving the cookies from the tray (see note 3).
Video
Would you like to save this recipe?
We’ll email this post to you, so you can come back to it later!
Notes
- This short chilling time (20-30 minutes) will give you cookies that spread out more, resulting in a flatter, chewier texture. If you prefer thicker, chunkier cookies, you have two great options:
– Substitute the melted butter for softened (room temperature) butter and cream it with the sugar for 3 to 5 minutes until light and fluffy.
– Alternatively, chill the cookie dough for at least an hour in the fridge to allow it to firm up considerably.
In both of these cases, add an additional 1 to 2 minutes of baking time to ensure your chunkier cookies are perfectly cooked through. - Depending on the size of your oven and baking tray, you might need to bake the cookie dough in two separate batches to avoid overcrowding the tray. Alternatively, you can easily freeze a portion of the unbaked dough for baking at a later date – perfect for fresh cookies on demand!
- It’s very important to remember that these oat chocolate chip cookies will be quite soft and fragile immediately after coming out of the oven. They will tend to break apart easily if you try to move them while they are still warm. For best results, allow them to cool completely on the baking sheet (transferred to a wire rack) before handling. This cooling process allows them to firm up and achieve their perfect chewy texture.
Nutrition (per serving)
Calories:
266
kcal
|
Carbohydrates:
30
g
|
Protein:
4
g
|
Fat:
15
g
|
Saturated Fat:
8
g
|
Polyunsaturated Fat:
1
g
|
Monounsaturated Fat:
4
g
|
Trans Fat:
1
g
|
Cholesterol:
36
mg
|
Sodium:
123
mg
|
Potassium:
149
mg
|
Fiber:
2
g
|
Sugar:
17
g
|
Vitamin A:
276
IU
|
Calcium:
27
mg
|
Iron:
2
mg
