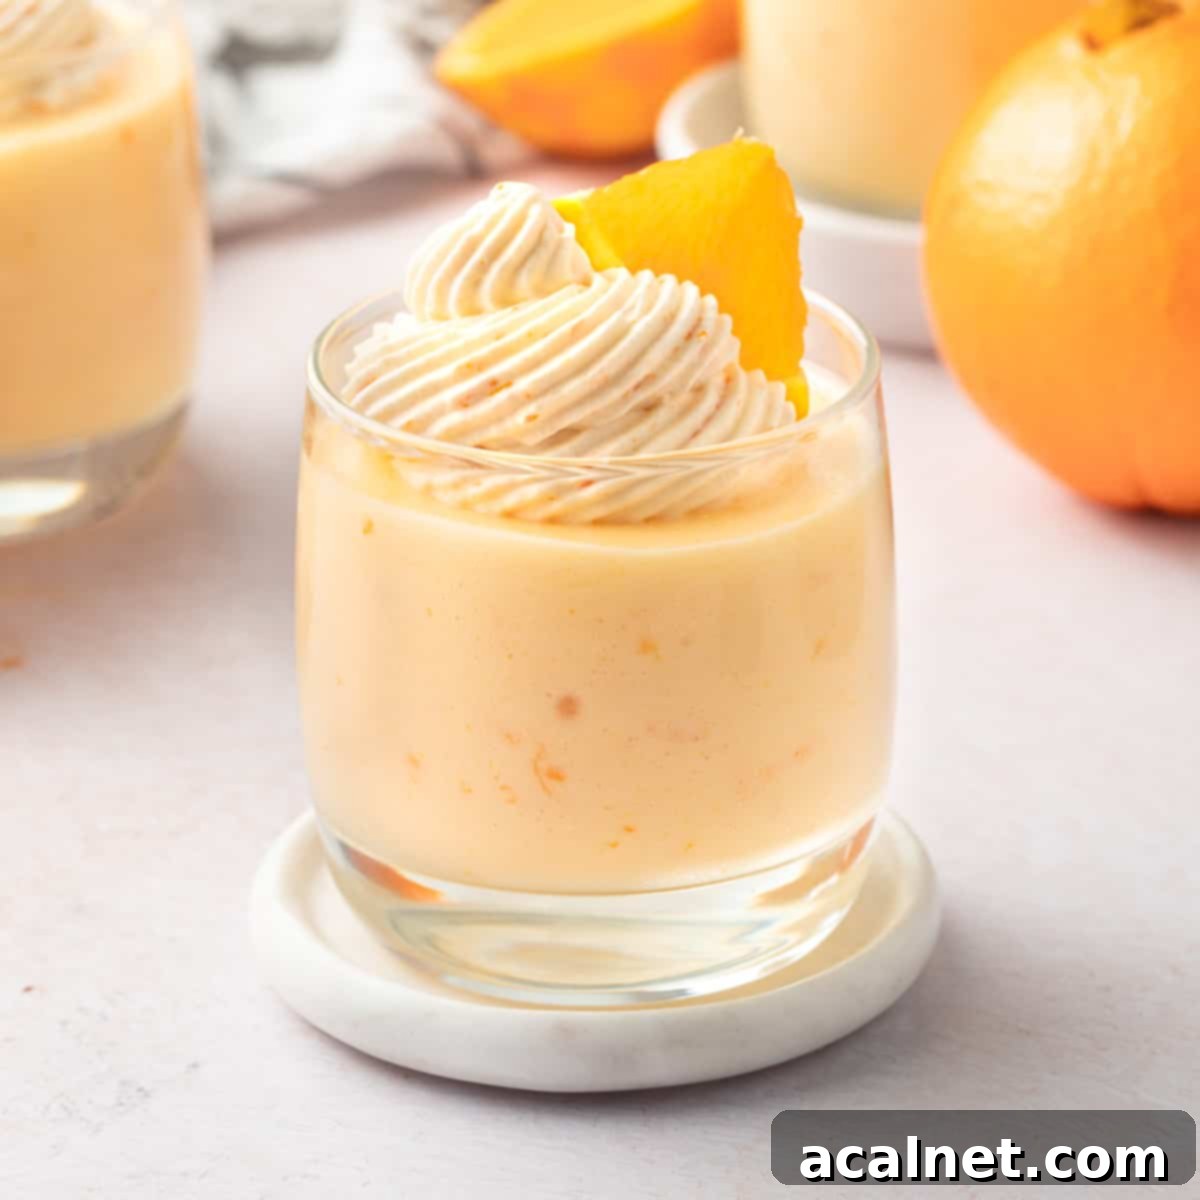
Easy No-Bake Orange Mousse Cups: Light, Fluffy & Refreshing Dessert
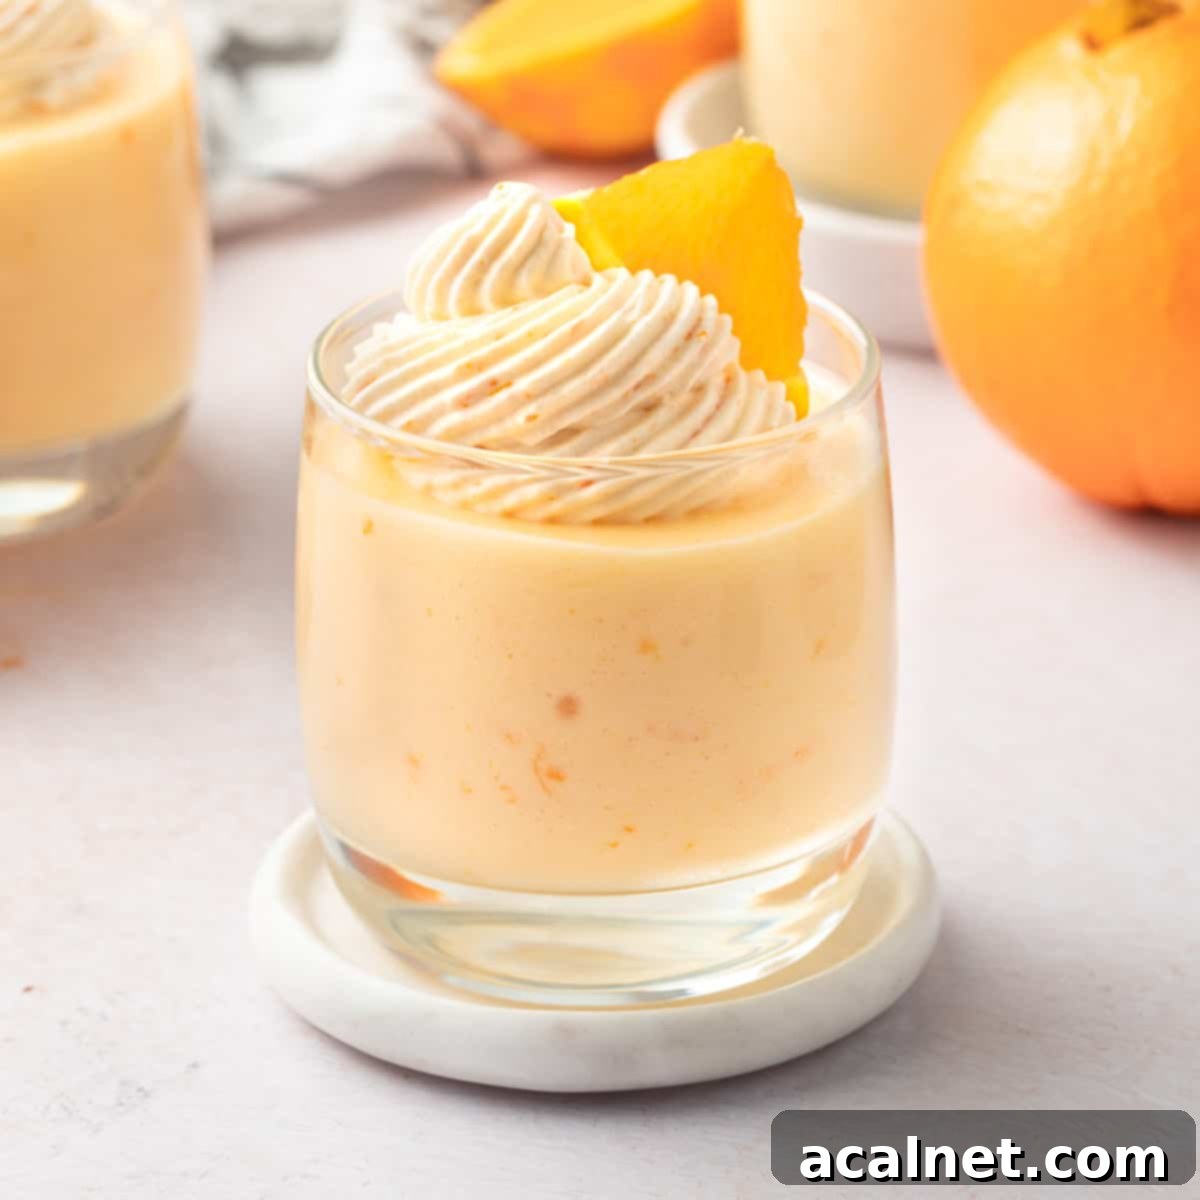
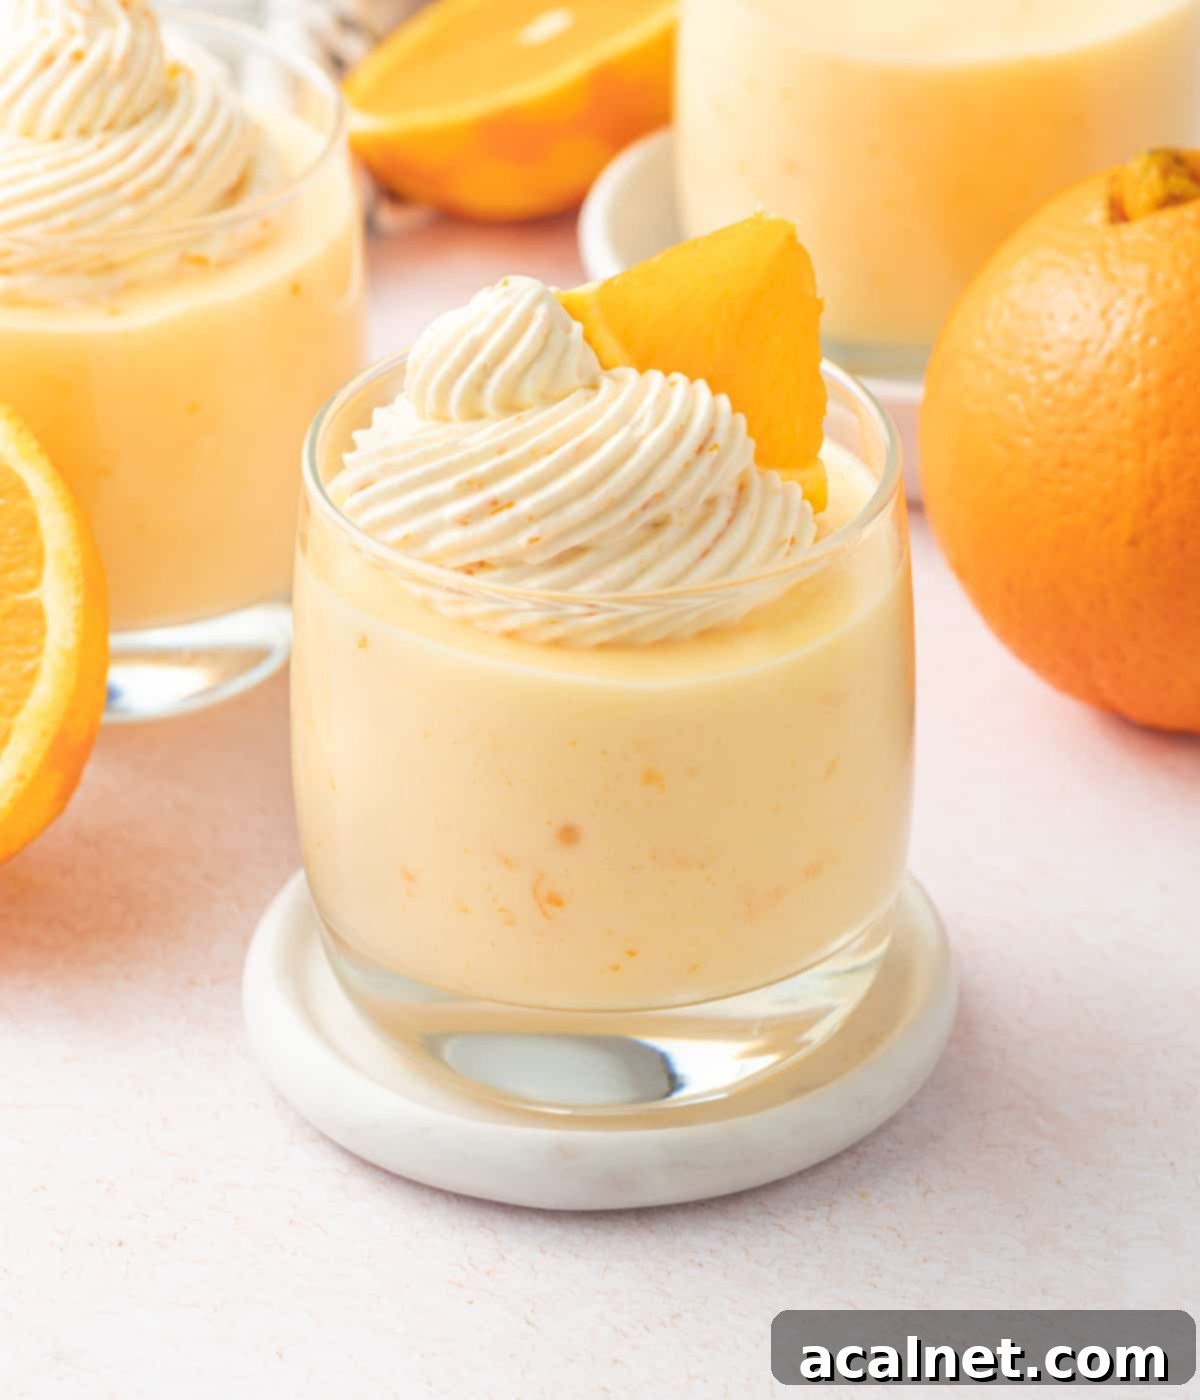
These delightful Orange Mousse Cups offer a taste of pure sunshine, delivering a deliciously light, fluffy, and fresh dessert experience. With a simple preparation involving just 4 core ingredients, they are the epitome of an easy-to-make, yet incredibly impressive, no-bake treat. Perfect for a sophisticated dinner party or any special occasion, their make-ahead convenience ensures a stress-free hosting experience, allowing you to focus on enjoying time with your guests.
[feast_advanced_jump_to]
Why You’ll Adore These Orange Mousse Cups
If you’re seeking a dessert that masterfully balances effortless preparation with a stunning presentation, look no further than these creamy Orange Mousse Cups! They embody everything you desire in a perfect sweet ending: incredibly simple to create, visually captivating, and bursting with vibrant flavor. This 4-ingredient wonder is a truly no-bake dessert, eliminating the need for an oven and making it a fantastic option for any time of year. Its ability to be prepared well in advance is a game-changer for entertaining, allowing you to enjoy your guests without last-minute kitchen stress. Each spoonful offers a heavenly fluffy texture, infused with the bright, fresh essence of oranges. Whether it’s the grand finale to a festive holiday meal, a refreshing treat for a summer gathering, or a sophisticated dessert for a special occasion, these Orange Mousse Cups are simply perfect. They deliver that coveted ‘wow’ factor with minimal effort, making you look like a pastry pro!
Craving a different twist? Explore my Chocolate Orange Mousse recipe for another irresistible combination!
Understanding Mousse: The Art of Airy Desserts
A mousse, derived from the French word for “foam,” is a culinary preparation celebrated for its distinctively light and airy texture. This delightful quality is achieved through the incorporation of air, typically by folding in a whipped element like whipped cream or whipped egg whites, into a flavorful base. Mousses can be both sweet and savory, hot or cold, but it’s the sweet, chilled versions that often steal the spotlight as elegant desserts.
The magic of a mousse lies in its delicate structure. The air bubbles introduced by whipping give it that characteristic “foamy” quality, while a stabilizer, such as gelatin, often helps to maintain its shape and prevent it from collapsing. This careful balance creates a dessert that is rich in flavor but surprisingly light on the palate, making it an exquisite choice for sophisticated dining or a refreshing treat on its own.
Can’t get enough of mousse desserts?
Discover more inspiration with my 15+ delicious Mousse Recipes round-up!
Essential Ingredients for Your Orange Mousse
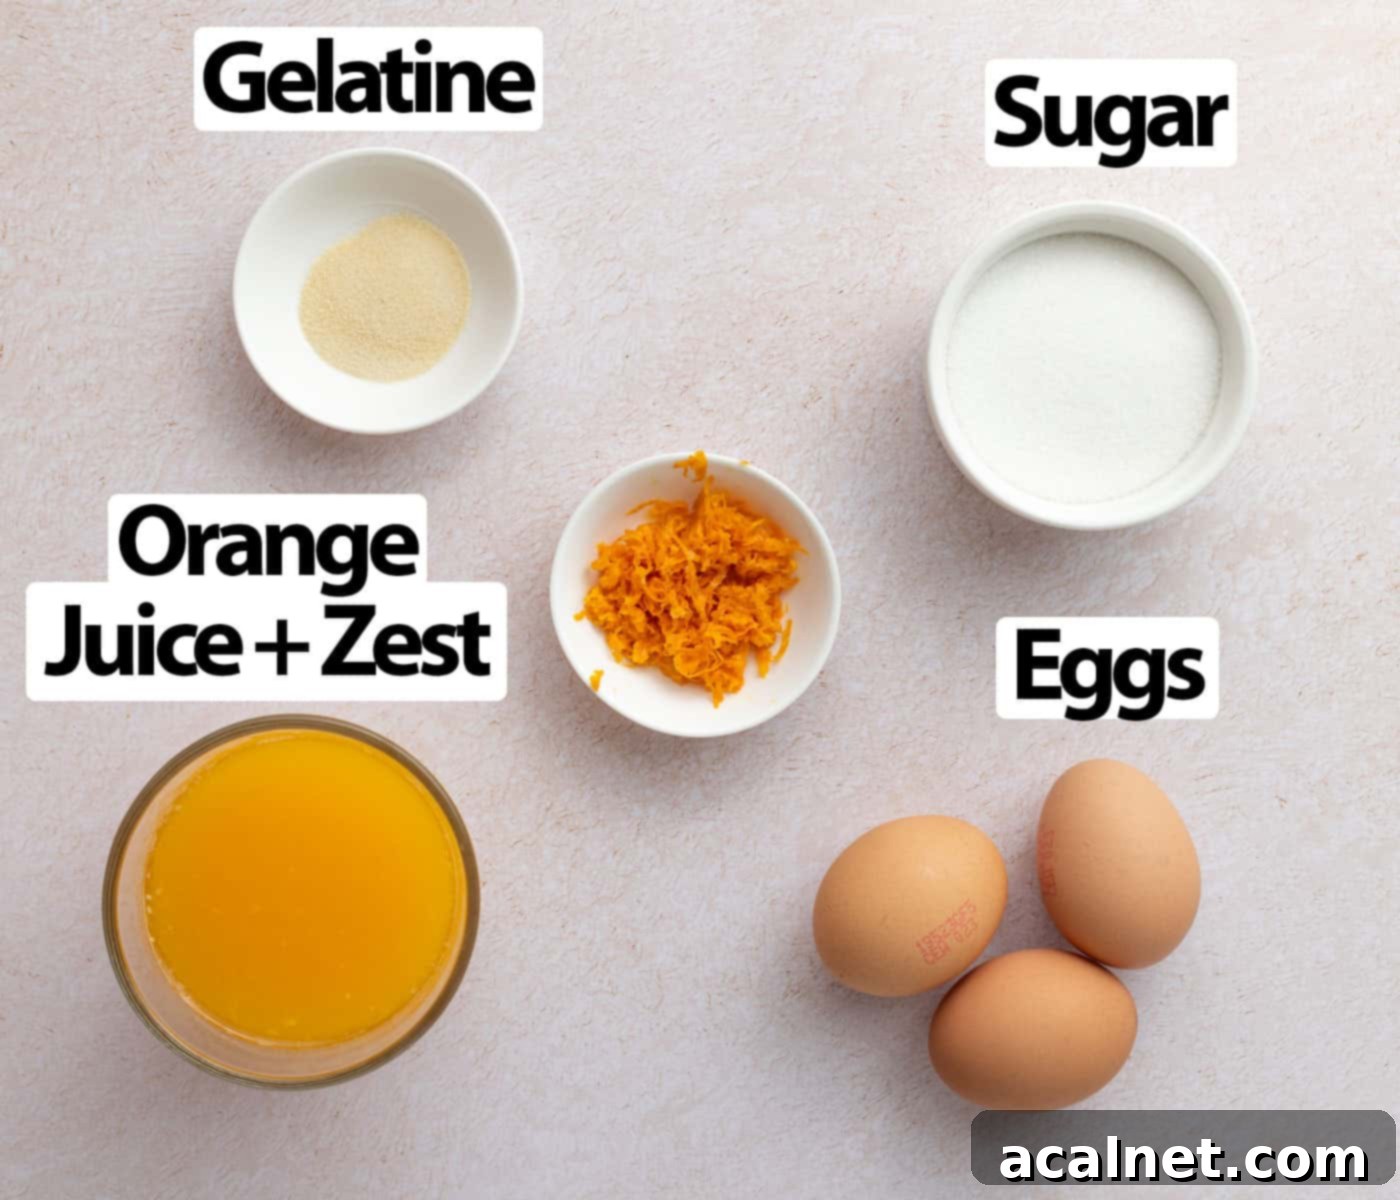
Scroll down to the detailed recipe card below for all exact quantities and measurements.
For the Vibrant Orange Mousse:
- Sugar: We use caster sugar, also known as superfine granulated sugar, for its ability to dissolve quickly and evenly. Half of the sugar will be used to sweeten and stabilize the egg yolk mixture, contributing to the mousse’s base, while the other half is crucial for whipping the egg whites into a stable, glossy meringue.
- Eggs: You’ll need large eggs, ideally at room temperature, with yolks and whites carefully separated. Room temperature eggs whip more easily and achieve greater volume. As the egg whites are not fully cooked, it is highly recommended to use pasteurized eggs for safety. Pasteurization ensures any potential bacteria are eliminated.
- Orange: To infuse maximum citrus flavor, we utilize both fresh orange juice and the finely grated orange zest. The juice provides the essential liquid base and tangy notes, while the zest contains aromatic oils that deliver a powerful, bright orange punch. Be sure to avoid grating the bitter white pith, as it can impart an unpleasant taste to your delicate mousse.
- Gelatine: This is our crucial stabilizing agent. I prefer gelatine powder, which needs to be rehydrated, or “bloomed,” in cold water before use. If you have gelatine sheets (also known as leaves), these can be substituted easily. Refer to the FAQs section below for detailed substitution instructions, as gelatine is key to achieving that perfectly set, yet wobbly, mousse texture.
For the Optional Orange Whipped Cream Topping:
- Thickened / Heavy Cream (heavy whipping cream): The secret to stable whipped cream lies in its fat content. Ensure you choose a cream with at least a 30% fat content. Anything less will struggle to whip properly and won’t hold its beautiful peaks once aerated, resulting in a runny topping.
- Icing or Powdered Sugar: I use a minimal amount of powdered sugar to lightly sweeten the topping, creating a balanced flavor that complements the orange mousse without being overly sweet. If you prefer a sweeter cream, feel free to adjust the quantity to your taste. Powdered sugar is preferred over granulated as it dissolves instantly, ensuring a silky-smooth texture.
- Orange Zest: A simple yet effective addition, a touch of fresh orange zest in the whipped cream provides an extra layer of bright citrus aroma and flavor, further enhancing the overall orange experience of the dessert.
Crafting Your Orange Mousse: A Step-by-Step Guide
Follow these detailed steps to create your perfectly airy and flavorful Orange Mousse Cups. Precision in timing and technique will ensure the best results!
1. Preparing the Aromatic Juice & Yolk Base
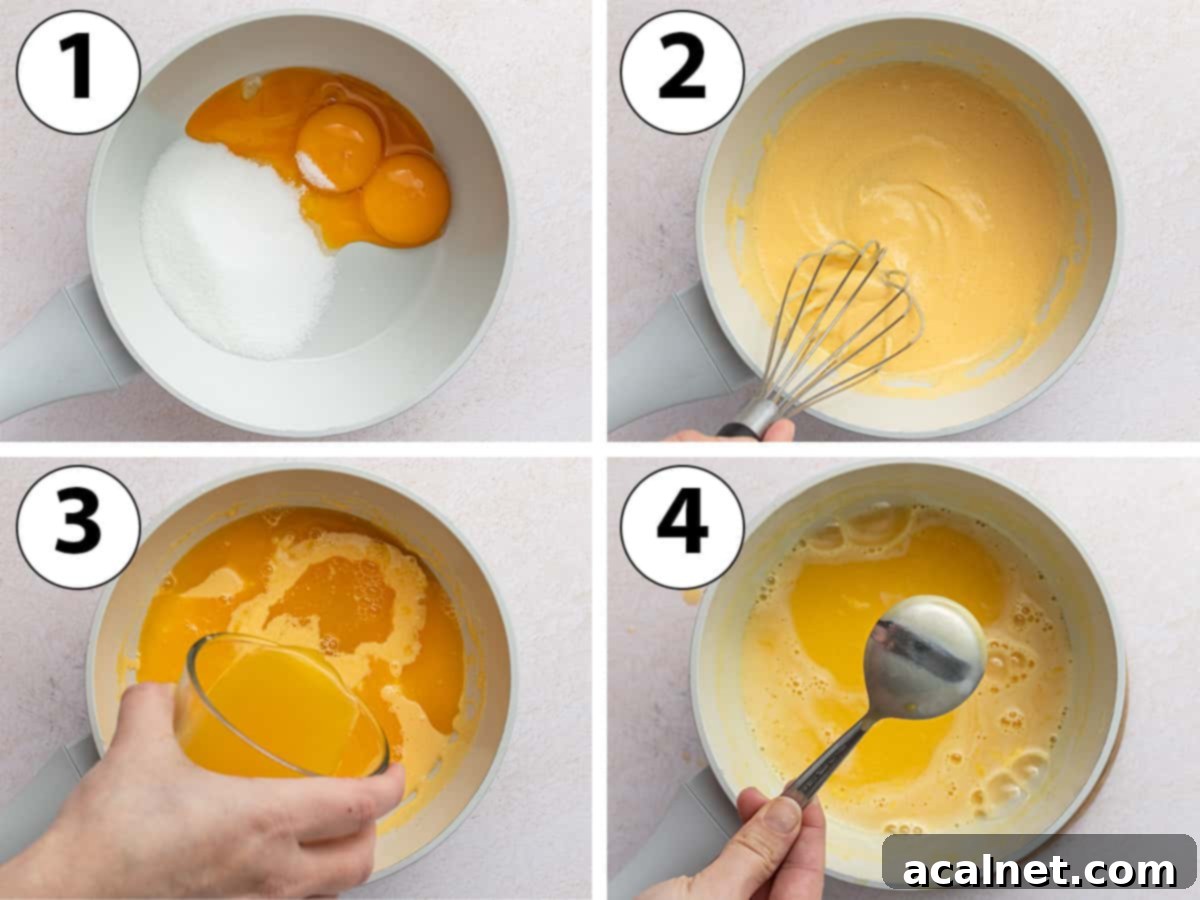
Before you begin the cooking process, ensure all your ingredients are prepped. This means zesting and juicing your oranges, carefully separating your egg yolks and whites, and rehydrating your gelatin powder in a small bowl with cold water. Stir the gelatin well to prevent lumps and set it aside to bloom into a thick paste.
- Photo 1: Combine the egg yolks and half of the caster sugar in a small, heat-proof saucepan. The sugar will help stabilize the yolks.
- Photo 2: Whisk these two ingredients together until they are well combined and the mixture is smooth and slightly pale.
- Photo 3: Pour in the fresh orange juice and whisk thoroughly until the mixture is uniform and completely smooth.
- Photo 4: Place the saucepan over low heat. Continuously stir the mixture with a heat-proof spatula, ensuring it doesn’t stick to the bottom. Cook for about 5 to 10 minutes, or until the egg and orange mixture has gently thickened and consistently coats the back of a spoon.
For precise cooking and to ensure food safety, ideally use a kitchen thermometer. The target temperature for cooking the eggs safely without scrambling them is between 82 and 84 degrees Celsius (180 to 183 degrees Fahrenheit). This ensures the egg yolks are cooked sufficiently while maintaining a smooth texture. The exact cooking time will vary based on your pan’s size and your stove’s temperature settings. It is absolutely crucial to prevent the mixture from boiling, as this will inevitably overcook the eggs, leading to an undesirable chunky, curdled consistency rather than a smooth base.
In essence, we are crafting an orange-infused “crème anglaise” or custard base here, where the traditional dairy has been delightfully replaced with vibrant orange juice for a fresh citrus twist.
2. Incorporating Gelatine and Zest for Structure and Flavor
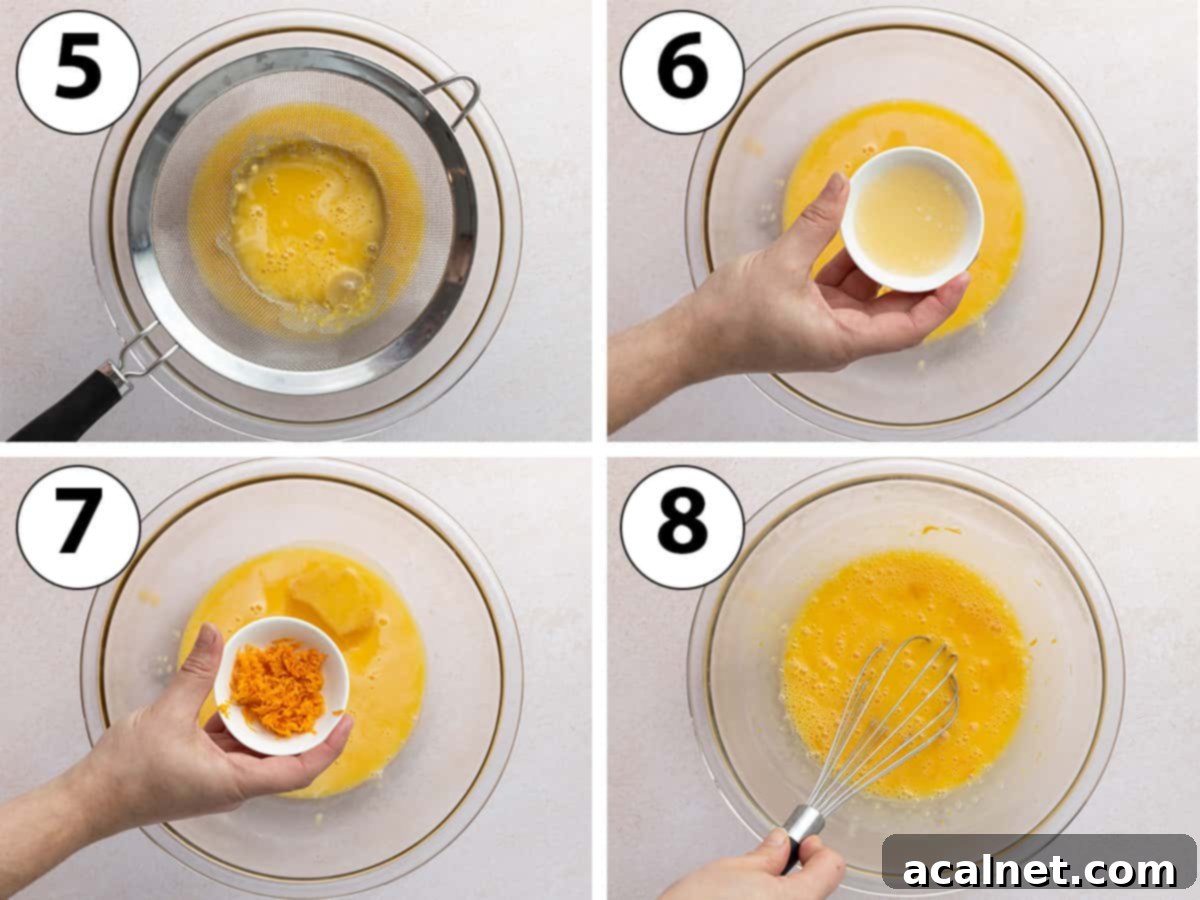
- As mentioned, if you haven’t already, ensure your gelatine powder is properly rehydrated. Mix it with very cold water in a small bowl, stirring until any lumps disappear and it forms a thick, jelly-like paste. This “blooming” step is essential for the gelatine to dissolve smoothly and activate its setting power.
- Photo 5: Carefully pour the cooked orange-yolk mixture through a fine mesh sieve into a large mixing bowl. This crucial step removes any tiny lumps or bits of overcooked egg that may have formed, ensuring your mousse base is silky smooth.
- Photo 6: Immediately add the bloomed gelatine paste to the warm orange mixture. Whisk vigorously until the gelatine is completely dissolved. The warmth of the mixture is vital for the gelatine to fully integrate and become effective.
- Photo 7: Introduce the fresh orange zest to the mixture. This is the perfect time to add it, allowing its essential oils to infuse and enhance the citrus flavor as the mixture cools.
- Photo 8: Give it a quick whisk to ensure the zest is evenly distributed throughout the base.
- Now, cover the bowl with plastic wrap, ensuring the wrap directly touches the surface of the mixture. This prevents a skin from forming. Place the bowl in the fridge to chill for approximately 30 minutes to 1 hour. It should no longer feel hot to the touch, but it’s important not to let it become too cold, or the gelatine will start to set prematurely, making it difficult to fold in the egg whites later.
The exact chilling time will depend on the size of your bowl and the efficiency of your refrigerator. As a general guideline, gelatin typically begins to set once the temperature drops below around 40 degrees Celsius (104 degrees Fahrenheit). You want the mixture to be cool but still pourable and fluid enough for the next step.
3. Gently Folding for the Ultimate Fluffy Texture
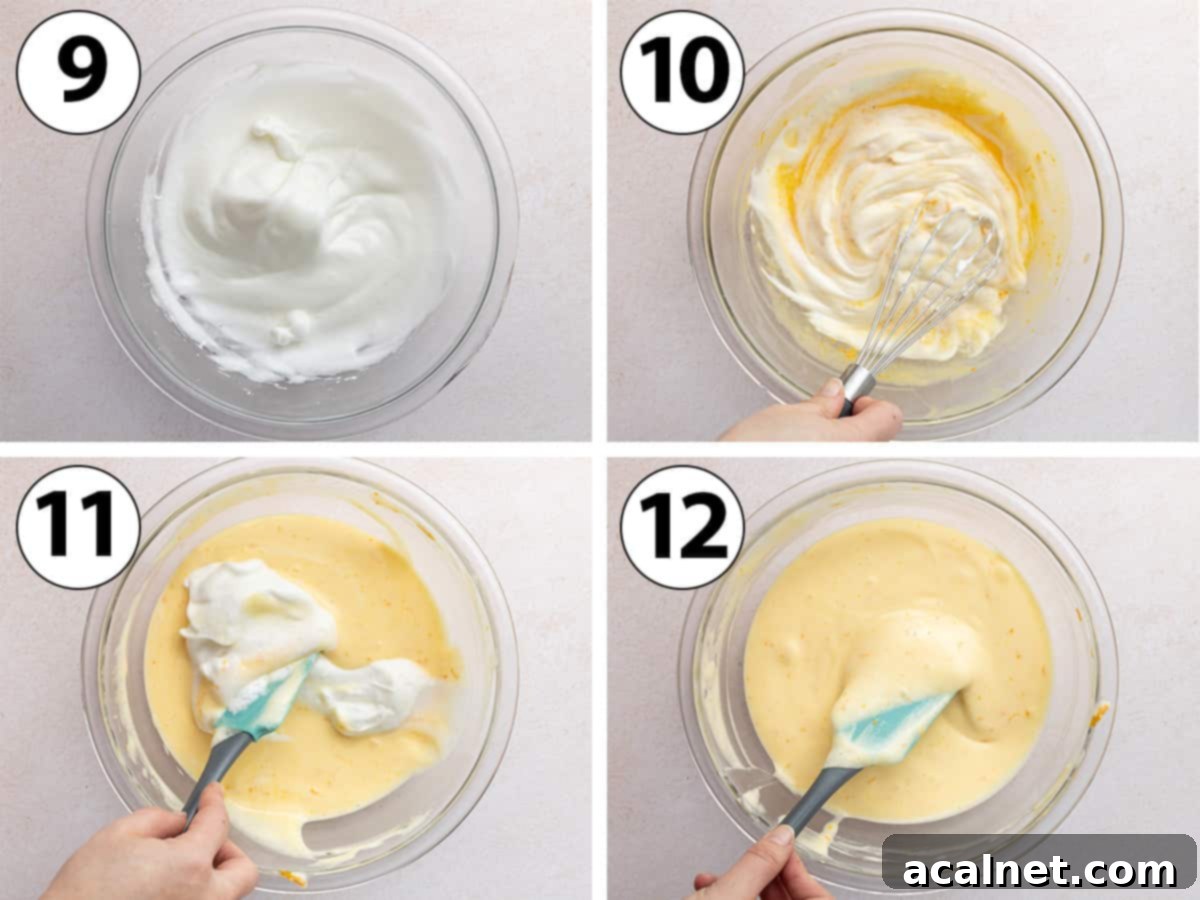
- Once your orange-yolk mixture has sufficiently cooled (but not set!), it’s time to prepare the whipped egg whites, which will give the mousse its signature airy texture.
- Place the separated egg whites into a very clean, large bowl. Ensure there’s no grease or yolk residue, as this can prevent the whites from whipping properly. If using a stand mixer, fit it with the whisk attachment.
- Begin whipping the egg whites on a medium-low to medium speed. As they whip, they will gradually increase in volume, turn slightly opaque white, and reach a consistency resembling light shaving cream.
- Photo 9: While continuously whipping, gradually add the remaining half of the sugar, one tablespoon at a time. This slow addition allows the sugar to fully dissolve and helps to stabilize the egg whites, creating a glossy, firm meringue. Once all the sugar is incorporated, increase the mixer speed to medium-high or high and continue whisking until you achieve stiff, glossy peaks. The egg whites should hold their shape firmly on the whisk and appear thick and shiny.
- Photo 10: Retrieve the chilled egg yolk mixture from the fridge and give it a light whisk to loosen its consistency. Then, add about a quarter of the whipped egg whites to this base and very gently mix it in using a whisk.
Using a whisk to incorporate a small portion of the egg whites initially will naturally deflate them slightly. However, this step is crucial as it lightens the dense yolk mixture, making it much easier to gently fold in the remaining egg whites without losing too much precious air. This technique prevents lumps and ensures a smoother final mousse.
- Photo 11: Switch to a large rubber spatula for the remaining egg whites. Gently fold them into the orange base in 3 or 4 additions. The key here is a light hand: use an under-and-over motion, scraping the bottom of the bowl and folding the mixture over the egg whites. Stop folding as soon as no streaks of egg whites are visible. Over-mixing at this stage will deflate the mousse, resulting in a denser, less airy texture.
- Photo 12: Once all the egg whites are integrated, you should have a thin, light, and creamy mixture. At this point, it will resemble more of a thick custard or pudding than a firm mousse – and that’s perfectly normal! The true, airy mousse texture will develop as it chills and sets in the refrigerator.
- Carefully pour the delicate orange mousse into your chosen serving cups, ramekins, or a larger decorative serving dish if you prefer a communal dessert rather than individual portions. Place the filled cups into the fridge to chill and set for at least 3 to 4 hours. For the best, fully developed texture and flavor, chilling overnight is highly recommended.
- Optionally, once the mousse has fully set, prepare your exquisite orange whipped cream topping. Pour the very cold heavy whipping cream into a large, clean bowl. Sift in the icing sugar to avoid any lumps. Using a hand mixer (or a stand mixer with the whisk attachment), whisk on medium to high speed until the cream forms stiff peaks – it should hold its shape beautifully. Gently fold in the fresh orange zest to infuse it with extra citrus aroma.
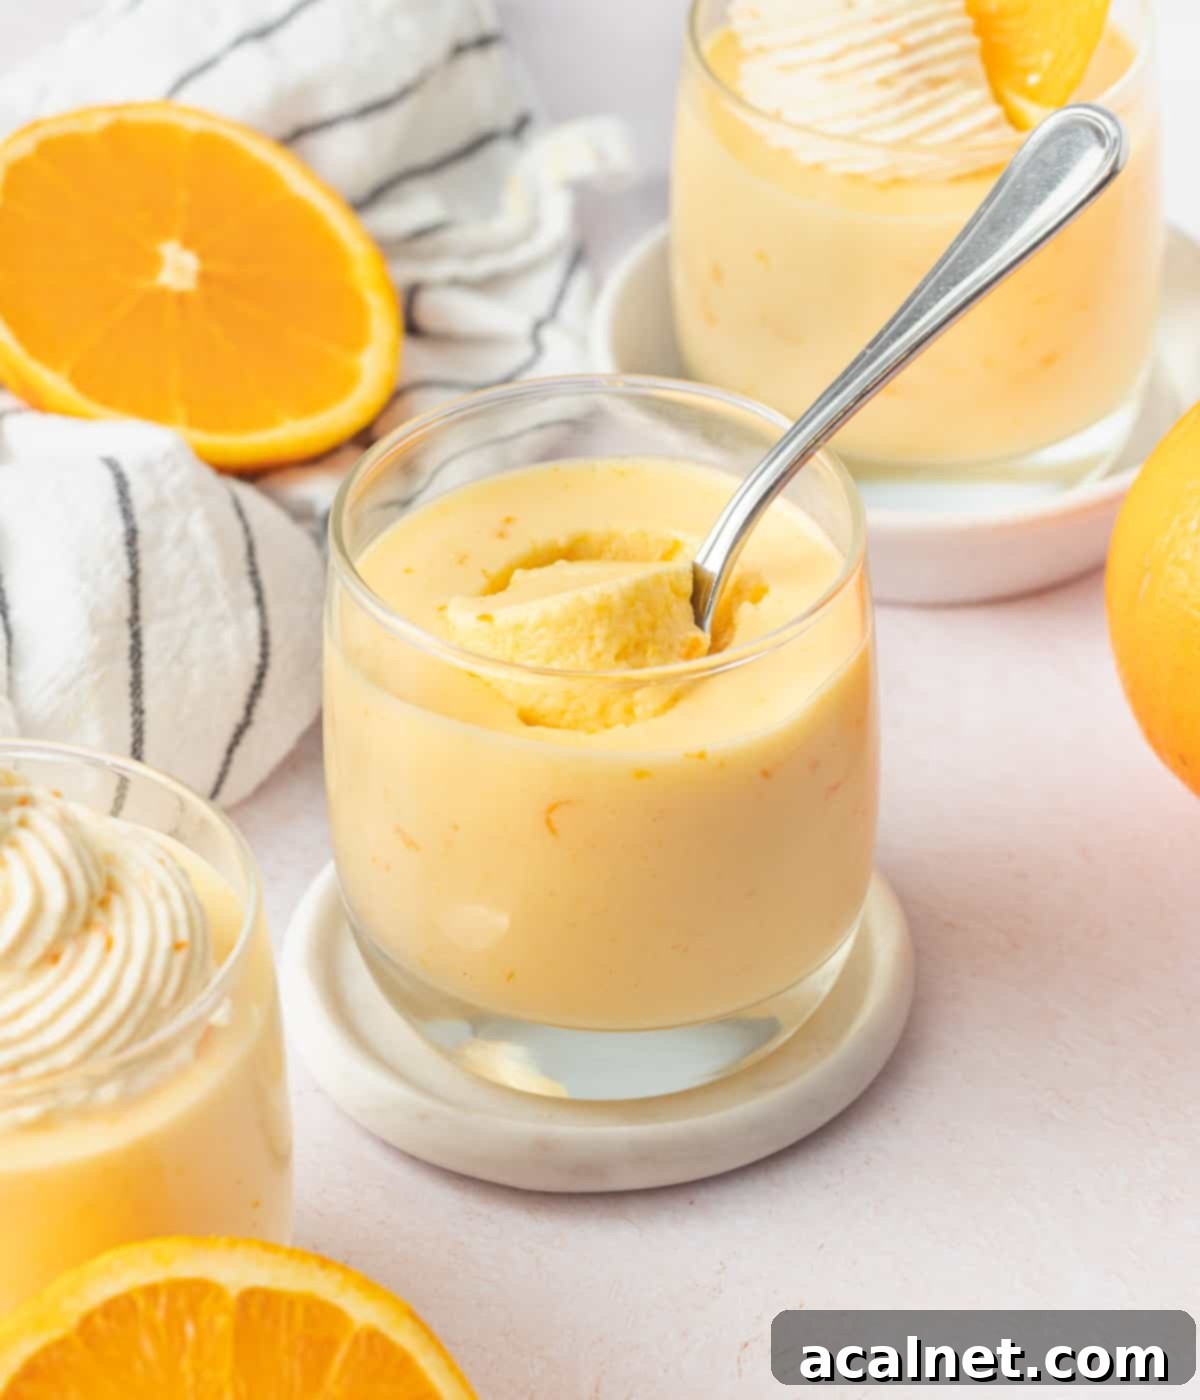
- Crown your perfectly set orange mousse with a generous dollop of this fragrant whipped cream. For an elegant touch, use a piping bag fitted with a star-shape nozzle to pipe the cream. Finish each cup with a delicate quarter or a thin slice of fresh orange and perhaps a tiny sprig of mint for a pop of color. Keep these beautiful desserts refrigerated until you are ready to serve them.
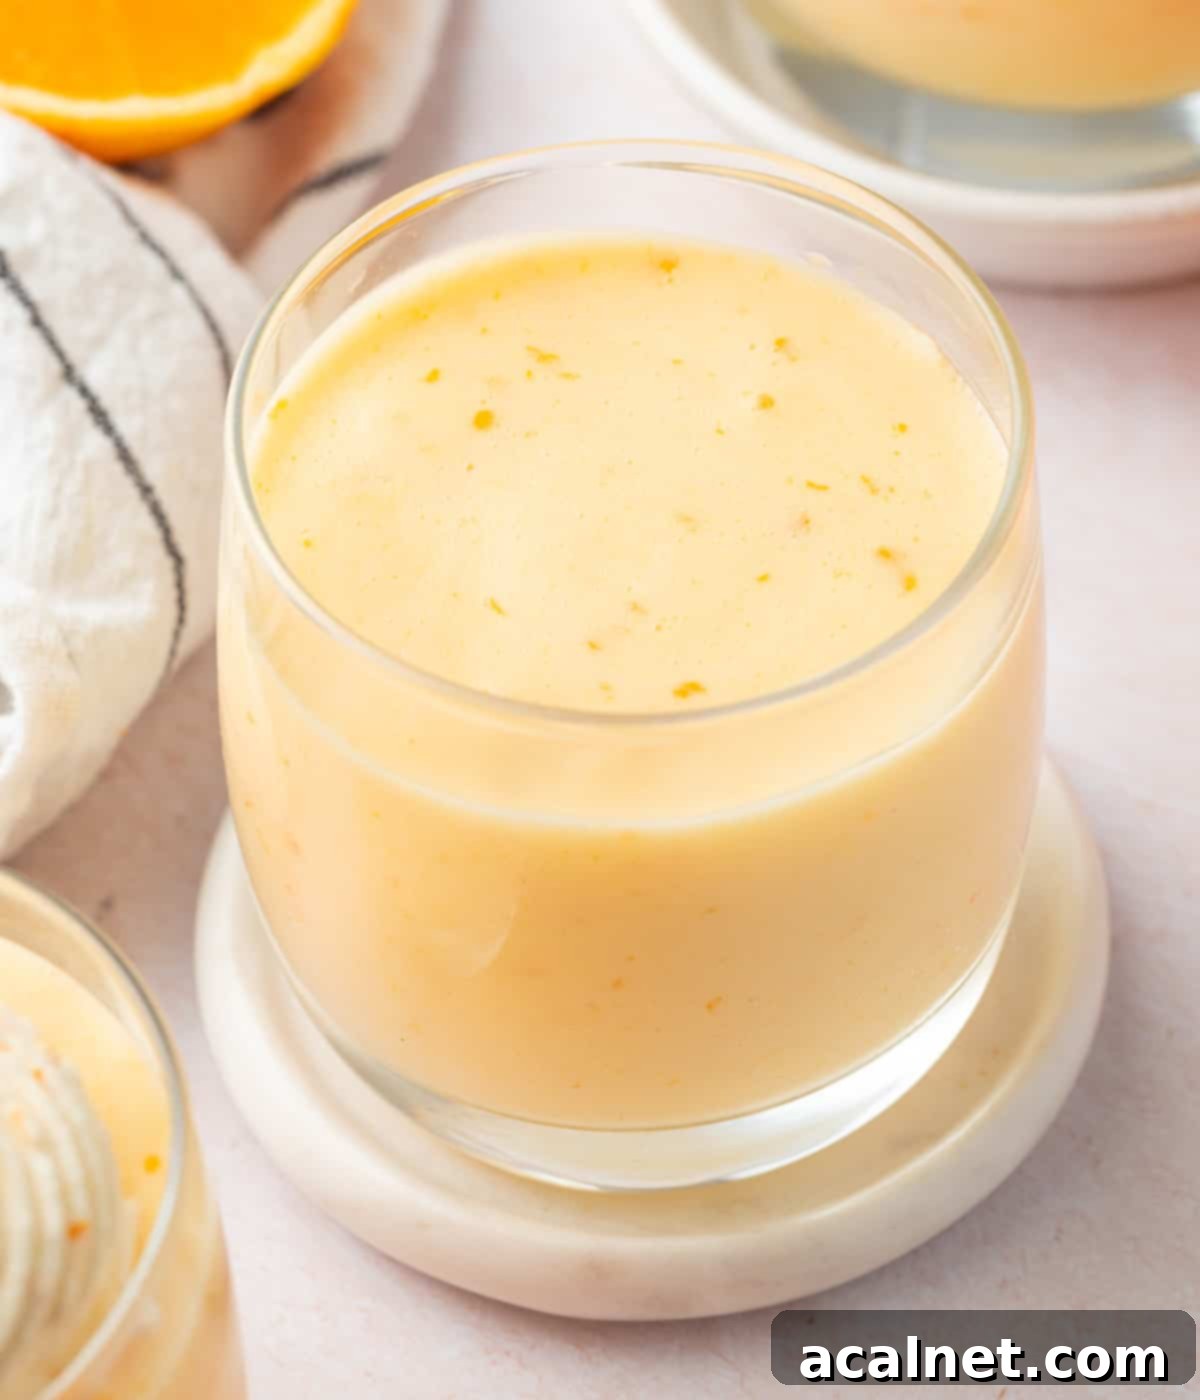
Frequently Asked Questions About Orange Mousse
Absolutely! If gelatine powder isn’t readily available, gelatine sheets (also known as leaves) are a perfectly viable alternative. To substitute, use 1 1/2 platinum strength gelatine sheets for every 3/4 teaspoon of gelatine powder. The process is slightly different: first, soak the gelatine sheets in a large bowl of very cold water for about 10 minutes. This allows them to soften and “bloom.” Once soft, carefully squeeze the sheets to remove all excess water before adding them to your warm orange mixture as directed in the recipe. The warm liquid will dissolve them instantly.
While it is technically possible to omit the gelatine, it’s important to understand that the gelatine plays a critical role in stabilizing the mousse. This particular mousse recipe doesn’t rely on a high fat content (like cream-based mousses) to hold its structure, so gelatine is essential for achieving that characteristic light, yet firm, texture. If you choose to skip the gelatine, your mousse will have a significantly less fluffy and much more runny, pudding-like consistency. It will still be delicious, but it won’t have the classic airy, set mousse quality.
Consuming raw eggs can carry a small risk of salmonella. However, this risk is significantly mitigated when using pasteurized eggs. Pasteurization is a heat treatment process that gently heats the eggs to kill harmful bacteria like salmonella, making them safe for consumption in raw or lightly cooked preparations. Always opt for pasteurized eggs if your recipe calls for raw egg whites.
It’s worth noting that even with pasteurized eggs, certain individuals, such as pregnant women, young children, the elderly, or those with weakened immune systems, might still be advised to avoid raw or undercooked eggs as a precautionary measure. Always consult with a healthcare professional if you have concerns.
This particular recipe has been developed and tested specifically with whipped egg whites to achieve its signature light and airy texture. While you could experiment with using whipped cream as an aerating agent (especially if you prefer to avoid raw eggs entirely), I cannot guarantee the exact same result. If you choose to use whipped cream, the final texture and taste of the dessert will likely be notably different: it will be richer, heavier, and creamier, lacking the ethereal lightness that whipped egg whites contribute. The “foam-like” quality that defines a traditional mousse, particularly one without high-fat dairy as its primary base, is best achieved through the aeration of egg whites.
Pro Tips & Tricks for Perfect Orange Mousse
- Achieving Perfect Egg Whites: Be mindful not to over-whip your egg whites. Over-whipped whites will become dry, crumbly, and lose their ability to create that smooth, airy texture. When they reach stiff peaks, they should appear very glossy, smooth, and hold their shape beautifully on the whisk or in the bowl. Stop immediately at this stage!
- Respect the Timings: The recommended cooking, chilling, and resting times are not arbitrary – they are absolutely crucial for the success of this mousse. The egg mixture must be warm enough (but not boiling!) to properly dissolve the gelatine, ensuring a smooth, lump-free base. Subsequently, it requires sufficient chilling time to cool down before the whipped egg whites are folded in. Adding whipped egg whites to a warm mixture will cause them to melt and deflate, ruining the mousse’s delicate structure.
- Troubleshooting Dense Mousse: If, after chilling for several hours, your orange mousse feels dense rather than beautifully fluffy, it’s a strong indication that the whipped egg whites were folded in too vigorously. Remember, the goal is to gently incorporate the air-filled whites while preserving as many tiny air bubbles as possible. Use a light hand and a broad spatula to fold, always aiming to lift and incorporate, rather than stir or smash.
- Creative Topping Ideas: For a delightful variation, consider replacing the whipped cream topping with a generous swirl of my homemade Orange Curd! Its tangy sweetness would provide an exquisite contrast to the light mousse. You could also garnish with candied orange peel, fresh mint leaves, or a sprinkle of toasted shredded coconut for added texture and visual appeal.
- Ensure Clean Bowls: When whipping egg whites, make sure your mixing bowl and whisk attachment are impeccably clean and completely free of any grease or fat. Even a tiny speck can prevent egg whites from whipping to their full volume. Wiping the bowl and whisk with a little lemon juice or vinegar before starting can help ensure they are perfectly clean.
Storing Your Orange Mousse & Freezing Advice
These exquisite orange mousse cups require refrigeration until you’re ready to serve them. For optimal freshness and texture, they are best enjoyed within 24 hours of preparation. While they can be safely stored in the refrigerator for up to 2 days, their delicate airy quality is at its peak on the first day.
If you’re making these in advance for an event, I highly recommend adding the optional whipped cream topping only a few hours before serving. This ensures the cream remains fresh, perfectly whipped, and visually appealing.
The beauty of this mousse is its ideal status as a make-ahead dessert. The significant chilling time required for the mousse to properly set and develop its signature texture means it’s designed to be prepared hours, or even a day, before your event, freeing up your time on the day itself. Unfortunately, this delicate dessert will not freeze well. The freezing and thawing process tends to degrade the mousse’s light, airy structure, resulting in a watery, deflated, and less appealing texture.
Explore More Delightful Mousse Recipes
If you’ve fallen in love with the airy texture and vibrant flavors of this orange mousse, you’ll be thrilled to discover more of our exquisite mousse creations. Dive into these other fantastic recipes, each offering a unique twist on this classic dessert:
- Double Raspberry Mousse
- Coffee Mousse Cups
- Mango Mousse
- Strawberry Mousse
- Passion Fruit Mousse
- Vanilla Mousse Cups
- Chocolate Orange Mousse
Loved this recipe?
We’d be thrilled to hear your thoughts! Leave a comment below and share your delicious creation with us on Instagram by tagging @a.baking.journey!
Recipe Card
Orange Mousse Cups
Print Recipe
Ingredients
Orange Mousse
- 3 large Eggs, pasteurized, egg yolks and whites separated
- 80 gr Caster Sugar, divided in half
- 180 ml Fresh Orange Juice, (from about 3 large oranges)
- 3/4 teaspoon Gelatine Powder (*), + 1 tablespoon cold water for blooming
- 2 teaspoon Fresh Orange Zest
Orange Whipped Cream (optional)
- 120 ml Cold Thickened / Heavy Cream, min. 30% fat content
- 20 gr Icing Sugar, or powdered sugar
- 1 teaspoon Orange Zest
Instructions
Orange Mousse Preparation
- Begin by preparing all your ingredients: zest and juice the oranges, carefully separate the egg yolks from the egg whites. To bloom the gelatine, mix the gelatine powder with 1 tablespoon of very cold water in a small bowl. Stir well to ensure no lumps remain and set aside until it forms a thick paste.
- In a small saucepan, combine the egg yolks with half of the caster sugar. Whisk thoroughly until well combined. Add the fresh orange juice and whisk until the mixture is smooth and uniform.
- Place the saucepan over low heat. Cook gently for 5 to 10 minutes, continuously stirring with a heat-proof spatula. The mixture should thicken slightly and coat the back of a spoon (see note 1). Ensure the mixture does not boil to prevent the eggs from curdling.
- Immediately pour the cooked orange-yolk mixture through a fine mesh sieve into a large mixing bowl. Discard any tiny lumps or cooked egg bits caught in the sieve to ensure a silky-smooth base.
- Add the bloomed gelatine paste to the warm mixture and whisk well until it is completely dissolved. Gently stir in the fresh orange zest.
- Cover the bowl with plastic wrap, pressing it directly onto the surface of the mixture to prevent a skin from forming. Chill in the fridge for 30 minutes to 1 hour. The mixture should be cool but still liquid, not yet set (see note 2).
- While the orange base chills, place the egg whites in a very clean large bowl (for a hand mixer) or the bowl of a stand mixer fitted with the whisk attachment. Begin whipping on medium-low speed until they start to foam and increase in volume.
- Gradually add the remaining half of the sugar, one tablespoon at a time, while continuing to whip. Once all sugar is incorporated, increase the speed to high and whisk until stiff, glossy peaks form. The egg whites should be thick and hold their shape firmly.
- Take the chilled orange-yolk mixture from the fridge and give it a quick whisk to loosen. Add about a quarter of the whipped egg whites to it and gently mix with a whisk to lighten the base (see note 3).
- Switch to a rubber spatula and gently fold in the remaining whipped egg whites in 3 or 4 additions. Use an under-and-over motion, stopping as soon as no white streaks are visible. Avoid over-mixing to maintain the mousse’s airy texture. The mixture will be light and creamy, resembling a custard at this stage (see note 4).
- Pour the orange mousse into individual serving cups or a large dish. Place in the fridge to chill and set for at least 3 to 4 hours, or ideally overnight, for the best texture.
Optional Orange Whipped Cream Topping
- When the mousse is set, place the very cold heavy whipping cream in a large, clean bowl. Sift in the icing sugar. Using a hand mixer (or stand mixer with the whisk attachment), whip on medium-high speed until stiff peaks form. Gently fold in the orange zest.
- Top the orange mousse with a generous dollop of whipped cream, or pipe it using a star-shaped nozzle. Garnish with a small slice of fresh orange or a sprig of mint. Keep refrigerated until ready to serve.
Would you like to save this recipe?
We’ll email this post to you, so you can come back to it later!
Notes
- The exact cooking time for the egg yolk mixture can vary depending on your pan size and stove temperature. For precision, use a kitchen thermometer to cook the eggs to an ideal temperature between 82 and 84 degrees Celsius (180 to 183 degrees Fahrenheit). This ensures safety and prevents curdling.
- The chilling time is crucial for the orange base. You want it cool enough not to melt the egg whites, but not so cold that the gelatine begins to set. As a reference, gelatine starts to set below approximately 40 degrees Celsius (104 degrees Fahrenheit). Monitor it closely.
- Incorporating a quarter of the whipped egg whites into the denser yolk mixture first, even if it deflates them slightly, serves to lighten the base. This step ensures the remaining egg whites can be folded in more easily and evenly, without overworking the mixture or creating lumps.
- Don’t be alarmed if the mousse looks more like a thin custard or pudding after folding in the egg whites. This is completely normal! The magical airy and fluffy texture will develop as the mousse fully sets in the refrigerator.
Nutrition (per serving)
